Jump to content

Paper Models By Rusl2125

Art

203 replies to this topic

#21 RuSL

    Member

  • PipPipPipPipPip
  • Little Helper
  • 115 posts
  • LocationRussia

Posted 19 July 2015 - 12:27 AM

Nowadays model is approximately finished but I can posting progress here If you want.
Ok.
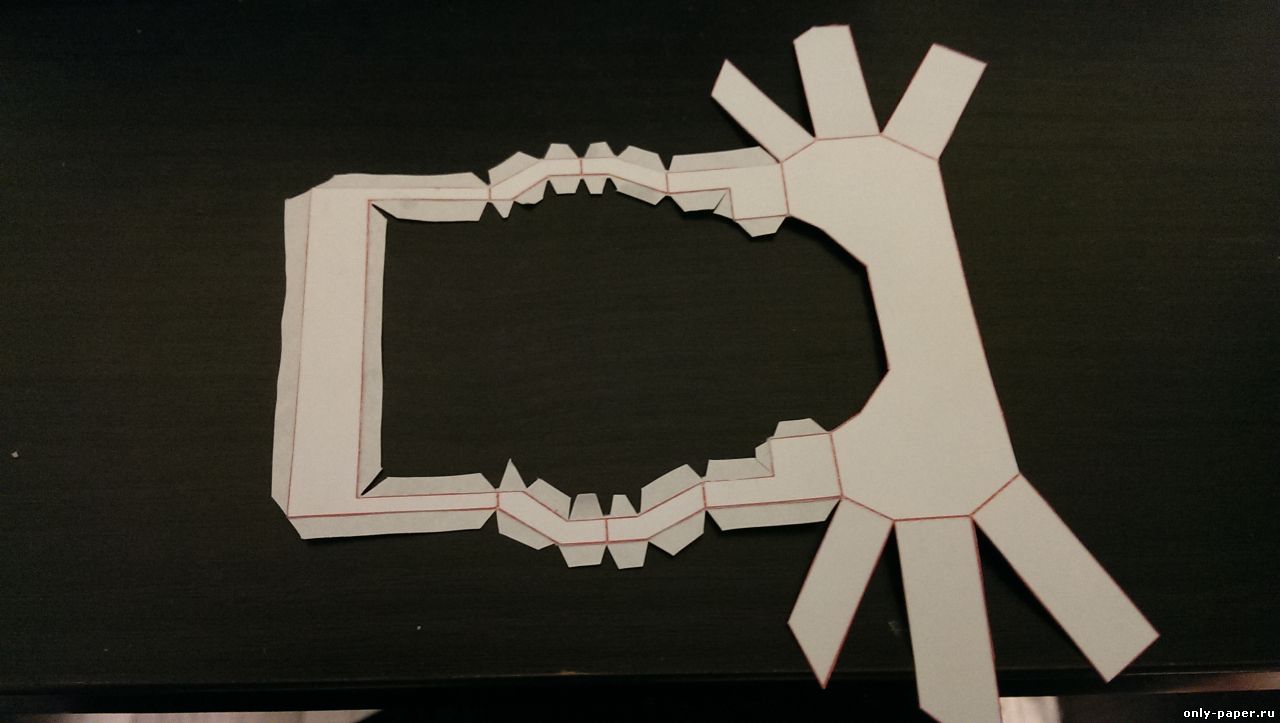
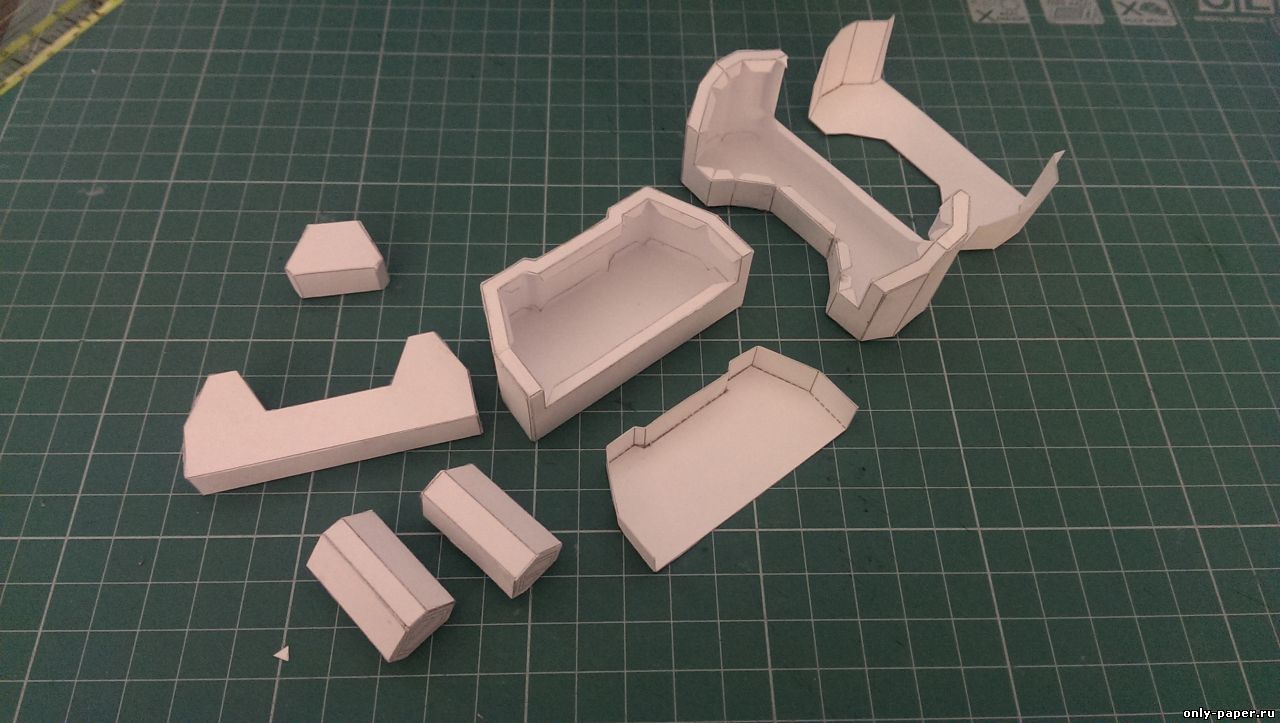
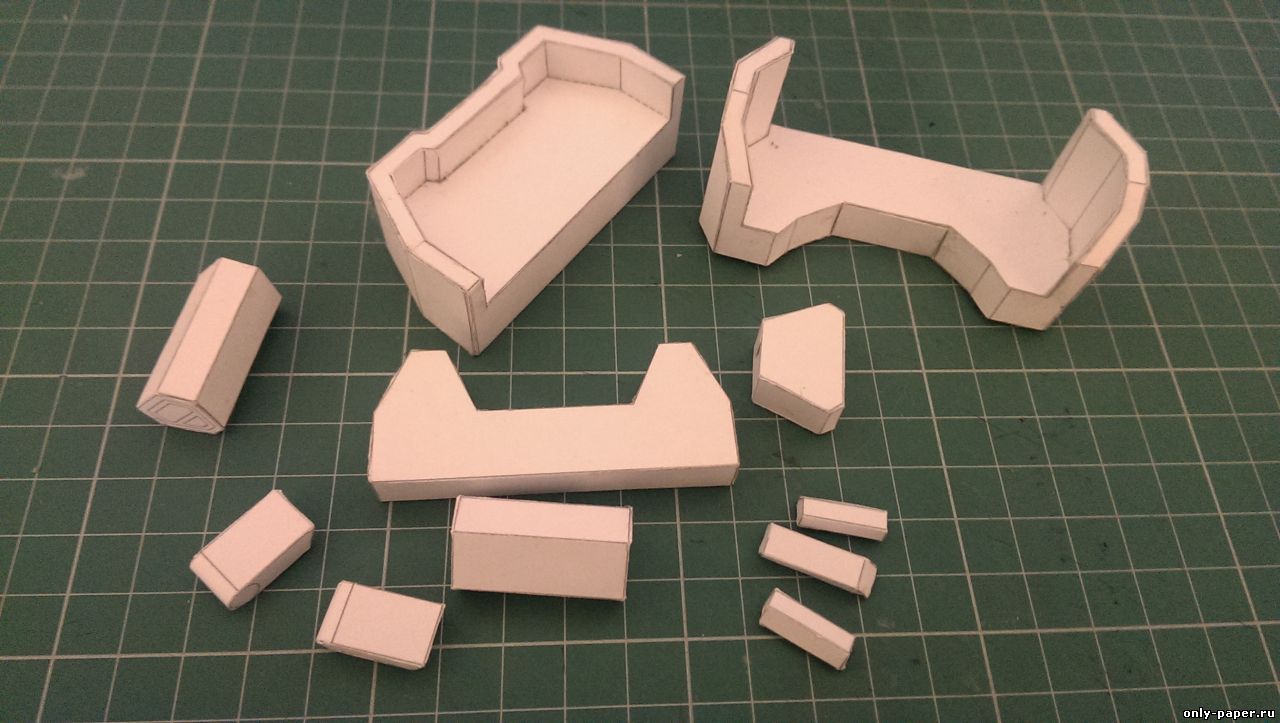
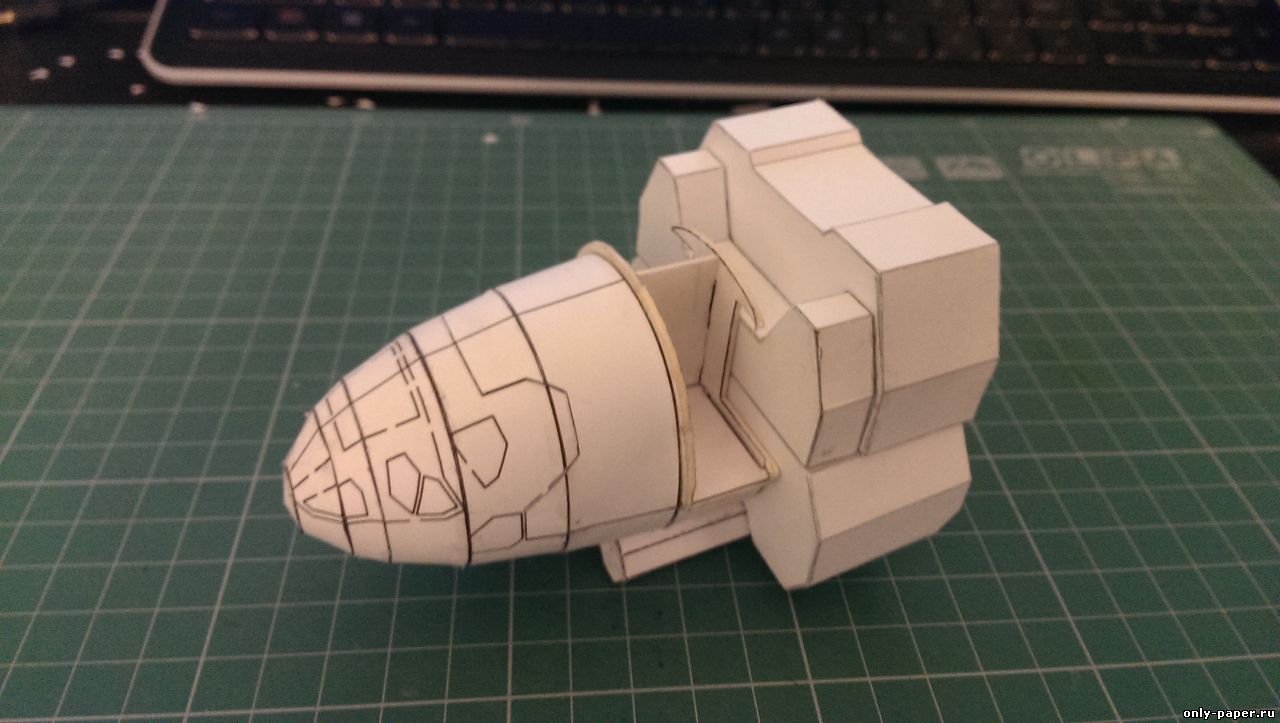
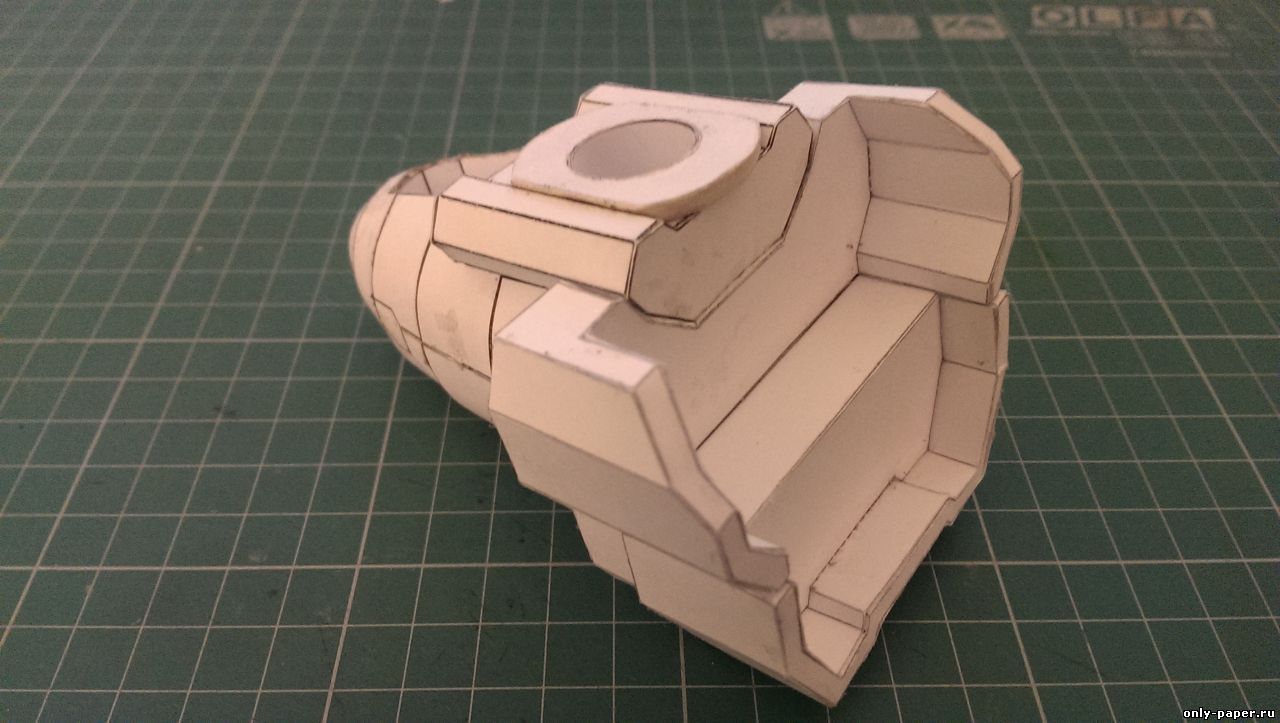
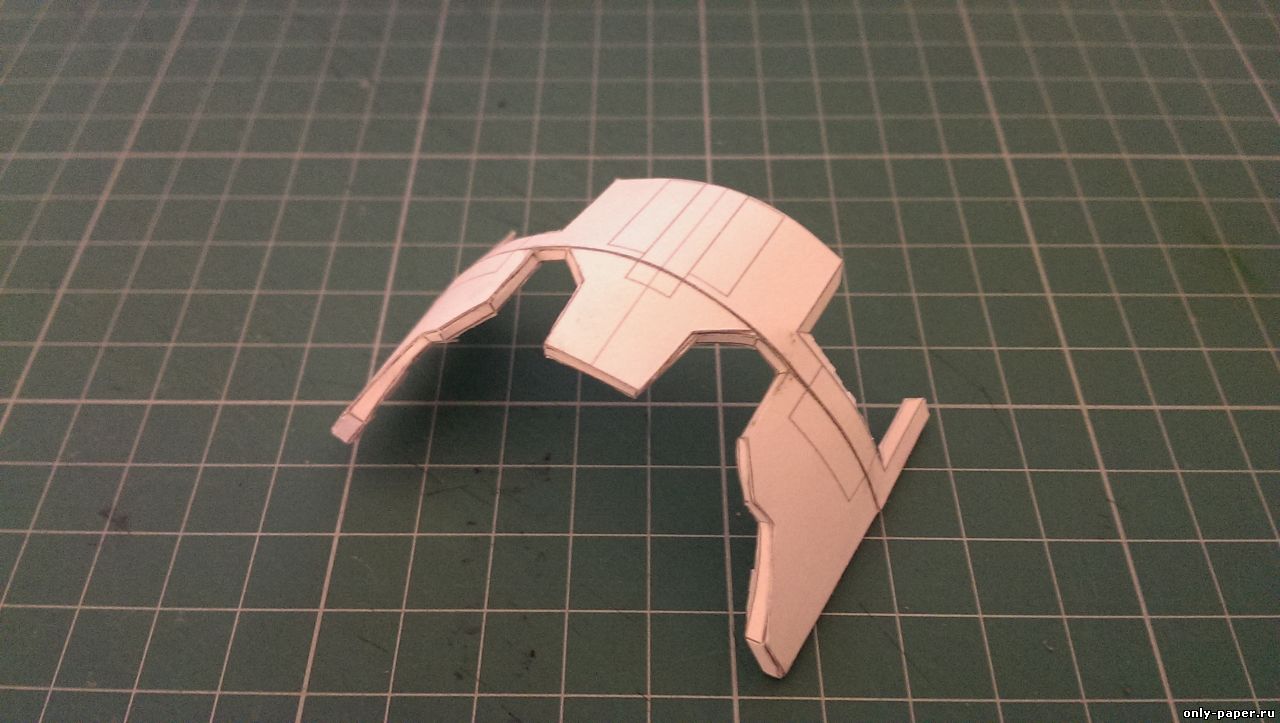
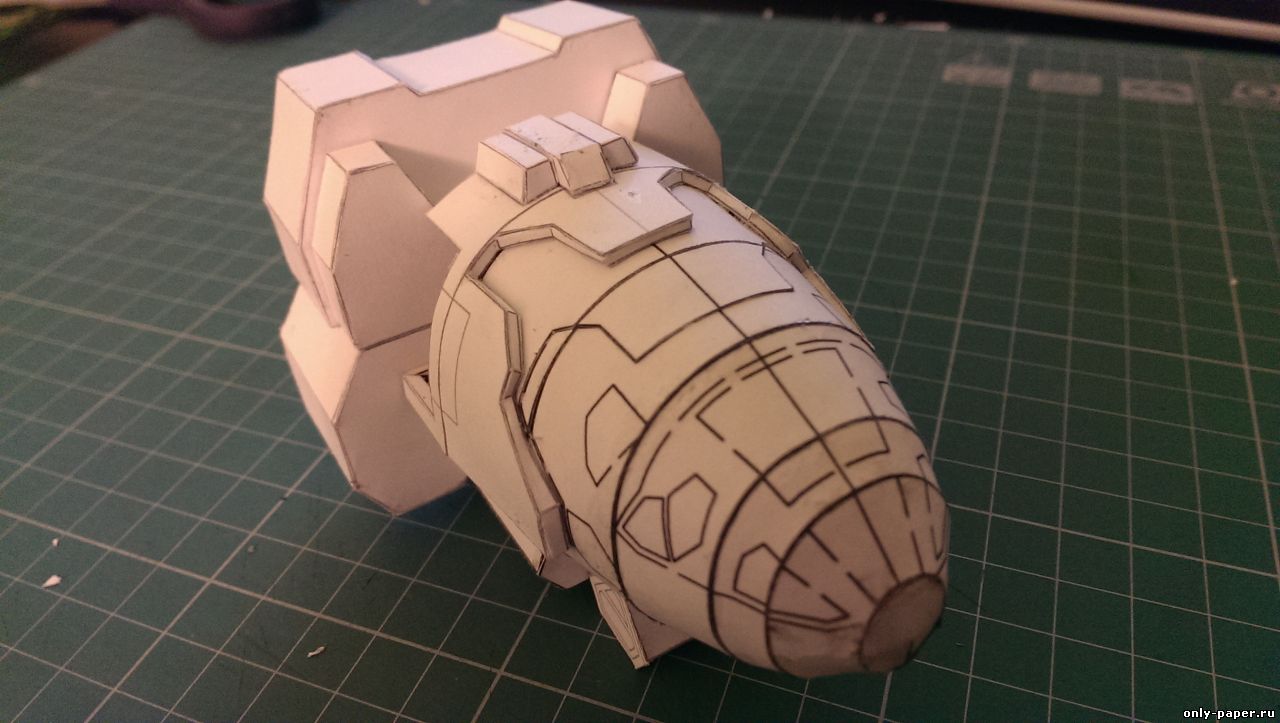
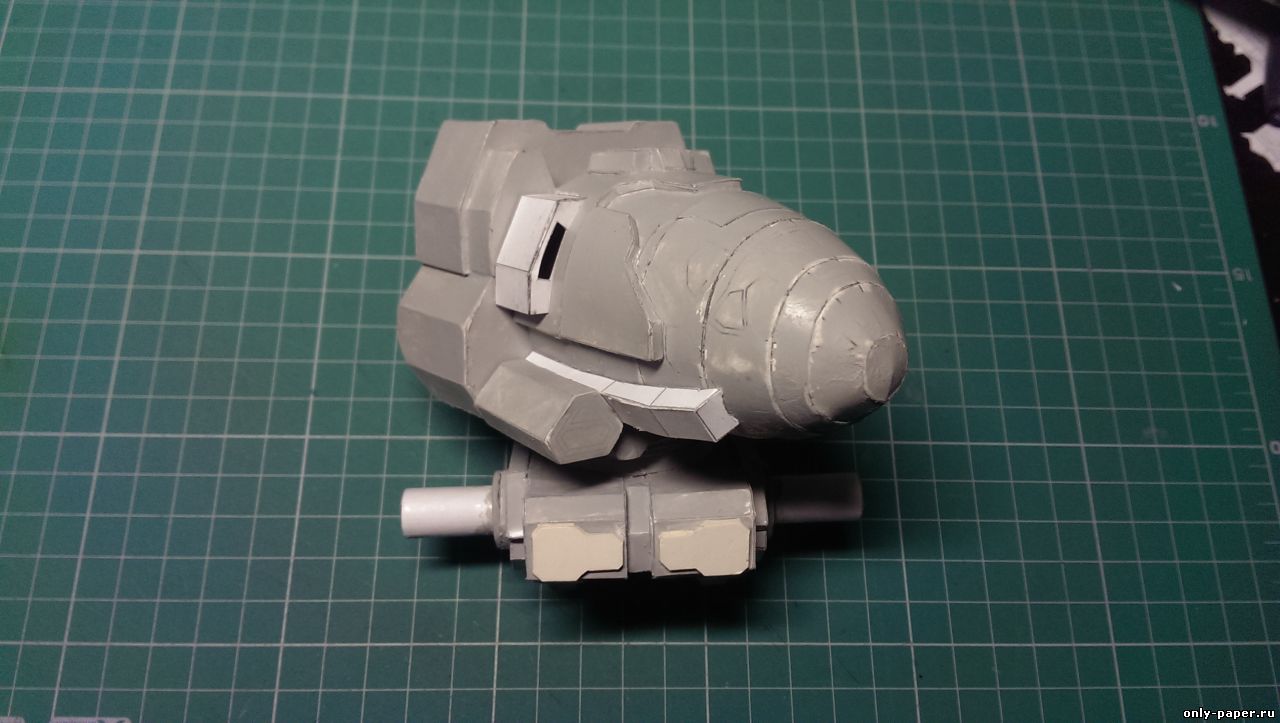
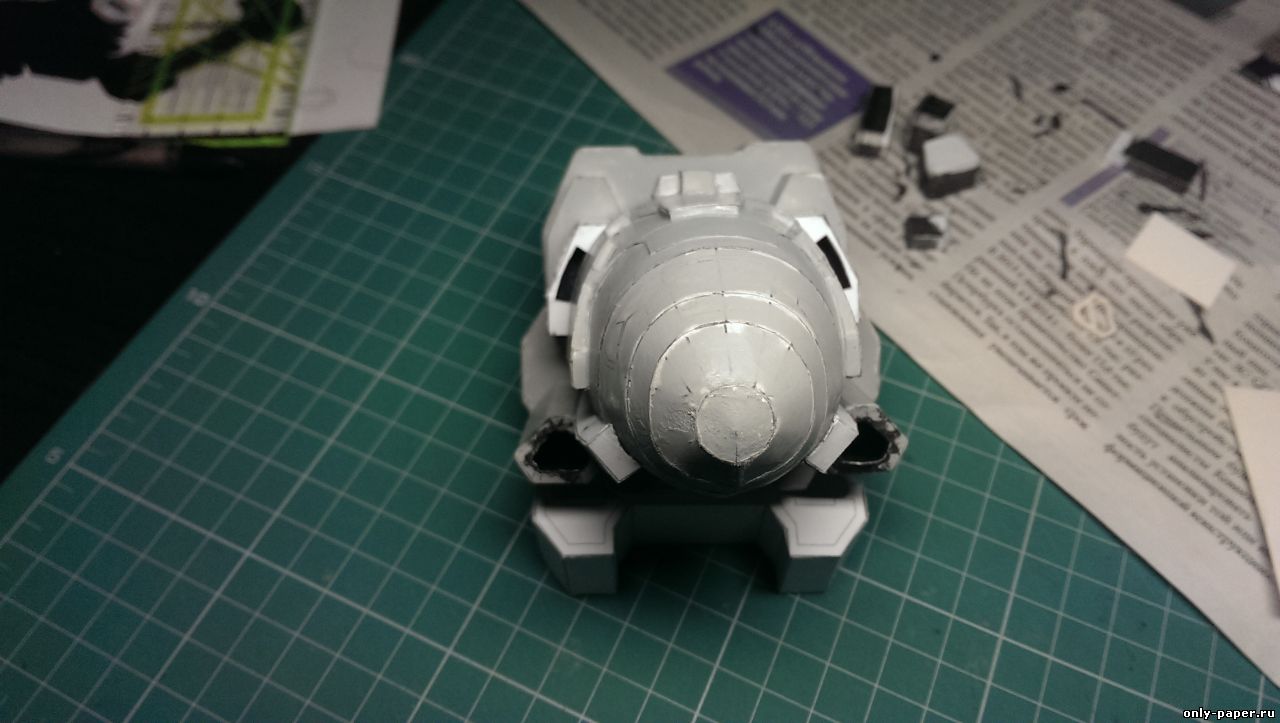
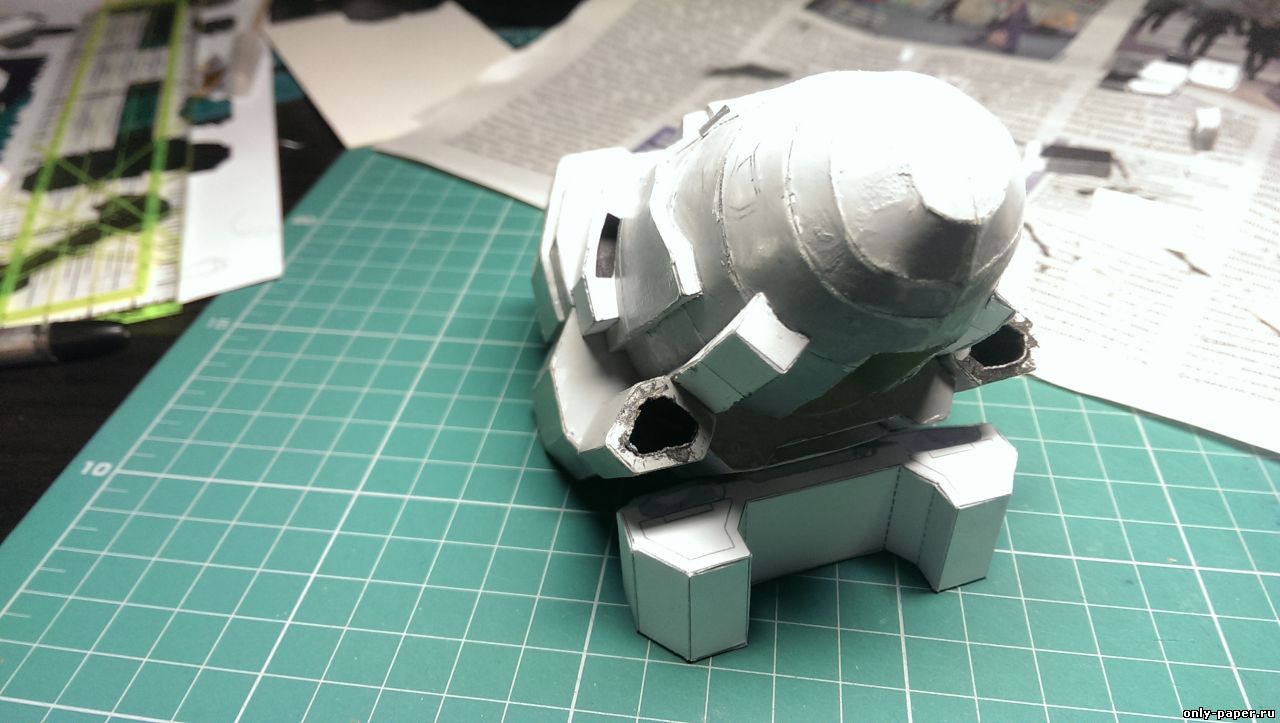
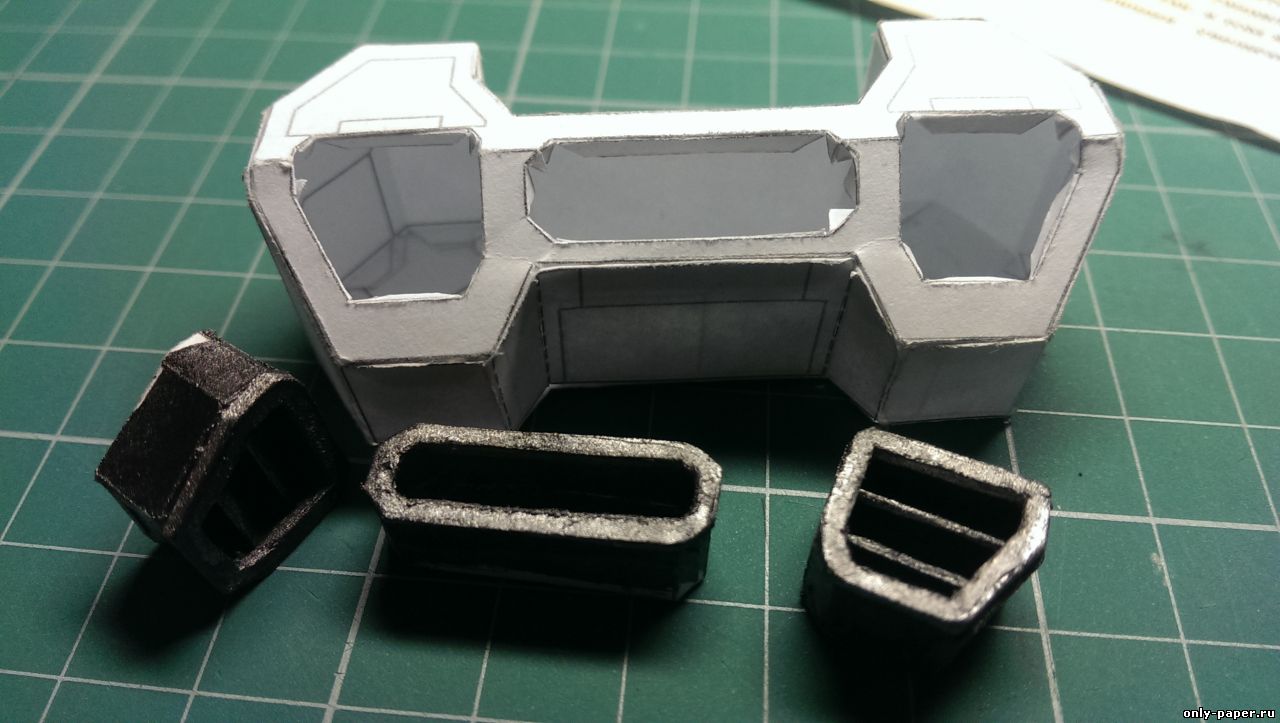
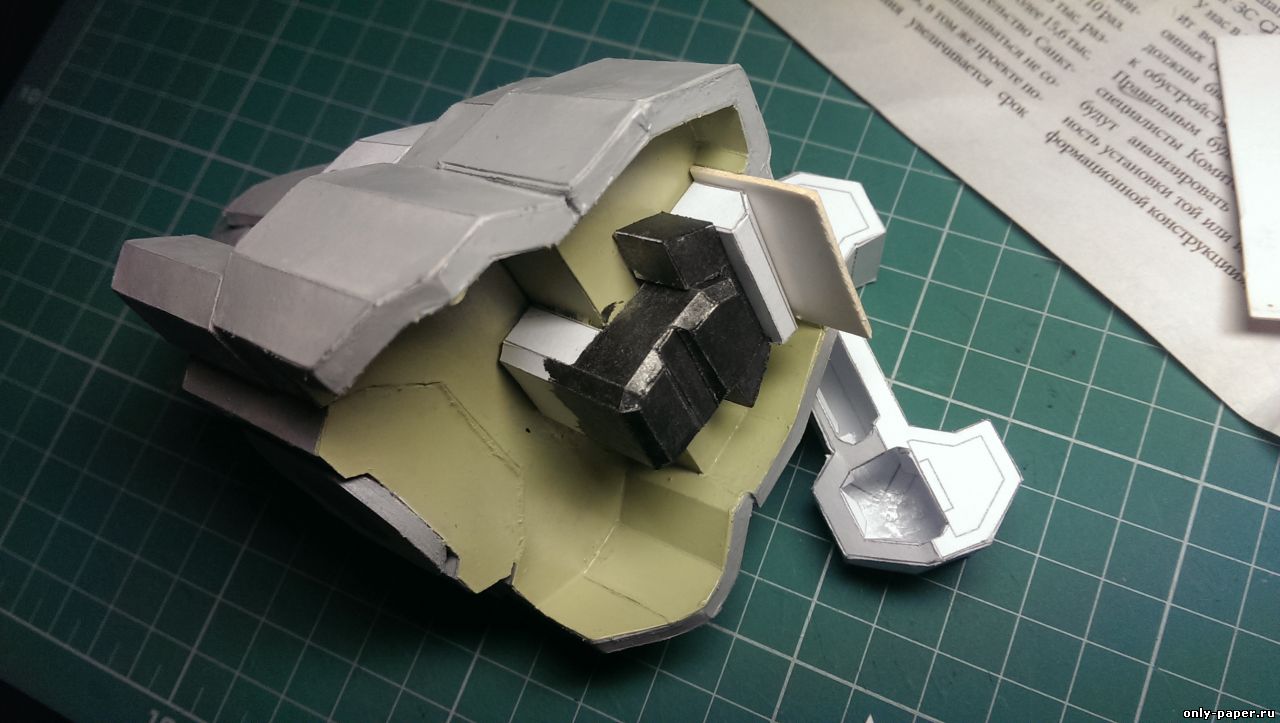
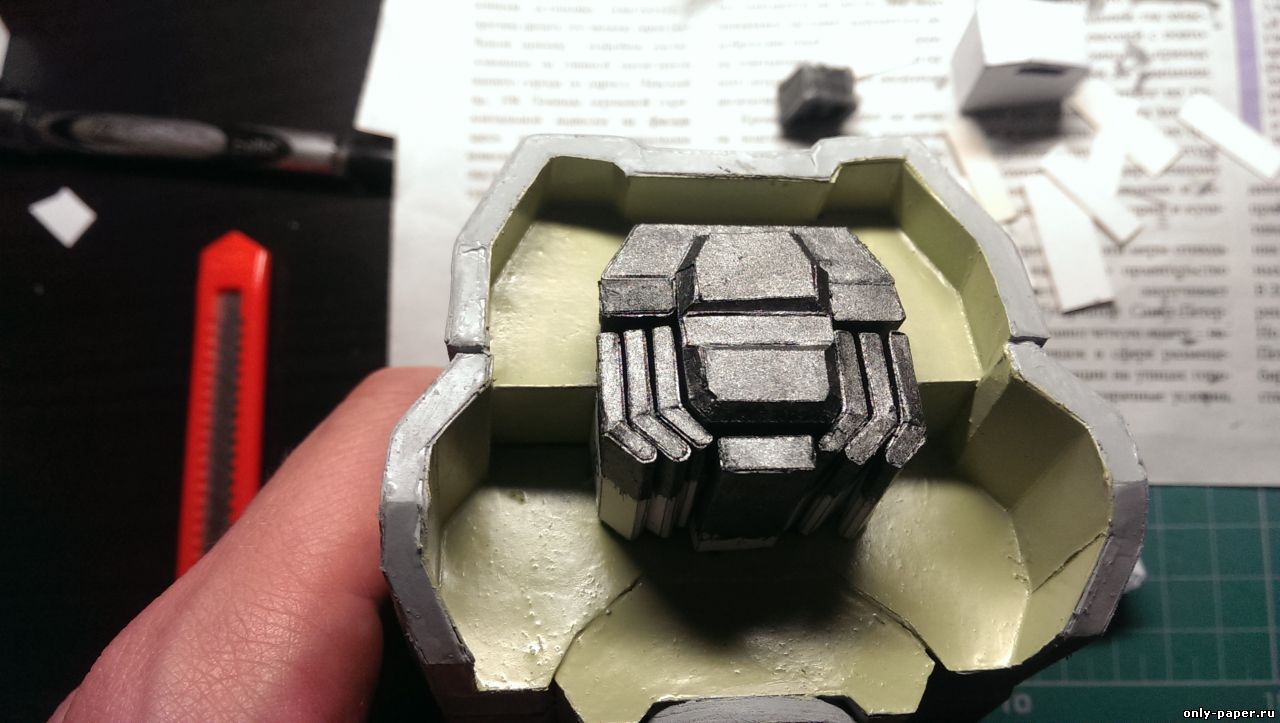
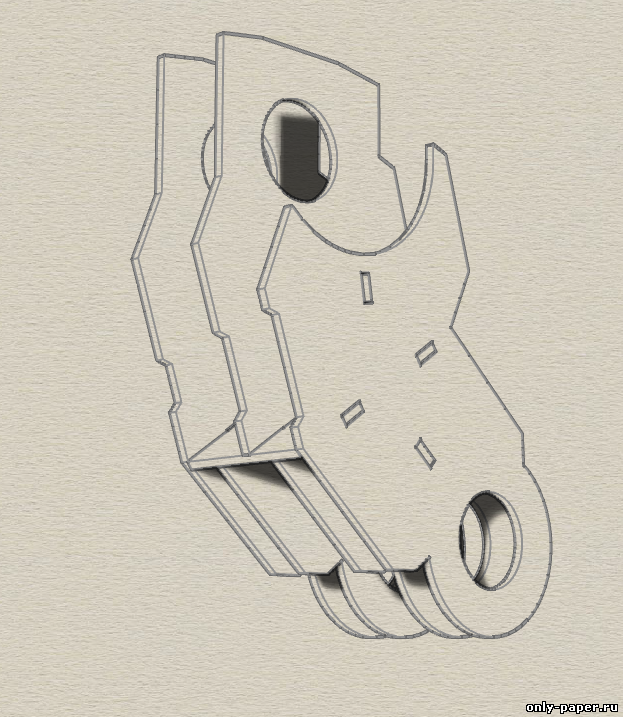
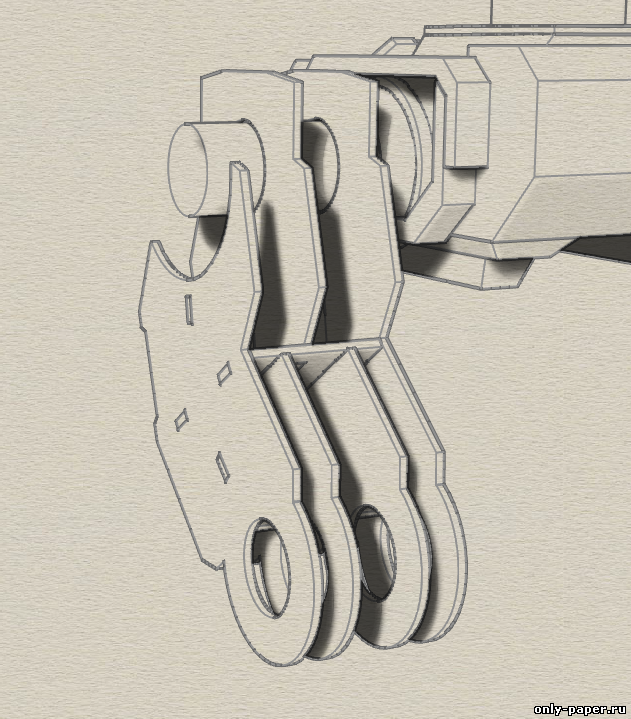
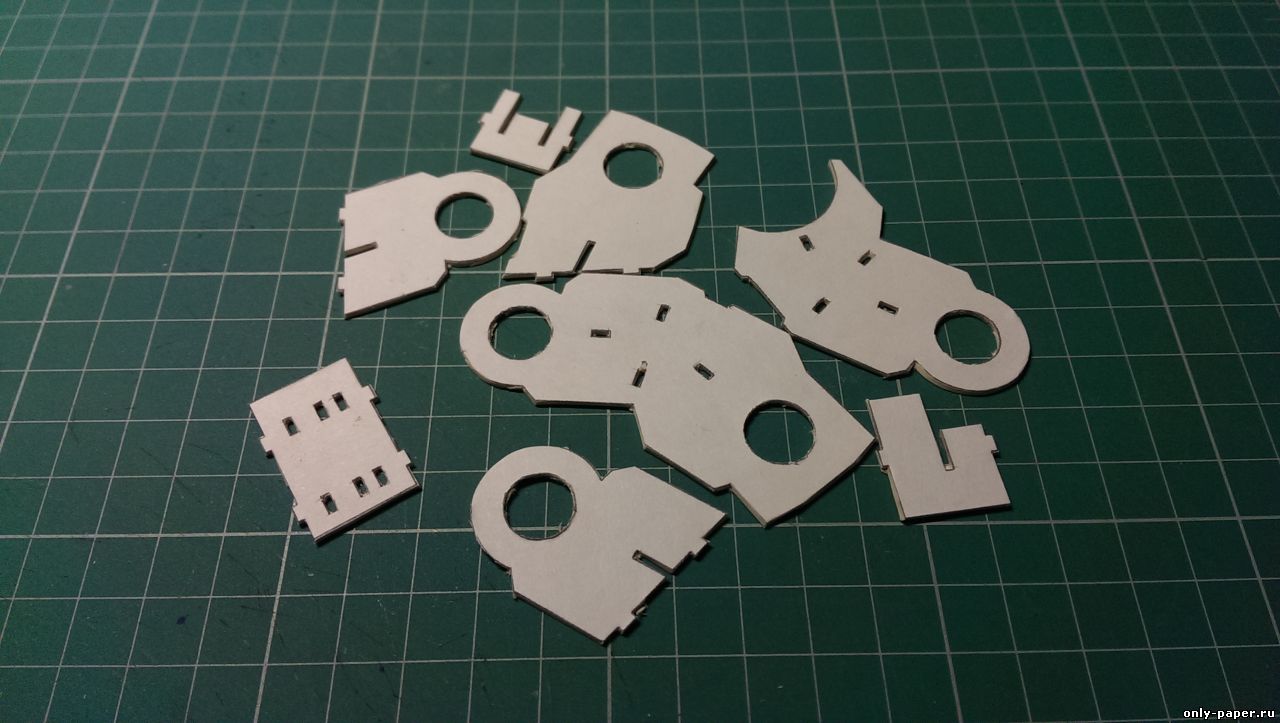
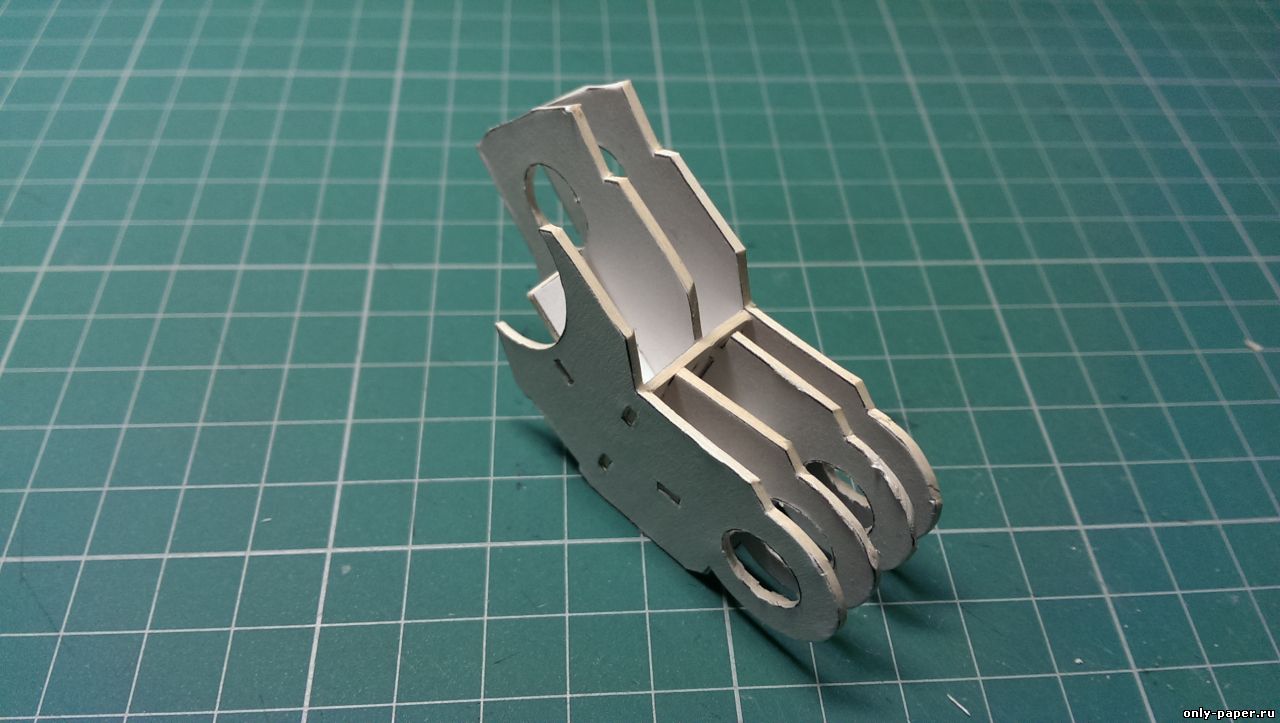
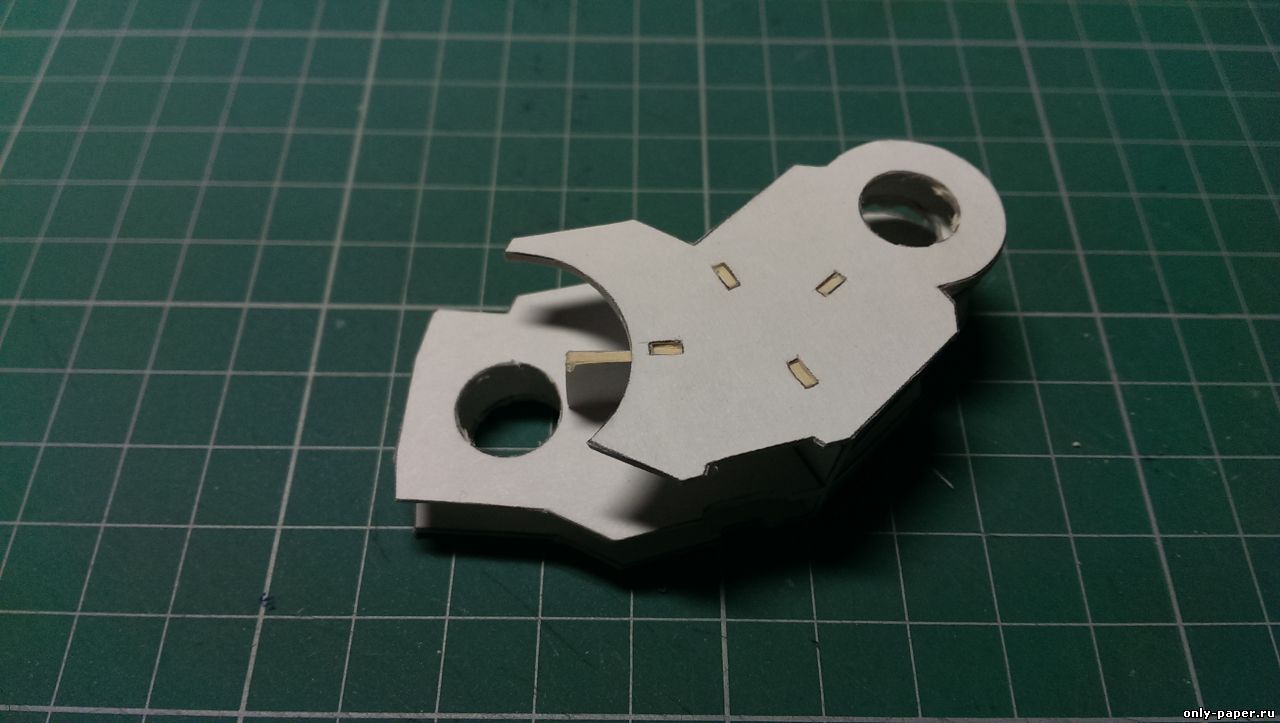
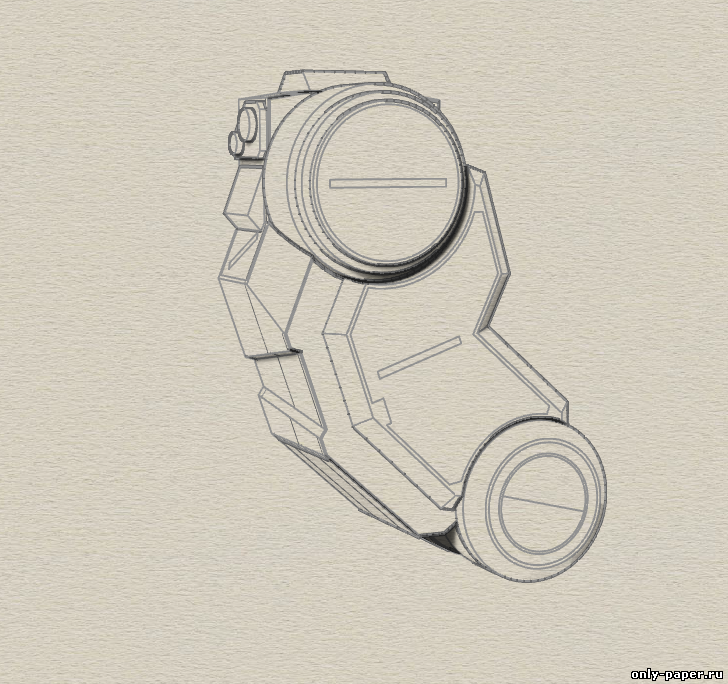
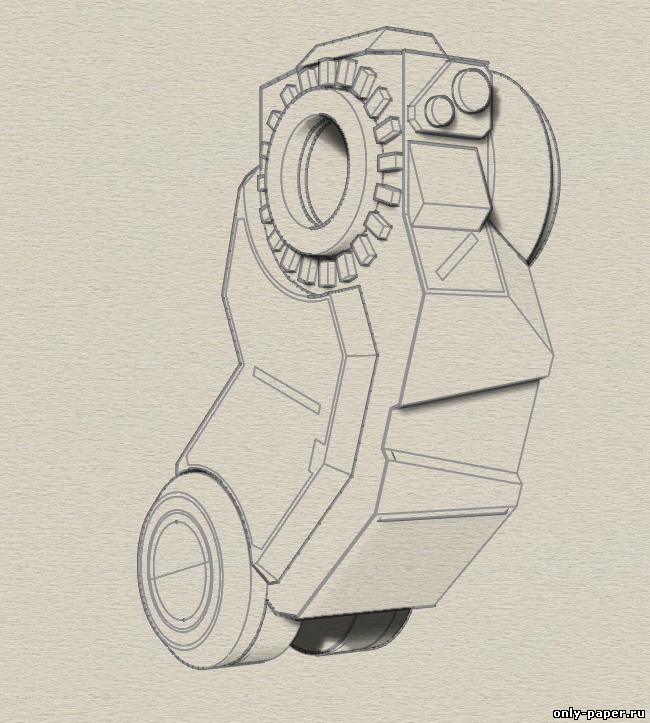
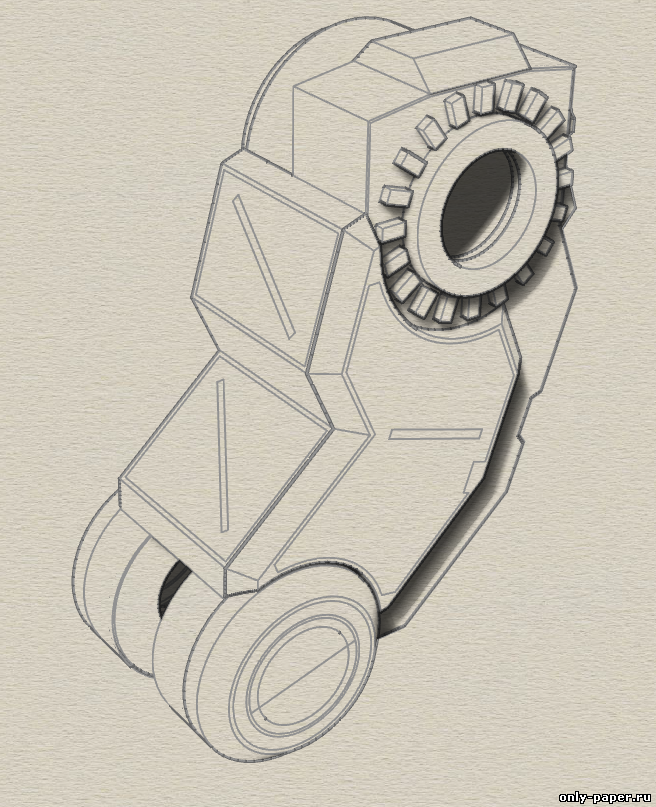
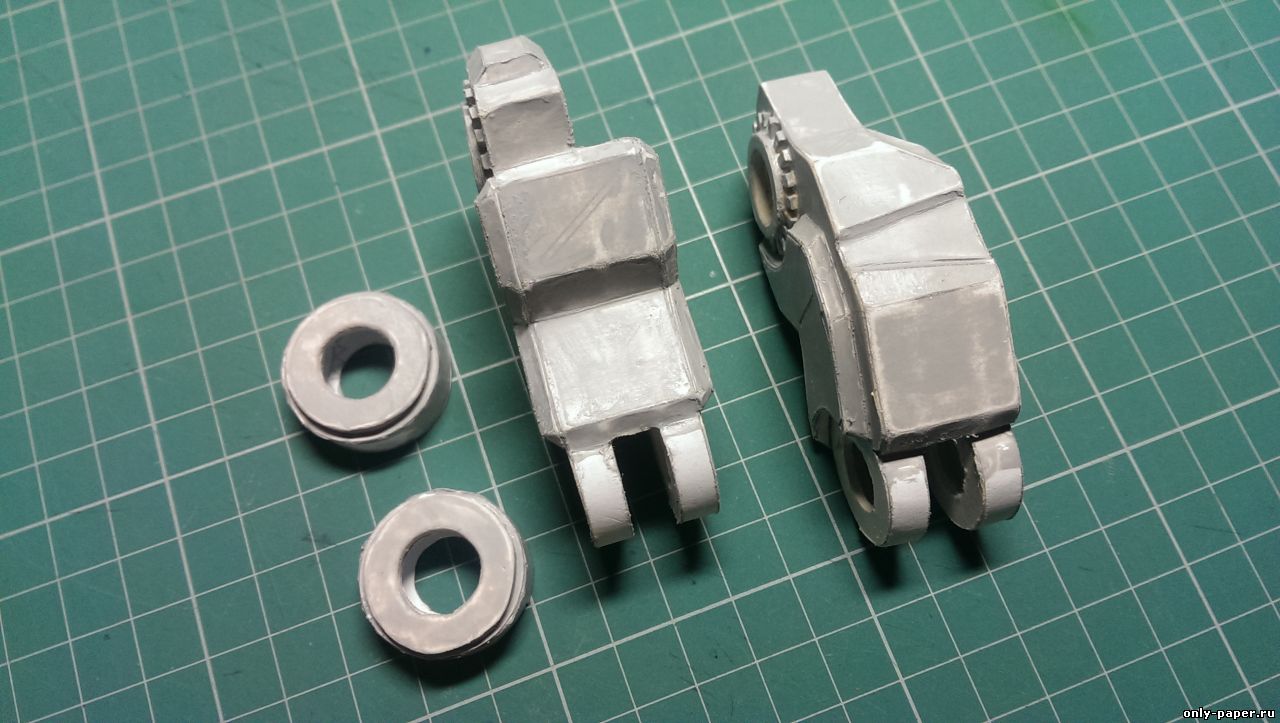
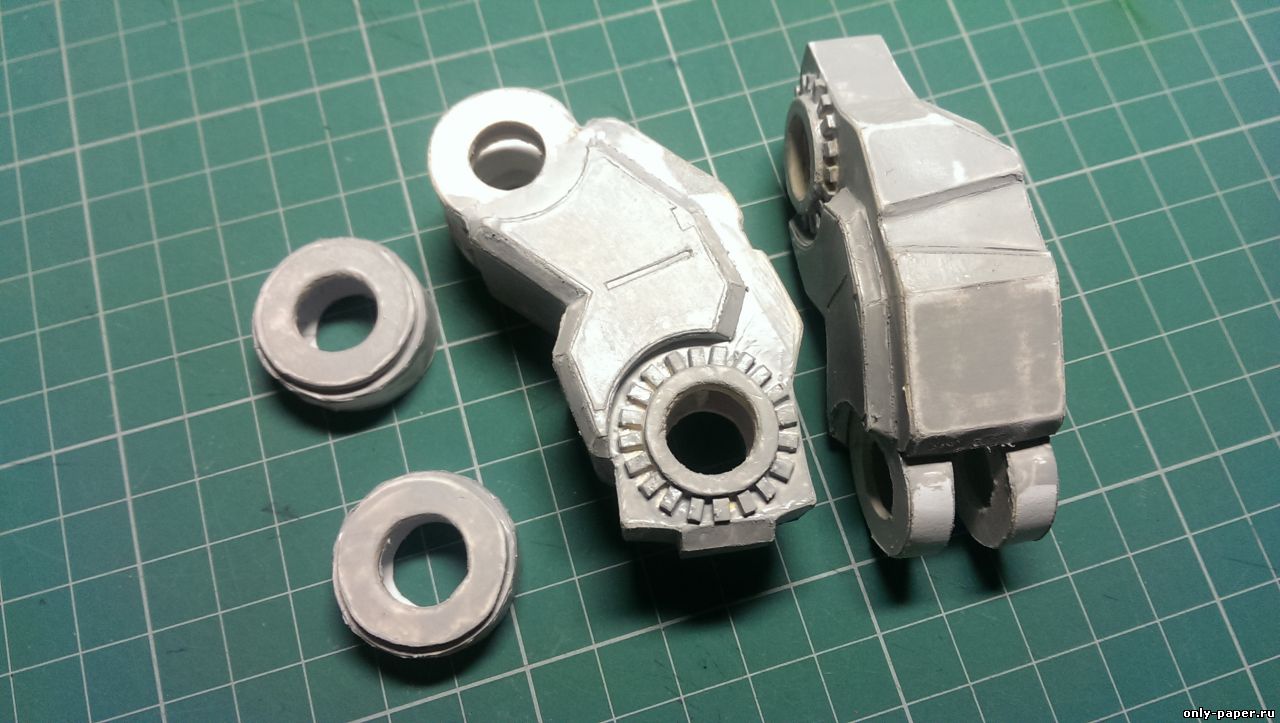
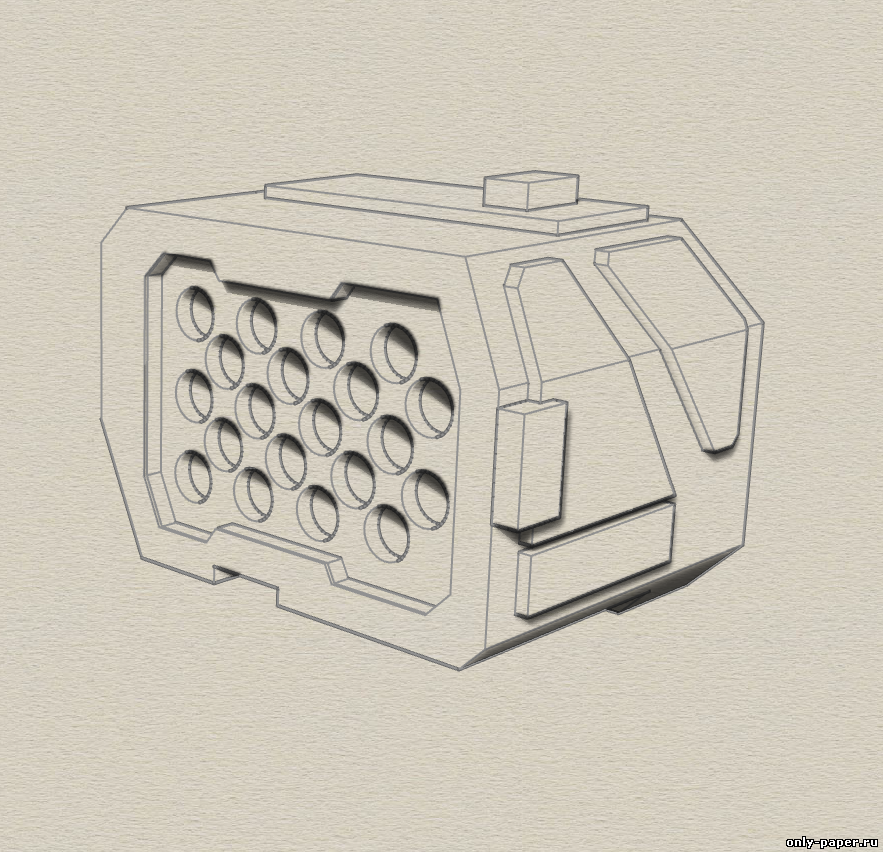
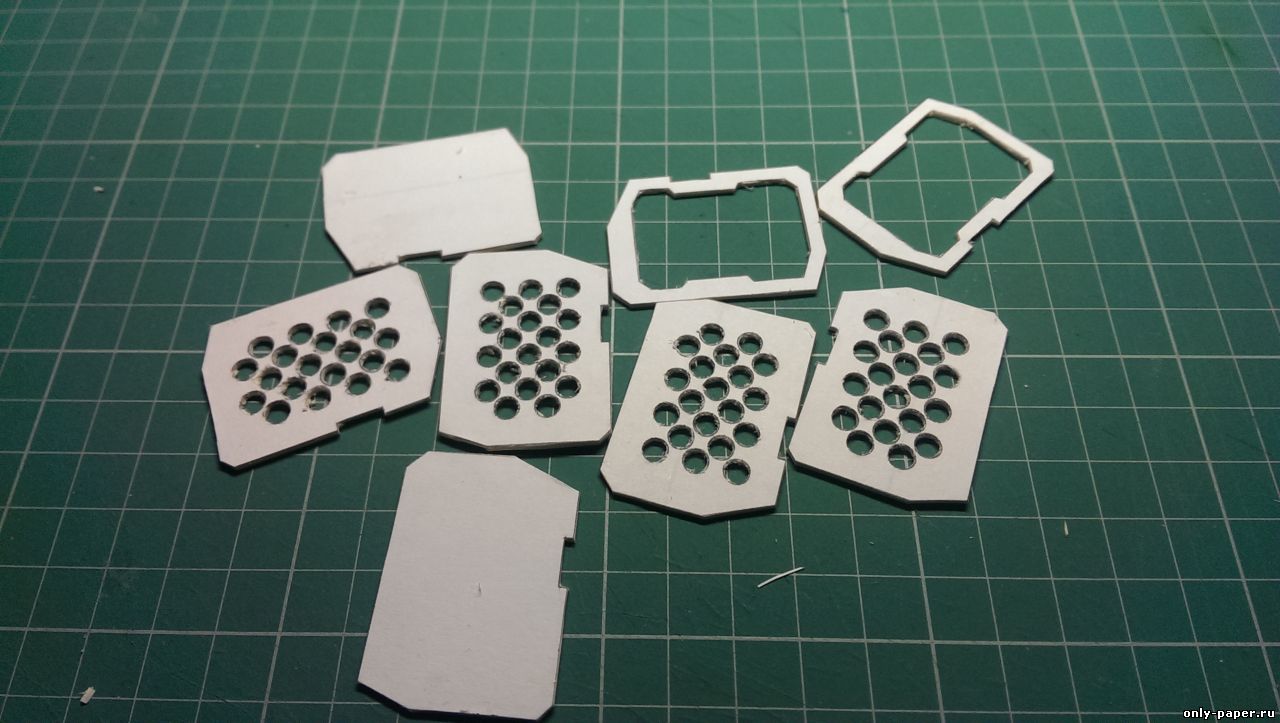
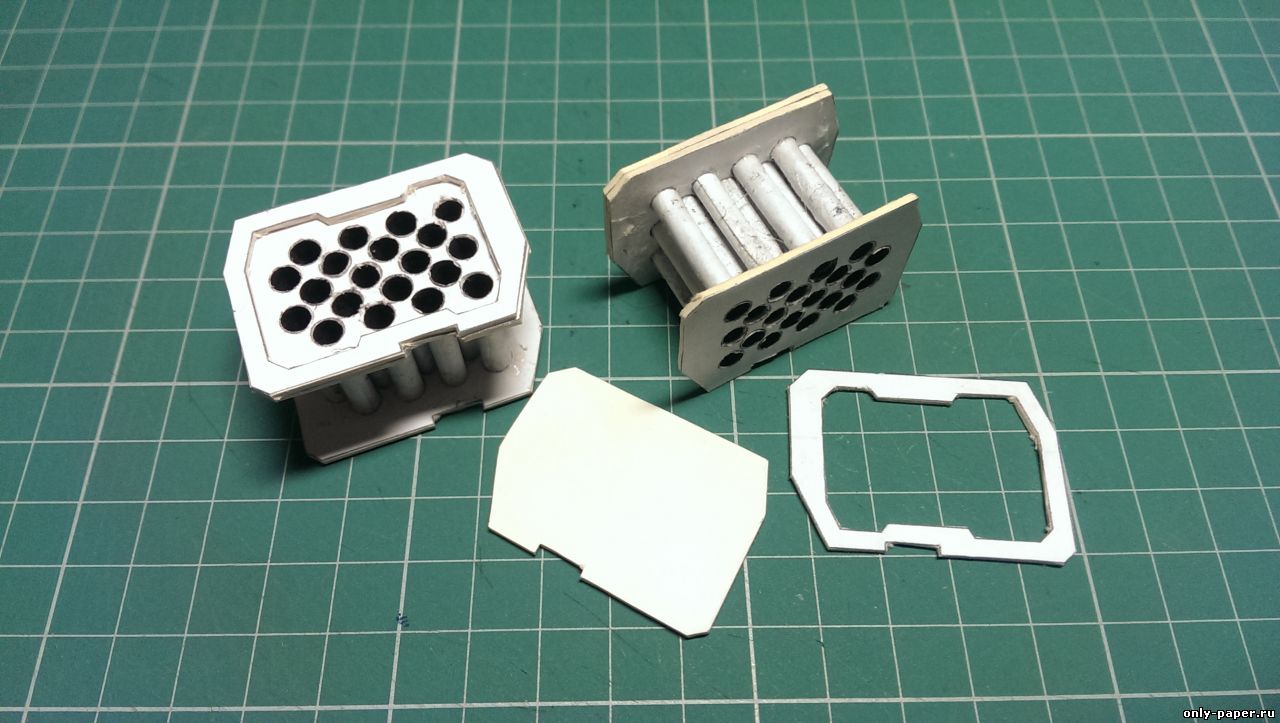
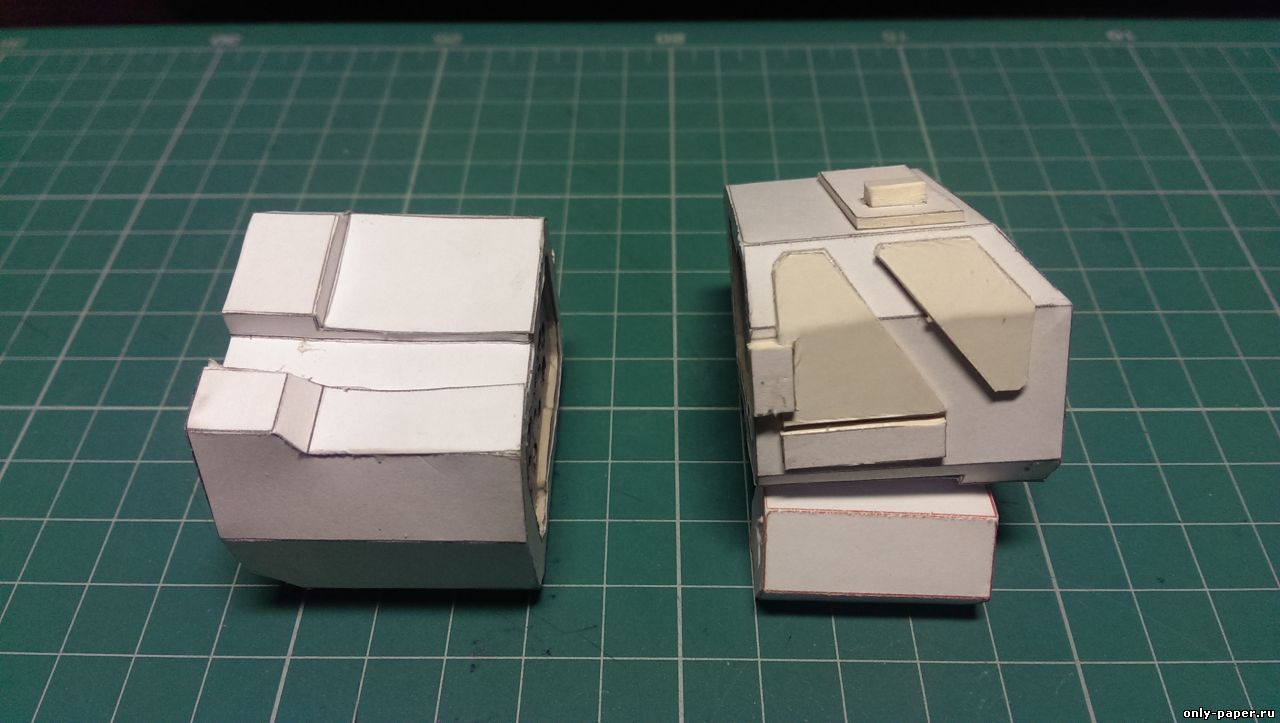
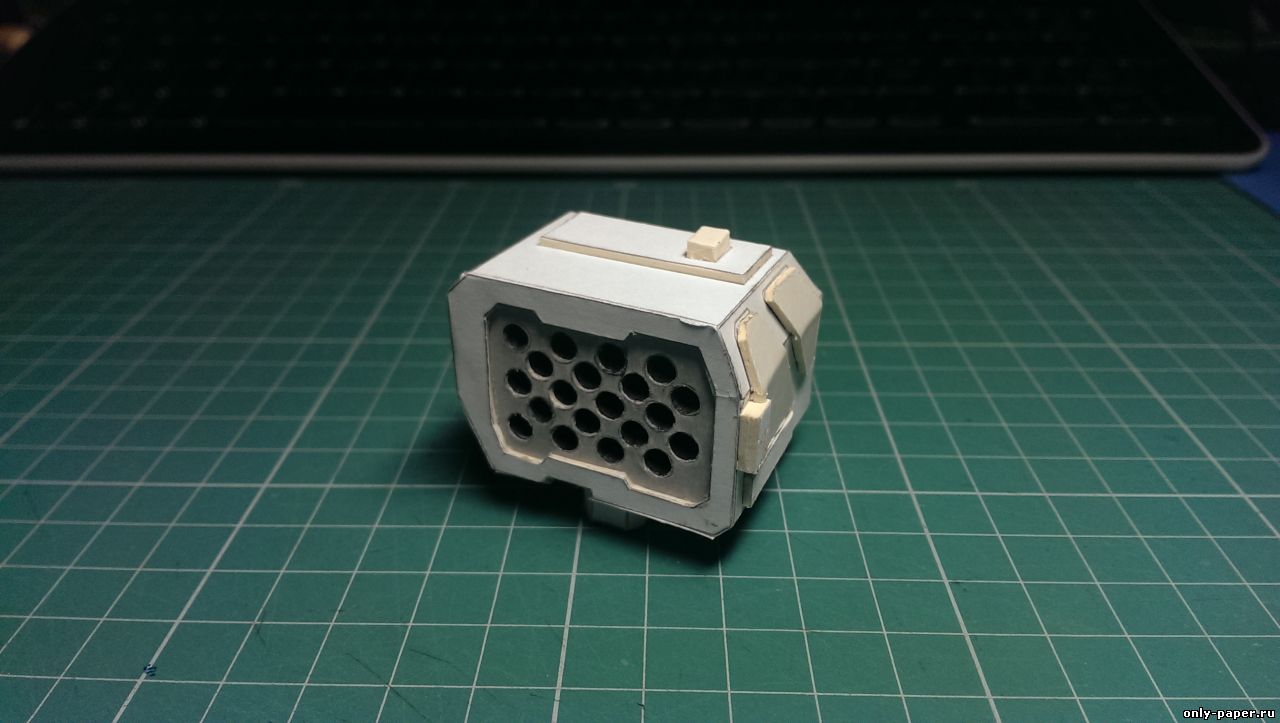
Lets continue building cockpit. There are some details with difficult shapes. But I think its not problem for most modelers.

Posted Image

Posted Image

Posted Image

Posted Image

Posted Image

Posted Image

Posted Image

Posted Image

Posted Image

Edited by RuSL, 19 July 2015 - 12:28 AM.


#22 antoha proud

    Member

  • PipPipPipPipPip
  • FP Veteran - Beta 2
  • 158 posts
  • LocationUkraine. Kyiv

Posted 19 July 2015 - 01:23 AM

Есть простая таблица масштабов, открывается в Гугле. Ну да ладно с ними с масштабами. Последние фотки породили во мне завистливого зверька! Выглядит оч. круто!
Пара вопросов:
- Какую использовал бумагу для шпангоутов и обшивки?
- Чем будешь красить после сборки (если будешь)?
И конечно же мой внутренний и оч. завистливый зверёк выпрашивает раскройки для печати :mellow:

PS. Что будет с носом?

#23 RuSL

    Member

  • PipPipPipPipPip
  • Little Helper
  • 115 posts
  • LocationRussia

Posted 19 July 2015 - 03:21 AM

View Postantoha proud, on 19 July 2015 - 01:23 AM, said:

Есть простая таблица масштабов, открывается в Гугле. Ну да ладно с ними с масштабами. Последние фотки породили во мне завистливого зверька! Выглядит оч. круто!
Пара вопросов:
- Какую использовал бумагу для шпангоутов и обшивки?
- Чем будешь красить после сборки (если будешь)?
И конечно же мой внутренний и оч. завистливый зверёк выпрашивает раскройки для печати :mellow:

PS. Что будет с носом?

  • Шпангоуты - картон 1мм
    Обшивка - бумага для черчения 160
  • Уже покрасил. Акриловые на водной основе. Кистями.
  • Выкройки будут, но только после того, как все подправлю и сделаю схему сборки.
  • С носом все ок. Так кажется только на фото.


#24 antoha proud

    Member

  • PipPipPipPipPip
  • FP Veteran - Beta 2
  • 158 posts
  • LocationUkraine. Kyiv

Posted 19 July 2015 - 03:49 AM

View PostRuSL, on 19 July 2015 - 03:21 AM, said:

Выкройки будут, но только после того, как все подправлю и сделаю схему сборки.


Буду терпеливо, очень ТЕРПЕЛИВО ждать выкроек :unsure: ну и конечно же фоток.
Больше фоток!

Клей по всей видимиости ПВА?

#25 Hit the Deck

    Member

  • PipPipPipPipPipPipPipPipPip
  • 4,677 posts
  • LocationIndonesia

Posted 19 July 2015 - 04:15 AM

Hmm...this is a really interesting alternative to 3D-Printing!

#26 antoha proud

    Member

  • PipPipPipPipPip
  • FP Veteran - Beta 2
  • 158 posts
  • LocationUkraine. Kyiv

Posted 19 July 2015 - 05:00 AM

View PostHit the Deck, on 19 July 2015 - 04:15 AM, said:

Hmm...this is a really interesting alternative to 3D-Printing!


That is the best aiternative! For now, I suppose. And much, much cheapper.

Edited by antoha proud, 19 July 2015 - 05:01 AM.


#27 RuSL

    Member

  • PipPipPipPipPip
  • Little Helper
  • 115 posts
  • LocationRussia

Posted 19 July 2015 - 05:21 AM

View PostHit the Deck, on 19 July 2015 - 04:15 AM, said:

Hmm...this is a really interesting alternative to 3D-Printing!


Yes. More difficult I think but cheaper and everybody can build it.

View Postantoha proud, on 19 July 2015 - 05:00 AM, said:


That is the best aiternative! For now, I suppose. And much, much cheapper.


+1

Edited by RuSL, 19 July 2015 - 05:22 AM.


#28 RuSL

    Member

  • PipPipPipPipPip
  • Little Helper
  • 115 posts
  • LocationRussia

Posted 19 July 2015 - 08:58 PM

Next package of photos.

Posted Image

Posted Image

Usually I primed all details cause it make its like plastic. Better for painting at next stages.

Posted Image

Posted Image

Posted Image

Posted Image

Preliminary version of jump jets.

Posted Image

Posted Image

And backside of torso with engine(?)radiators

Posted Image

Posted Image

Edited by RuSL, 19 July 2015 - 08:59 PM.


#29 RuSL

    Member

  • PipPipPipPipPip
  • Little Helper
  • 115 posts
  • LocationRussia

Posted 20 July 2015 - 08:22 PM

Legs. Its needed reinforce because this parts should be movable. I'm recommend always reinforcing all cutouts in details by cardboard. It's make all movable knots more strength.

At this situation I'm using cardboard frames in main directions according shape of leg.

Posted Image

Posted Image

Posted Image

Posted Image

Posted Image

Posted Image

#30 Sean Lang

    Member

  • PipPipPipPipPipPipPip
  • The Wolf
  • The Wolf
  • 969 posts
  • Facebook: Link
  • Twitter: Link
  • Twitch: Link
  • LocationNorth Carolina

Posted 20 July 2015 - 09:29 PM

I'm in love with this thread... just thought you should know...

#31 antoha proud

    Member

  • PipPipPipPipPip
  • FP Veteran - Beta 2
  • 158 posts
  • LocationUkraine. Kyiv

Posted 20 July 2015 - 11:37 PM

Fantastic! More! Plese more!

#32 Grendel408

    Member

  • PipPipPipPipPipPipPipPipPip
  • Bad Company
  • Bad Company
  • 2,611 posts
  • LocationBay Area, California

Posted 21 July 2015 - 11:25 AM

WOW! Talk about building a Mech from the ground up!!! Good thing you don't have to create the actual internals ;) Keep up the excellent work, RuSL :D

#33 RuSL

    Member

  • PipPipPipPipPip
  • Little Helper
  • 115 posts
  • LocationRussia

Posted 21 July 2015 - 08:30 PM

Continue. Covering. Sticking. Priming. Done!

Posted Image

Posted Image

Posted Image

Posted Image

Posted Image

Posted Image

#34 antoha proud

    Member

  • PipPipPipPipPip
  • FP Veteran - Beta 2
  • 158 posts
  • LocationUkraine. Kyiv

Posted 22 July 2015 - 12:53 AM

Very acurate work!
Probably You spent alot of time doing this parts?

But : If You are going through the Hell, keep going!

Edited by antoha proud, 22 July 2015 - 03:11 AM.


#35 RuSL

    Member

  • PipPipPipPipPip
  • Little Helper
  • 115 posts
  • LocationRussia

Posted 22 July 2015 - 08:48 PM

View Postantoha proud, on 22 July 2015 - 12:53 AM, said:

Very acurate work!
Probably You spent alot of time doing this parts?

But : If You are going through the Hell, keep going!


Thx. Not so much time. I think its was made for 6 hours by 2 evening.
Now time for LRM-20. It is consist of 2*20 tubes. Into it will be placed rockets. Im already constructed smth like this at early models and know that its looks very well.

So you need little bit more patience but results will perfect!

Posted Image

Posted Image

Posted Image

Posted Image
Posted Image

Posted Image

Posted Image

Posted Image

Posted Image
Posted Image

Edited by RuSL, 22 July 2015 - 08:52 PM.


#36 antoha proud

    Member

  • PipPipPipPipPip
  • FP Veteran - Beta 2
  • 158 posts
  • LocationUkraine. Kyiv

Posted 22 July 2015 - 11:04 PM

View PostRuSL, on 22 July 2015 - 08:48 PM, said:

Thx. Not so much time. I think its was made for 6 hours by 2 evening.


12 hours with painting?

I think I would try to combine your technique with my sculpting if You give us schems. It will help to avoid ribs on the torsoes. And make some solid details if there is such a nectssity.

http://mwomercs.com/...__fromsearch__1

And wanted to ask if You got a plans of building any other mechs?
It would be nice to see Aidan's Pride Summoner.

Edited by antoha proud, 22 July 2015 - 11:09 PM.


#37 antoha proud

    Member

  • PipPipPipPipPip
  • FP Veteran - Beta 2
  • 158 posts
  • LocationUkraine. Kyiv

Posted 22 July 2015 - 11:37 PM

Ну, и покрасить, скажем вот так:

http://atlashunters....by_ironhawk.jpg

#38 RuSL

    Member

  • PipPipPipPipPip
  • Little Helper
  • 115 posts
  • LocationRussia

Posted 22 July 2015 - 11:40 PM

View Postantoha proud, on 22 July 2015 - 11:04 PM, said:

12 hours with painting?


6 hours whithout painting. I painted all torso together twice.

View Postantoha proud, on 22 July 2015 - 11:04 PM, said:

I think I would try to combine your technique with my sculpting if You give us schems. It will help to avoid ribs on the torsoes. And make some solid details if there is such a nectssity.


I think its not needed, but you can decide yourself when will build it.
Paper give me all what I want ^_^.

View Postantoha proud, on 22 July 2015 - 11:04 PM, said:

And wanted to ask if You got a plans of building any other mechs?
It would be nice to see Aidan's Pride Summoner.

I'm already finished 3d model of Mad Dog and now papercraft by my friend in progress. But I dont like smth in those 3d model. It was my first own project of mech and i made a lot of mistakes. May be in future I will rebuilding it and share nestings.


View Postantoha proud, on 22 July 2015 - 11:37 PM, said:

Ну, и покрасить, скажем вот так:

http://atlashunters....by_ironhawk.jpg


Im already painted it ;)

P.S. Now I have so less time for hobby and works under models/nestings became so slowly.
But if I will have time in future the next mech will be Ebon Jaguar.

Edited by RuSL, 22 July 2015 - 11:42 PM.


#39 White Bear 84

    Member

  • PipPipPipPipPipPipPipPipPip
  • Ace Of Spades
  • Ace Of Spades
  • 3,857 posts

Posted 22 July 2015 - 11:59 PM

Stahp teasing us already!! :P

Looks awesome so far :wub:

#40 Vellron2005

    Member

  • PipPipPipPipPipPipPipPipPipPip
  • The Blood-Eye
  • The Blood-Eye
  • 5,444 posts
  • LocationIn the mechbay, telling the techs to put extra LRM ammo on.

Posted 23 July 2015 - 12:03 AM

WOW... you, dude, are AMAZING....

Wish we could actually mount only lower missle pods on that thing, not always having missles going to the shoulder pods..


1 user(s) are reading this topic

0 members, 1 guests, 0 anonymous users