I'm sorry, I must not have been clear. I already have the .objs through the converter now I'm having issues with Mech Importer as described above.

2251 replies to this topic
#1622
-
-

- The Referee

- 6,458 posts
Rum Runner
- LocationPHX

Posted 20 November 2015 - 12:45 PM
 gregsolidus, on 20 November 2015 - 12:09 PM, said:
I'm sorry, I must not have been clear. I already have the .objs through the converter now I'm having issues with Mech Importer as described above.
Ah crap, got it. Do you have a screenshot of the output when you try to run it? And did you edit the script to reflect the directory you extracted the files to?
I put all the .pak files to "e:\blender projects\mechs". So they extracted to \objects\mechs\<mechnames>. The script needs to have the first part of that in it, and you run the script from say "e:\blender projects\mechs\objects\mechs\atlas\".
I seriously need to make this more user friendly. It's stupidly complicated right now. Sorry about that.

#1623

Posted 21 November 2015 - 12:06 AM
Made this quicky today:

Gonna work on an actual animation project soon, once I rig a few more mechs. I'm trying to work more on terrain and environment modeling, as those can be a bit tricky when using displacement maps.
Timberwolf was rigged in Maya. Scene was rendered with Furryball RT with indirect lighting. Skybox was used for additional environment/dome light lighting. Post processing effects include depth of field, bloom, and glare, all done within Furryball.
#1624
-

-
- Legendary Founder

- 1,352 posts
Member
Posted 21 November 2015 - 12:48 AM
Here you go: http://postimg.org/i...6on86mfcz/full/ . The base directory in the .ps1 file has been changed to "C:\Users\Greg\Documents\Papercraft\Extracted Models\Battletech" which is where the texture and objects files reside. The .ps1 file itself sits in the hunchback folder outside of the body folder per the example. It's not that bad, it would be easier if Powershell information didn't primarily consist of hyper specific examples and server shenanigans. I'm sure there is simple explanation but I can't find it.
#1625
-
-
- The Referee
- 6,458 posts
Rum Runner
- LocationPHX
Posted 23 November 2015 - 06:39 AM
Aresye Kerensky, on 21 November 2015 - 12:06 AM, said:
Gonna work on an actual animation project soon, once I rig a few more mechs. I'm trying to work more on terrain and environment modeling, as those can be a bit tricky when using displacement maps.
Timberwolf was rigged in Maya.
Timberwolf was rigged in Maya.
If you want, you can get the armature from the game files too if you use Noesis. Check out my third tutorial on extracting the models, and you can rig the mech all up in Blender then export it to a Maya supported format. Might save a bit of time over rigging from scratch.
#1626
-
-
- The Referee
- 6,458 posts
Rum Runner
- LocationPHX
Posted 23 November 2015 - 06:49 AM
gregsolidus, on 21 November 2015 - 12:48 AM, said:
Here you go: http://postimg.org/i...6on86mfcz/full/ . The base directory in the .ps1 file has been changed to "C:\Users\Greg\Documents\Papercraft\Extracted Models\Battletech" which is where the texture and objects files reside. The .ps1 file itself sits in the hunchback folder outside of the body folder per the example. It's not that bad, it would be easier if Powershell information didn't primarily consist of hyper specific examples and server shenanigans. I'm sure there is simple explanation but I can't find it.
It looks like you don't have mech-importer.ps1 in the path. If you run it without .\ starting, it searches the path for the file. If you run it like .\mech-importer.ps1, it only checks the directory you are currently in.
If it's not in the path, you have to specify the full directory to the script. So I think "c:\users\greg\scripts\mech-importer.ps1", or wherever you have that file.
#1627
Posted 24 November 2015 - 12:24 AM
Heffay, on 23 November 2015 - 06:39 AM, said:
If you want, you can get the armature from the game files too if you use Noesis. Check out my third tutorial on extracting the models, and you can rig the mech all up in Blender then export it to a Maya supported format. Might save a bit of time over rigging from scratch.
I'm more cinematic oriented, so when I create rigs in Maya I'm doing it under the philosophy that I'm "handing off" my rig to a separate animator, so I create custom, easy to see controllers that are controlling the bones through constraints, rather than keyframing the bones themselves. Makes things more fun to animate, and avoids a lot of potential bugs that can end up breaking a rig.
I did in fact use your method to extract the bones themselves, so I wasn't fully rigging from scratch. I'm actually studying to become a professional rigger, so I like to go the extra mile for practice, even though for personal animation work it's not needed.
Here's a screenshot of the rig itself:

Edited by Aresye Kerensky, 24 November 2015 - 12:32 AM.
#1628
-
-
- Legendary Founder
- 1,352 posts
Member
Posted 25 November 2015 - 05:13 AM
Heffay, on 23 November 2015 - 06:49 AM, said:
It looks like you don't have mech-importer.ps1 in the path. If you run it without .\ starting, it searches the path for the file. If you run it like .\mech-importer.ps1, it only checks the directory you are currently in.
If it's not in the path, you have to specify the full directory to the script. So I think "c:\users\greg\scripts\mech-importer.ps1", or wherever you have that file.
So even though it's in the hunchback folder, it's not in the path that includes the hunchback folder? I also tried calling it the "long way" through "C:\Users\Greg\Documents\Papercraft\Extracted Models\Battletech\Objects\mechs\hunchback\mech-import.ps1" to no effect.
#1629
-
-
- The Referee
- 6,458 posts
Rum Runner
- LocationPHX
Posted 25 November 2015 - 06:43 AM
gregsolidus, on 25 November 2015 - 05:13 AM, said:
So even though it's in the hunchback folder, it's not in the path that includes the hunchback folder? I also tried calling it the "long way" through "C:\Users\Greg\Documents\Papercraft\Extracted Models\Battletech\Objects\mechs\hunchback\mech-import.ps1" to no effect.
If it's in the hunchback folder, then you can call it locally. You hit just about ever combination to call the file short of the actual one that will do it.

From the hunchback directory, run:
.\mech-importer.ps1
That should be it. However, you might want to look into creating a scripts directory and adding that to the path, since you only have to do that once, and you can use asset-importer.ps1 there (for converting buildings, turrets, etc), cgf-converter.exe, and everything else without having to source the command.
#1630
-
-
- Legendary Founder
- 1,352 posts
Member
Posted 25 November 2015 - 09:25 AM
Found the issue. placed the new directory not only in the basedir variable but at the end of "$basedir = $basedir.replace("\","\\")". This is why you shouldn't code when you're tired. Thanks for the help and your work.
Edited by gregsolidus, 25 November 2015 - 09:26 AM.
#1631
-

-
- Big Daddy

- 119 posts
Member
- LocationGazorpazorp
Posted 25 November 2015 - 09:59 AM
Heffay,
its me again, i am the one who wanted to make a 3D Laser sintered Model in bigger scale of the Ebon Jaguar.
i do now have more time for the planned Ebon Jaguar Model, i now face the problem that the surface of the model seems to be quite smooth, but when i extract it to .stl it is more rough and doesn't look quite as good. Is there any way you can convert AND repair the original Model with the smooth surface? For the sintering process i will have to slice the model horizontally at the torso twist point, so one Model are the legs and the other the torso with Arms.
I have attached three pictures of the model:
1: Original Model
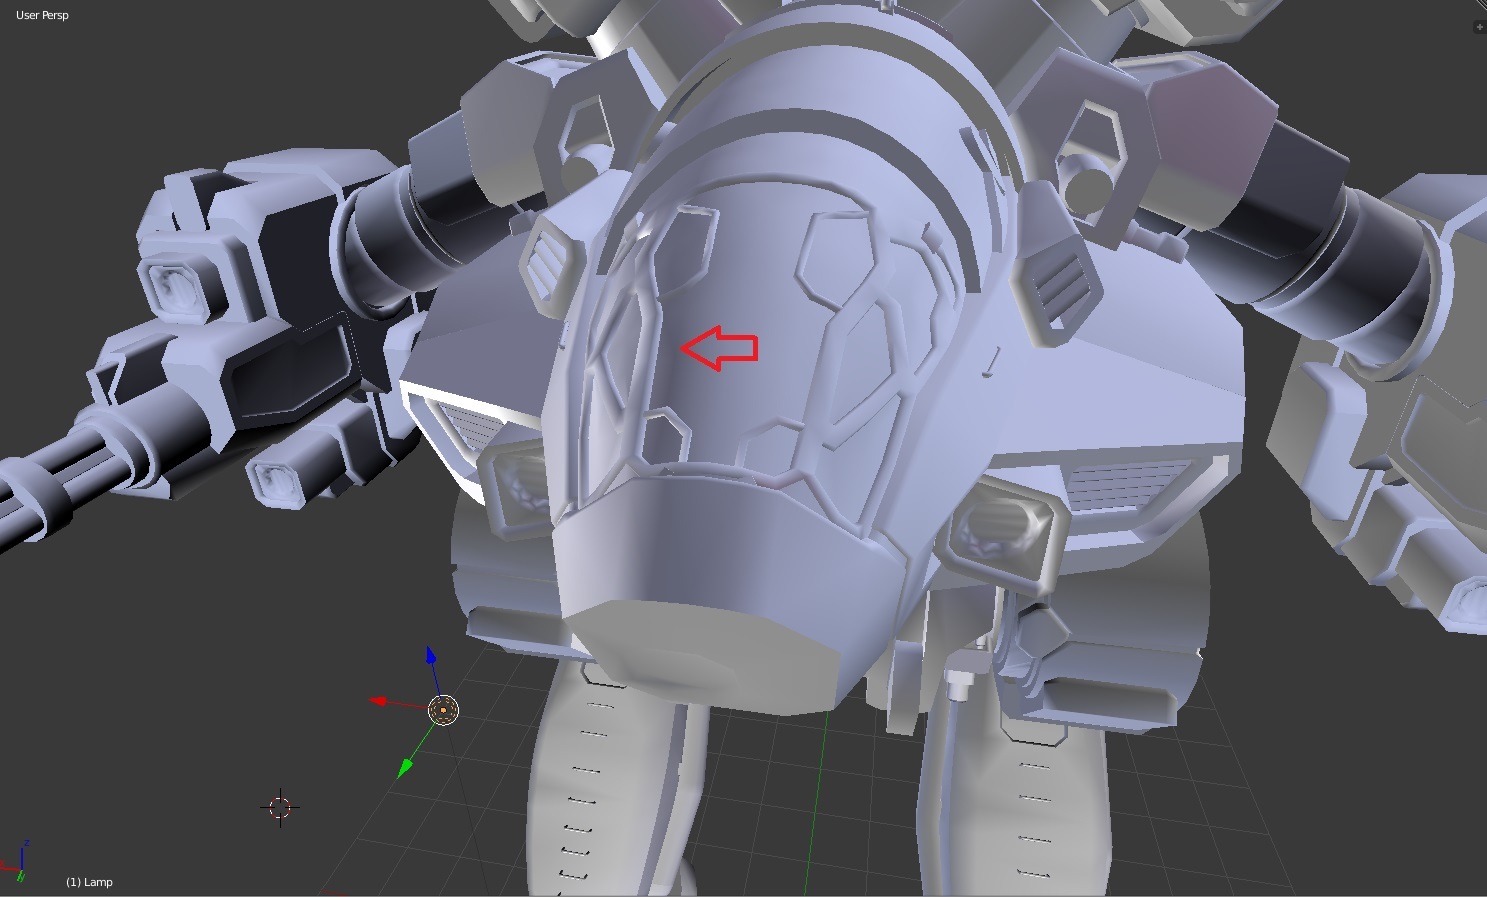
2: Model converted as .stl
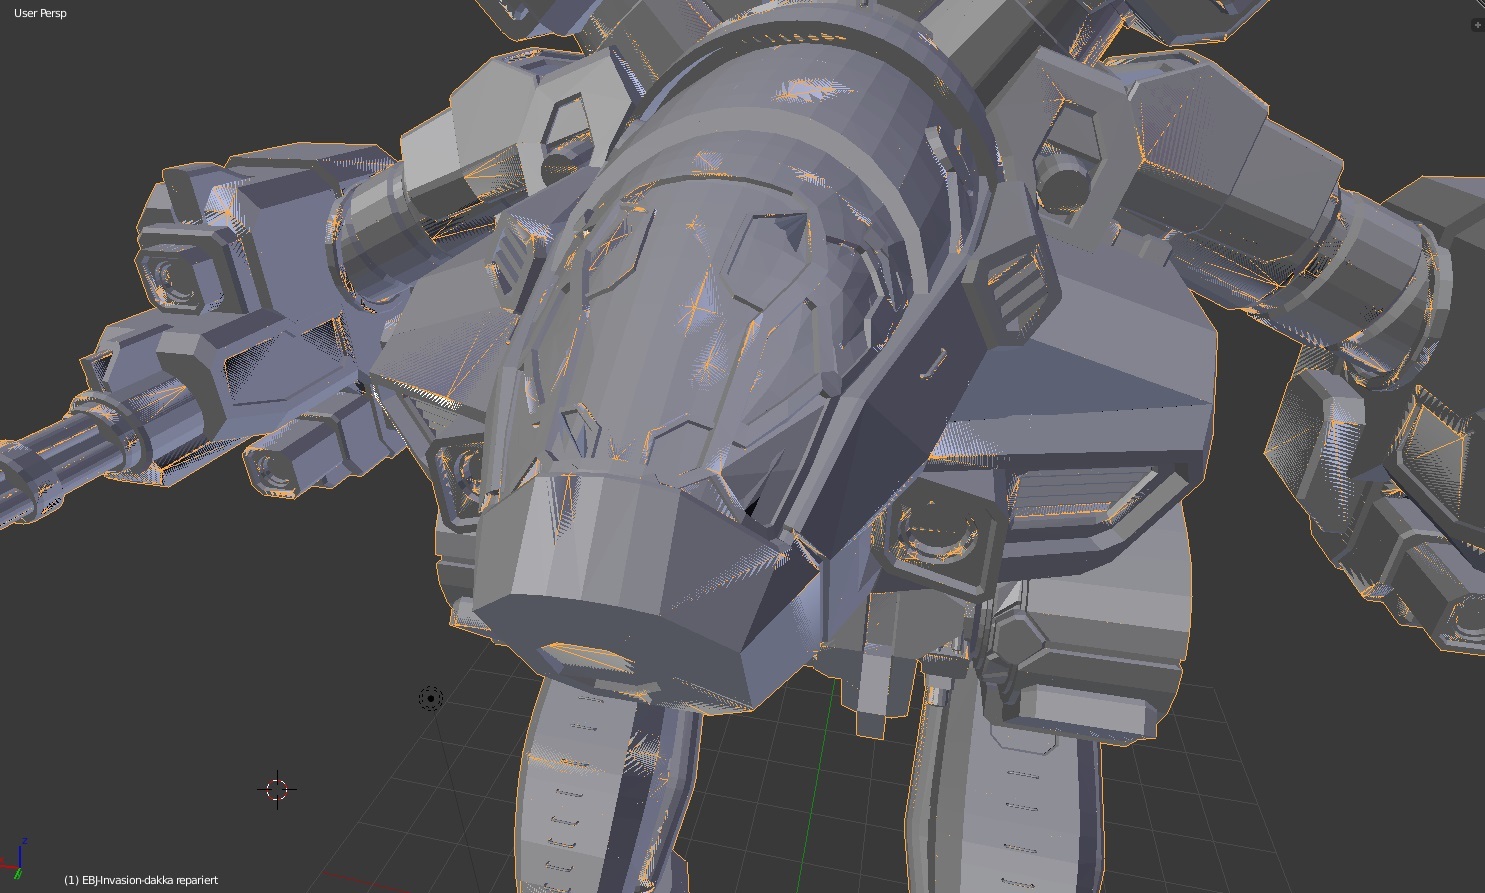
3: Model after Repair Tool process (note the repair failure on left side cockpit glass/frame
I would be very happy if you could help me...
Thank you,
greetings
its me again, i am the one who wanted to make a 3D Laser sintered Model in bigger scale of the Ebon Jaguar.
i do now have more time for the planned Ebon Jaguar Model, i now face the problem that the surface of the model seems to be quite smooth, but when i extract it to .stl it is more rough and doesn't look quite as good. Is there any way you can convert AND repair the original Model with the smooth surface? For the sintering process i will have to slice the model horizontally at the torso twist point, so one Model are the legs and the other the torso with Arms.
I have attached three pictures of the model:
1: Original Model
2: Model converted as .stl
3: Model after Repair Tool process (note the repair failure on left side cockpit glass/frame
I would be very happy if you could help me...
Thank you,
greetings
#1632
Posted 25 November 2015 - 10:12 AM
Peter Overheater, on 25 November 2015 - 09:59 AM, said:
Heffay,
its me again, i am the one who wanted to make a 3D Laser sintered Model in bigger scale of the Ebon Jaguar.
i do now have more time for the planned Ebon Jaguar Model, i now face the problem that the surface of the model seems to be quite smooth, but when i extract it to .stl it is more rough and doesn't look quite as good. Is there any way you can convert AND repair the original Model with the smooth surface? For the sintering process i will have to slice the model horizontally at the torso twist point, so one Model are the legs and the other the torso with Arms.
I have attached three pictures of the model:
1: Original Model
2: Model converted as .stl
3: Model after Repair Tool process (note the repair failure on left side cockpit glass/frame
I would be very happy if you could help me...
Thank you,
greetings
Nothing should have changed with the geometry during the export to .stl. In the original you're seeing a smoothed representation of the surface normals, so it appears smooth, however for .stl and 3d printing, you're seeing the actual mesh itself without the smoothing, so it appears rough.
All you should have to do to get a smoother model for 3d printing is subdivide the mesh.
I'm not too familiar with .stl format, so someone can correct me if I'm wrong. I did find this while I was researching it, so it may help: http://airwolf3d.com...hing-stl-files/
#1633
-
-
- Big Daddy
- 119 posts
Member
- LocationGazorpazorp
Posted 27 November 2015 - 08:59 AM
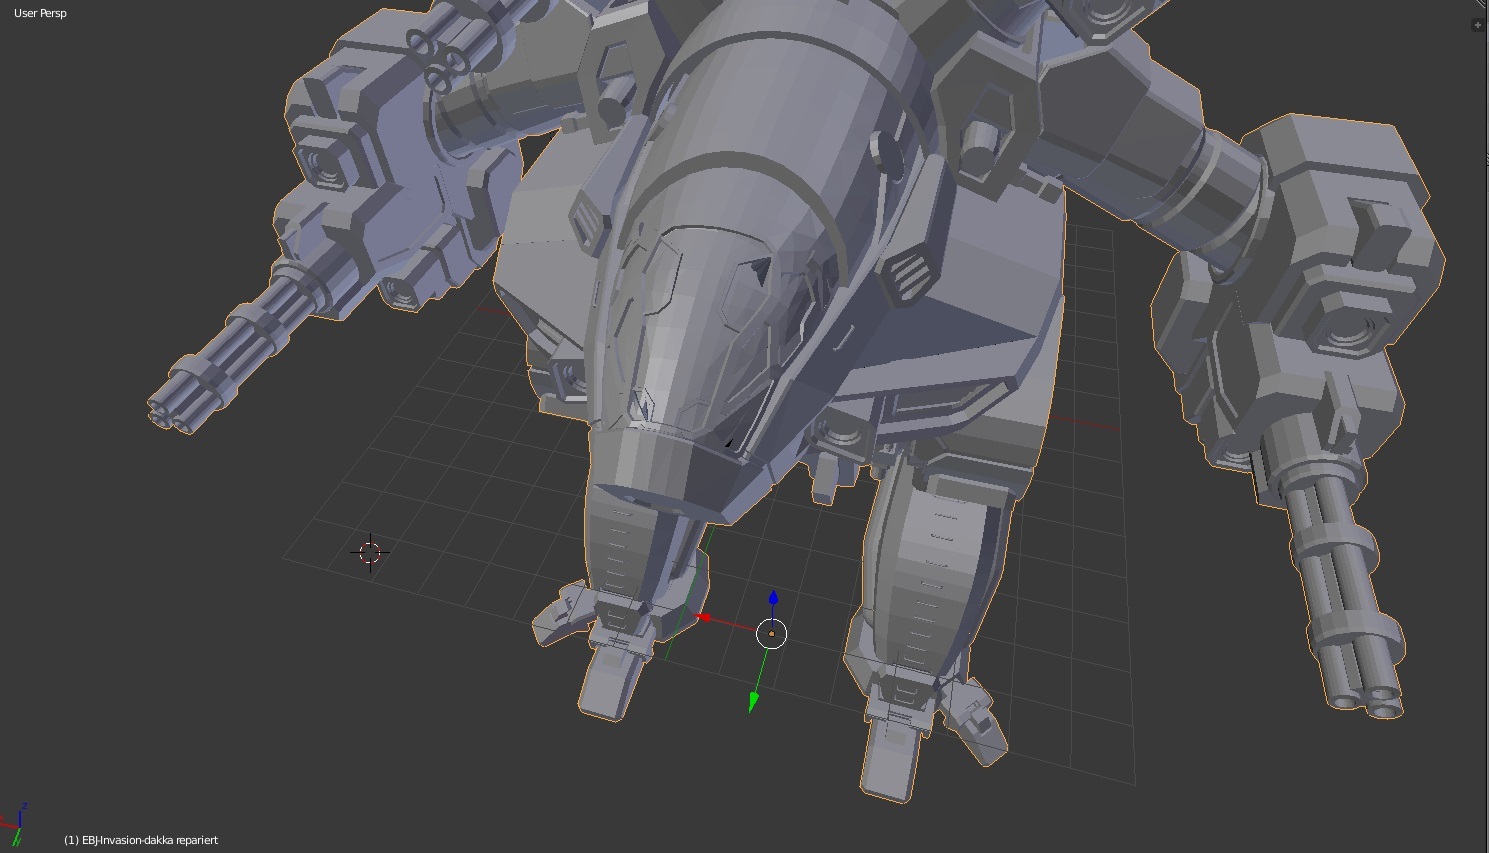
So i checked it today for ~4 hours, it seems it is not possible to smoothen the surfaces of the .stl model in a proper way. The best result i got from the above link looks like this:
Also some failures appear when using this method:
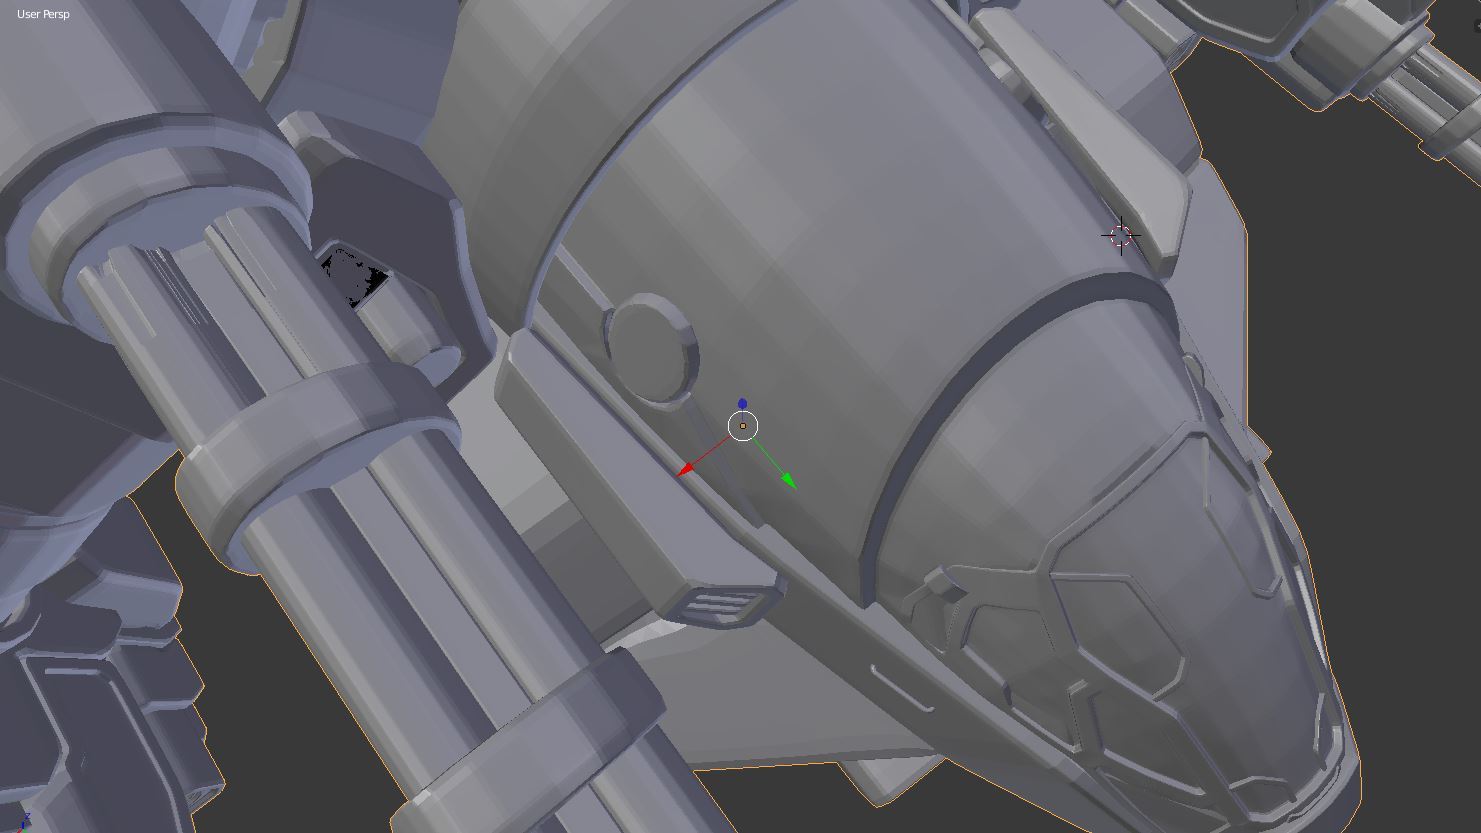
It would be perfect if there was a possibility to apply the auto smooth funtion to the "core" mesh.
I also thought about copying the outer visual skin, or "scanning" it with some kind of virtual 3D Scanner. I want to print the model in a relatively large scale, with round areas being rough it doesn't look quiete good...
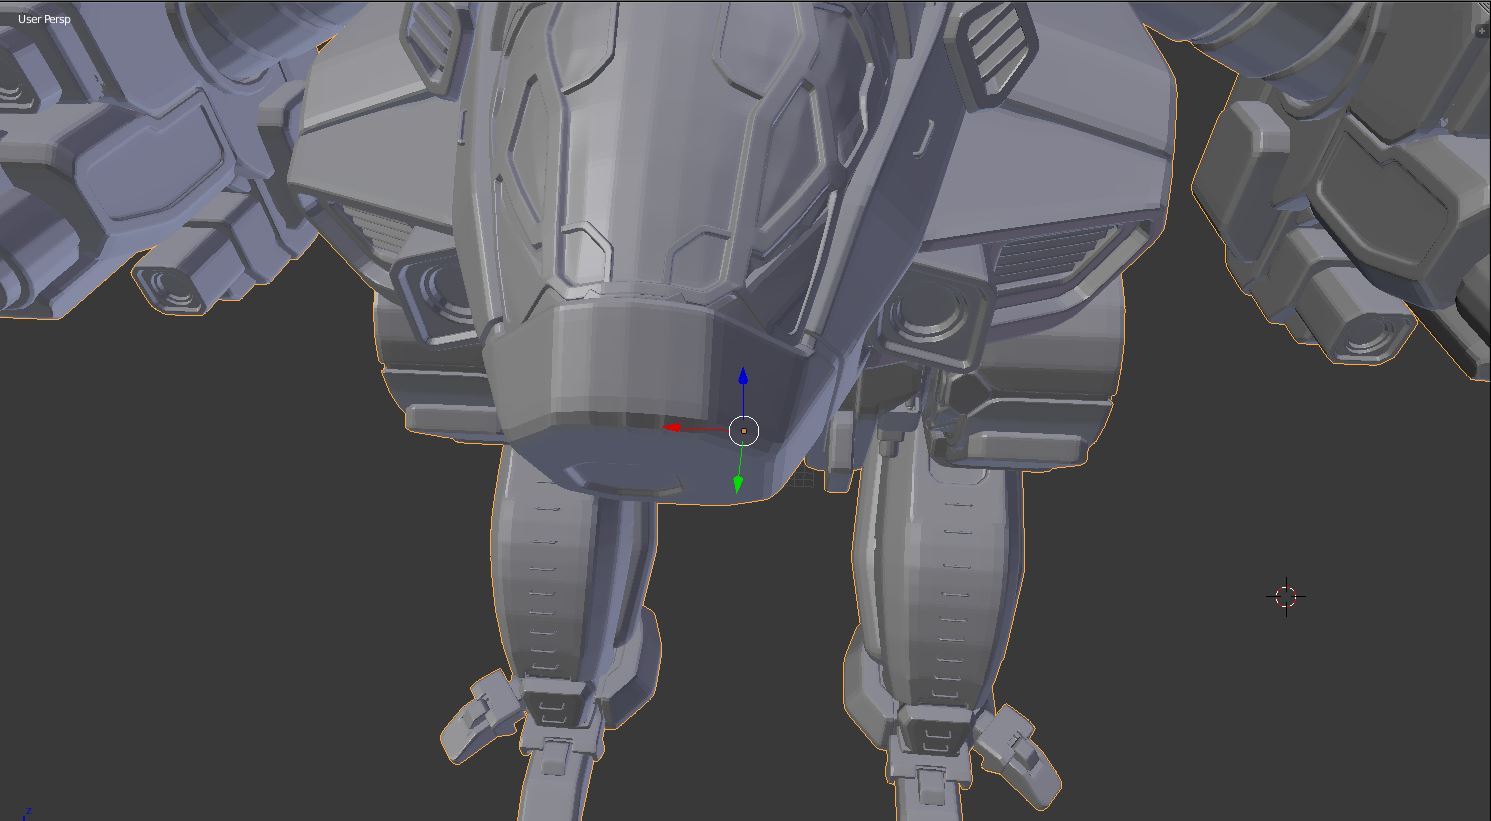
Just as an example, the Auto Smooth applied on the Model with 30° limiter:
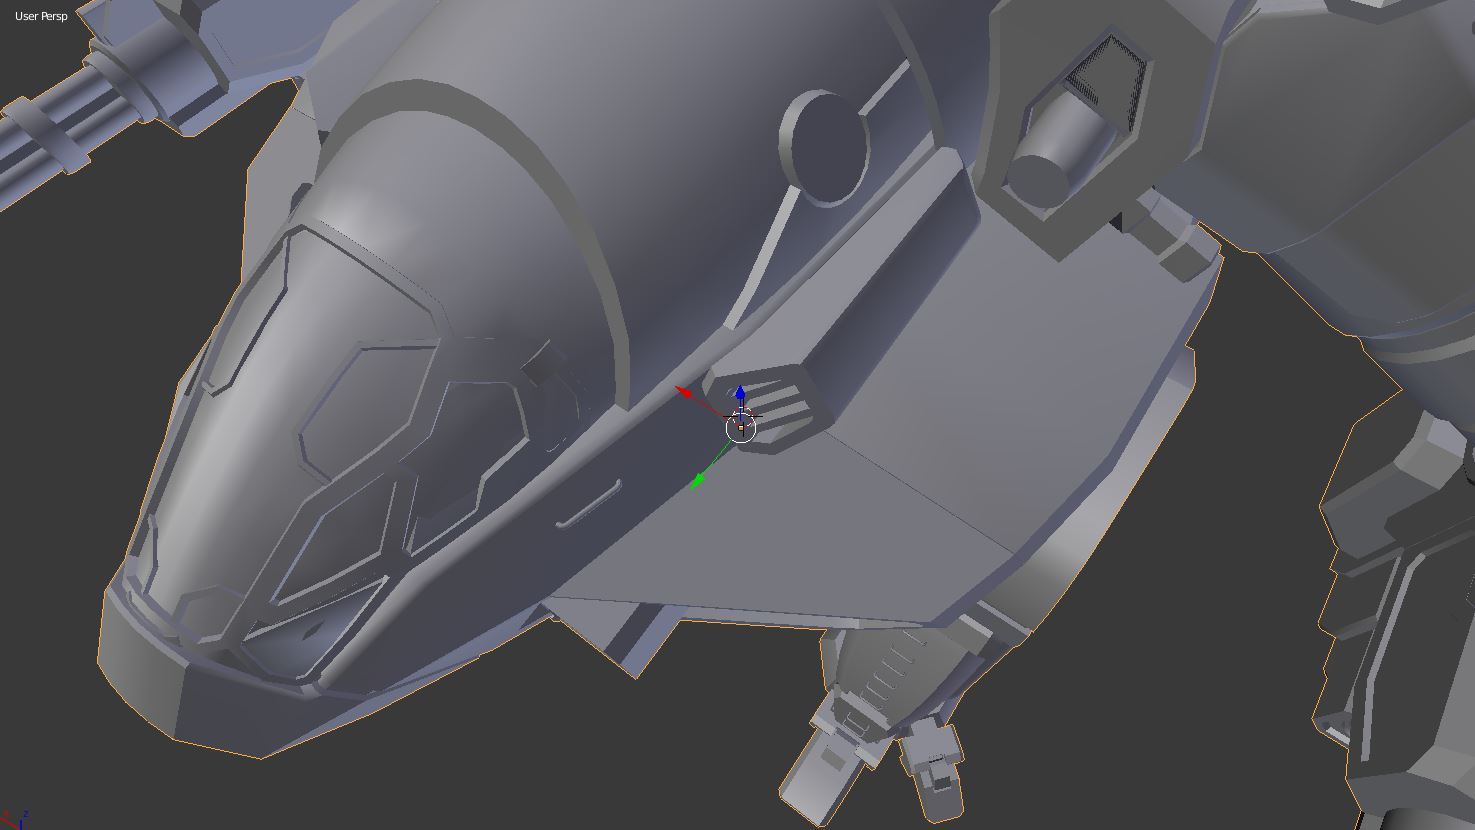
Also some failures appear when using this method:
It would be perfect if there was a possibility to apply the auto smooth funtion to the "core" mesh.
I also thought about copying the outer visual skin, or "scanning" it with some kind of virtual 3D Scanner. I want to print the model in a relatively large scale, with round areas being rough it doesn't look quiete good...
Just as an example, the Auto Smooth applied on the Model with 30° limiter:
Edited by Peter Overheater, 27 November 2015 - 09:00 AM.
#1634
-

-
- 2,253 posts
Member
Posted 27 November 2015 - 11:57 AM
Can't you just print it like this and sand the bumps down?
#1635
-
-
- Big Daddy
- 119 posts
Member
- LocationGazorpazorp
Posted 27 November 2015 - 01:09 PM
The problem is the material it gets printed is not very easy to sand. I can't say exactly which Plastic it is, but i've tried to cut and sand another part i have out of it, and it was just a lot of work. Also when i will attempt to sand some smaller parts like the UAC Cannons they probably break, and on a model that would normally cost a four- to five digit price i want it to be as perfect as it gets.
Also, many sections are hard to reach in order to sand them well.
Also, many sections are hard to reach in order to sand them well.
#1636
-

-
- The Hammer

- 48 posts
Member
Posted 27 November 2015 - 03:27 PM
Can't you do some sort of subdivision a couple times. The final count of quads doesn't matter, except that it is possible to have too much, but not likely as long as you consider what you are doing. Example, that windshield that is quite faceted, you could have 4 to 8 times the polys and get smoothness without overdoing it, though it depends on the size of the final print size too, and the size resolution.
#1637
-
-
- Big Daddy
- 119 posts
Member
- LocationGazorpazorp
Posted 27 November 2015 - 05:08 PM
Hello Ken, yes, i've tried that in different combinations (subdivide &smooth), but the old edges still remain. I did also try to mark only the faces inside the area of the windshield and the upper round torso, but i can't get it right. Took me hours of trying. I even looked for a python script which is similar to the operations which are done by the smoothing functions you get for the rendered Object.
Its not that i didn't try, i just can't find a solution for this problem. But in my opinion, as long as there are "virtual Dots" showing the rendered Mech, there must be a way to get them to a .stl file.
Its not that i didn't try, i just can't find a solution for this problem. But in my opinion, as long as there are "virtual Dots" showing the rendered Mech, there must be a way to get them to a .stl file.
#1638
-
-
- Bridesmaid

- 2,953 posts
Member
- LocationAdelaide, Australia
Posted 27 November 2015 - 10:21 PM
Peter Overheater, on 27 November 2015 - 05:08 PM, said:
Hello Ken, yes, i've tried that in different combinations (subdivide &smooth), but the old edges still remain. I did also try to mark only the faces inside the area of the windshield and the upper round torso, but i can't get it right. Took me hours of trying. I even looked for a python script which is similar to the operations which are done by the smoothing functions you get for the rendered Object.
Its not that i didn't try, i just can't find a solution for this problem. But in my opinion, as long as there are "virtual Dots" showing the rendered Mech, there must be a way to get them to a .stl file.
Its not that i didn't try, i just can't find a solution for this problem. But in my opinion, as long as there are "virtual Dots" showing the rendered Mech, there must be a way to get them to a .stl file.
It's not quite that simple. The smoothing process used by the renderer doesn't actually make the polygons more curved. Instead, it shades them as if the angle on the line perpendicular to the face of the polygons (properly known as the normal) steadily transitions from the centre of one polygon.

In a similar way, the normal map for the model provides specific angles for each pixel, allowing a complicated surface to appear to be present on what is otherwise a low-poly object. Unfortunately, there's no easy way to convert that data into actual geometry. There are some sculpting programs like Mudbox that will take a guess at the correct displacement, but even they will require that you go over the final product by hand to ensure that the mesh is intact, watertight, and in the right places before you can 3D print. The much easier solution is to just remodel the detail by hand. As much as that can seem daunting to someone new to 3D modelling, there really isn't an automagical button that just fixes everything.
(Original image before I modified it from http://www.benclowar...al_maps10.shtml if you want to learn about baking normals from high-poly to low-poly. But it's not really super relevant.)
#1639
-

-
- Bad Company

- 69 posts
Member
Posted 30 November 2015 - 06:09 PM
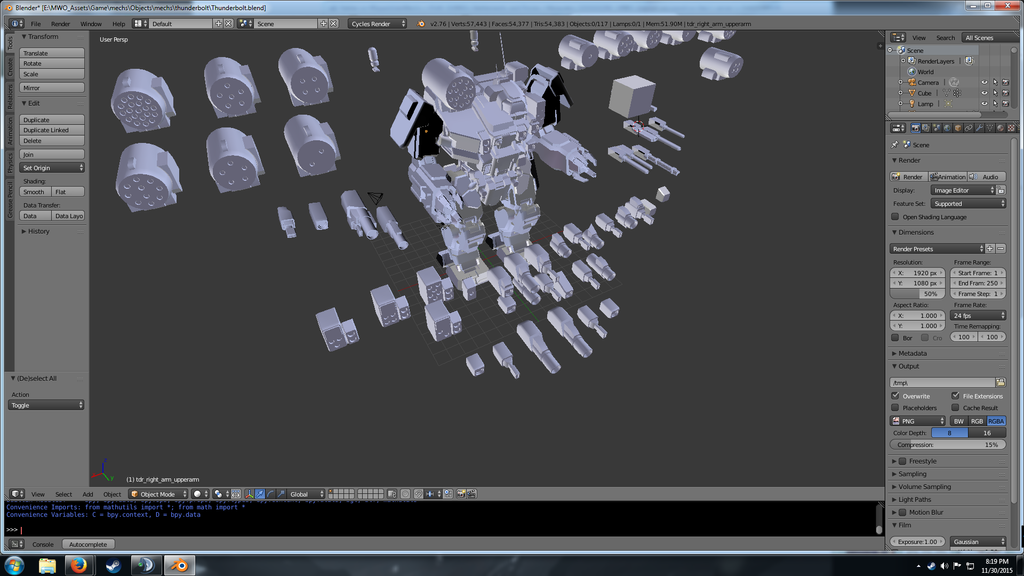
I've started pulling the mechs into Blender to have them 3D printed. Had a friend of mine help get me started on the scripts and with the few from this thread I can pull a mech into Blender in less than 5 minutes. The hard part is using Blender though.
http://img15.deviant...odd-d9ima73.png
with the two of us working together we should be able to get 1 mech prepped for printing every 2 weeks.
We did come into a few strange things though. The cgf-converter will not work with the Enforcer at all and the Black Knight comes out all derp and triangley.
Edited by Rabtar, 30 November 2015 - 06:10 PM.
#1640
-
-
- The Referee
- 6,458 posts
Rum Runner
- LocationPHX
Posted 30 November 2015 - 08:57 PM
Rabtar, on 30 November 2015 - 06:09 PM, said:
We did come into a few strange things though. The cgf-converter will not work with the Enforcer at all and the Black Knight comes out all derp and triangley.
Be sure to delete all the LOD files. I think that is the cause of the derpy triangles, but not positive. People have reported that before, but deleting the .obj files and redoing the export seems to have fixed it.
I'll have to check the enforcer issues though.


1 user(s) are reading this topic
0 members, 1 guests, 0 anonymous users


