

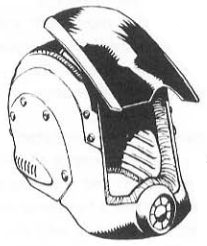
Sadly, no, we don't have this sort of exact information for a 'Mech like the chameleon, which is pretty much "the standard BattleMech cockpit setup."
Anyways, here's the sim-cockpit builder specific information:
PS! You'll see that I HAVE NOT put in information in the controls section about how control of torso twisting is achieved. That's because the exact information on that is not known. Cray has an opinion on how the controls for it should be done; I agree with him, but it's his opinion instead of being actual canon. I leave these torso twisting controls for you guys to figure out!
----------
The Neurohelmet (this is here "just in case" someone wants to "do" a neurohelmet):


Cockpit
BattleMechs are ground vehicles, yet their cockpits are more similar to those of aerospace fighters than other types of units. Inner Sphere cockpits normally include features tailored towards long engagements. Clan cockpits, however, do not usually incorporate these features, and are smaller and narrower than Inner Sphere cockpits, reflecting the clan ethos of efficiency and short, brutal campaigns.
Configuration
Configurability or the lack thereof is a source of much debate. Inner Sphere 'Mech designs tend to go through cycles of either being setup with multi-function displays and programmable switches or being setup with fixed displays and single function switches. Fixed function setups are somewhat more damage tolerant in that one destroyed control won't take out an entire suite of functions. Proponents of fixed control setups also say they allow for quicker operation, because controls never change. Ironically, adjustable control setup proponents also claim reflex advantages. They say this because a MechWarrior can customize his controls and displays to suit his preferences, which supposedly allows for quicker operation. In reality, the difference in speed is not much, if it even exists. This is mostly because MechWarriors have so much to learn just to qualify to pilot a 'Mech that they don't alter their control setups. In fact, standard training 'Mech layouts are very similar between the Clans and the Inner Sphere. Thus, virtually all 'Mech cockpits and default configurations are similar. OmniMechs, though, practically require configurable and customizable controls.
11.4 Displays & Audibles
While 'Mechs have dashboard and Primary HUD displays, Neurohelmets have often used an internal HUD. The average MechWarrior will customize the way the data is presented to him in his cockpit. These preferences can be saved on the battleROM chips that MechWarriors usually carry, in order to transfer settings between 'Mechs. Audible cues and verbal commands are also used to control a BattleMech.
BattleMechs have majoritarily had excellent speech recognition systems which are capable of understanding commands from their MechWarriors, even when they're screaming in combat, wounded, or are otherwise engaged. Most inner sphere MechWarriors use this speech recognition only for 'Mech security. Audio cues are usually handled via speakers mounted in the Neurohelmet that generate either a simple monotone warnings, or 3-D positional alarms to help a MechWarrior quickly locate threats.
12 Controls
The actual controls for a BattleMech are fairly simple, regardless of the complexity of the average BattleMech. This is not because the of the ignorant idea that the MechWarrior links directly with the BattleMech through the Neurohelmet. BattleMech controls are simple because the 'Mech handles the majority of the mundane details of operation. 'Mechs usually have a throttle, foot pedals, and one joystick - some will add a second joystick.
Again, not all BattleMechs will have the exact same setup, but most 'Mechs utilize control setups fairly similar to each other, much like how most Ground car controls (steering wheel, brakes, accelerator, shift control, light and wiper controls, etc.) are similar.
Provided for reference (DIY cockpit builders, this section should be a real help for you), the cockpit control setup of a T-IT-N10M Grand Titan, Produced by EarthWerks Industries, Circa 3054:

On the left
1- Access Hatch Controls - Used to seal the cockpit in order to keep intruders out, or to activate the emergency blast release system that unlocks the hatches.
2- Water supply, in an insulated removable container.
3- Food storage.
4- Medical Kit.
5- IFF (Identify Friend or Foe) transponder bank, where the 'Mech's IFF circuit card is.
6- Left weapons status display, displays information for half of the 'Mechs weapons. Ammunition counts, reload status, and energy using weapons recharge status are shown here. The Target Interlock Circuits (TICs) for half of the 'Mech's weapons are controlled here by a series of toggle switches.
7- Primary Cockpit HUD viewing mode controls. One switch here toggles the 'Mech's sensors between active and passive state. Another switch here toggles the display of IFF readouts on the main HUD, another toggles the searchlight function, and the last switch toggles Infrared (IR) tracking mode.
8- The Throttle. Forwards movement is achieved by moving the throttle forwards. Reverse movement requires pulling the throttle backwards with the reverse mode toggled on. The throttle is locked in place whenever the thumb button on the throttle is not depressed. 'Mechs equipped with Myomer Acceleration Signal Circuitry (MASC) will have a second thumb toggle on the throttle to control this system.
9- Speaker/Microphone Controls. This is where the MechWarrior activates or deactivates the microphones in their Neurohelmet, cockpit, or the 'Mechs external mics. Internal and external speakers are controlled from here as well.

In the center
1- Emergency ejection handlebar. Activates the explosives panel blow-outs on the cockpit and than triggers the rockets in the command chair in order to blast the MechWarrior free of their 'Mech. Some more advanced 'Mechs blast their entire head assembly off instead of just the command chair (for instance, the Hatcheman). Clan cockpits usually locate the emergency ejection handlebars on the top sides of the command couch.
2- The Computer Message Replay - this displays a visual readout from the DI computer of damage to critical systems, such as heat damaged equipment and dangerously weakened armor.
3- Main Control Rocker switches. These have various functions:
- Cross-hair (reticule) window limiting toggle - Overrides normal Targeting and Tracking behavior allows the MechWarrior to track a target with the reticule out to the extreme edges of the HUD, beyond the normal firing pattern of the weapons systems.
- Reverse Movement Mode toggle - Used in conjunction with the throttle to enable backwards movement.
- TIC (Target Interlock Circuit) Reconfiguration toggle - unlocks the current TIC setup which allows the MechWarrior to reconfigure the TICs via the side weapon status display controls.
- Sensor Reconfiguration toggle - Unlocks the current sensor scanning configuration so that it may be reconfigured.
- Heat Lock-Out Override toggle - Stops the 'Mech's computer systems from locking out the 'Mech's ability to fire it's weapons systems when the 'Mech is dangerously overheated.
5- Secondary View Screen - Displays 'Mech status, target status, long-range sensor sweep readout, and short-range sensor sweep readout.
6- Secondary View Screen Controls - Only one of these mode switches can be used at a time. Their functions:
- Short range sensor sweep - This displays a sensor sweep with a 2 Km sweep. Normally used in this mode are heat sensors, movement sensors, and sensors tracking fusion engine radiation signatures. The scanning 'Mech is displayed in the center of the screen, with sensor contacts displayed around the scanning 'Mech in a top-down form of view.
- Long range sensor sweep - Displays a 32 square Km map. This map is usually built from information that the Battle Computer pulls down from satellites (if there are any available). Terrain features, friendly 'Mechs, and enemy 'Mechs are shown on this map. No details about these features and 'Mechs beyond their location are shown if they are outside of the 2Km sensor sweep range (or if a C3/C3i system is in use and a friendly so-equipped 'Mech is within 2 Km of the contact).
- Armor Damage status - Displays armor damage information relayed from the DI computer to the Battle Computer. This information is read out in a visual outline of the 'Mech, with damage indicated by shades from red to black.
- Internal Damage status - Shows a readout of damaged weapons and/or internal equipment. This information is also shown in a visual outline of the 'Mech. A blank screen in this mode indicates no internal damage. Any component outlined in yellow indicates it is damaged. A red outline indicates a destroyed component.
- Enemy armor damage status - The same as for the scanning 'Mech, except information is given from scanned targets.
- Enemy internal damage status - The same as for the scanning 'Mech, except information is given from scanned targets, and the internal heat levels of the targeted 'Mech are also shown.
- Beagle Active Probe sweep - Reads out the information gleaned from the 'Mech's active probe (if the 'Mech is so equipped), showing shut down or concealed 'Mechs and other concealed units on the battlefield, along with more detailed information about targeted units.
8- Heat scale - This shows the level of waste heat built up in the 'Mech on a scale that runs from "safe" (green), to "risk" (yellow), to "danger" (red).
9- Anti-Missile Warning System - A large red warning light that engages when incoming missiles are detected. There is also a readout for the amount of AMS ammunition available and a control switch to activate/deactivate the AMS system.
10- 'Mech Kick Control switches - When these are activated the Foot Pedal controls can be used to control kicking instead of maneuvering. There is one switch for each leg.
11- 'Mech Punch and Grab switches - When activated these convert the firing (main) joystick over to physical combat/movement mode for the 'Mech's arms. The first two switches activate the physical combat mode for an individual arm. The third switch activates physical combat mode for both arms in which both arms carry out the same commands at the same time (usually used for pushing and charging attacks). In 'Mechs with dual sticks, each stick controls an individual arm, allowing for greater control by the MechWarrior.
- Punching - Punching is carried out by activating the switch for the desired arm or arms, aiming with the reticule on the main HUD, and pulling the main trigger. Manipulation of the weapons control stick enables the execution of simple jabbing and more powerful punches - while punch and grab mode is enabled, the control stick can move up and down as well as left and right. BattleMechs with two control sticks can control both arms individually at the same time via the activation of both punch and grab switches.
- Clubbing - Aimed and triggered in the same way a punch is.
- Grabbing - 'Mechs are generally programmed well enough to recognize when they should punch and when they should Grab. Grab commands are aimed and triggered similar to punches. Clubs and other weapons (makeshift or purpose built) are locked into the 'Mech's hand by fully closing/compressing the hand controls that the 'Mech uses (these controls are listed out below).
- Other modes - More dexterous movements:
- Older 'Mechs use either a pair of waldo gloves placed on either side of the command chair or sensors built into the MechWarrior's gloves in order to execute more deft hand movements; the 'Mech simply mimics the MechWarrior's gestures while these systems are activated.
- Newer 'Mechs utilize more capable and complex Actuator programming along with input from touch-sensitive surfaces on the control stick (or sticks) in order to carry out all but the most complex movements. However, for very fine movements, such as those involved in some combat engineering, newer 'Mechs still have to use the same pilot-gesture-movement mimicking setup that the older 'Mechs did (the comments from section 5.2 also apply here).
12- Gyroscope start-up and calibration control - Activates the Gyroscope system and transfers gyroscopic balance control to the Neurohelmet. There is also a manual control for off-loading a limited amount of the balance chores to the Gyroscope system if the Neurohelmet should be damaged in combat.
13- Foot movement Control Pedals - Located on the cockpit floor at the front. These are normally used to control which way the 'Mech turns. They also activate the 'Mech's jumpjets (if it is so equipped), and control the 'Mech's legs while kick-mode is activated. To turn the 'Mech to the left, you press down on the left pedal; to turn to the right, press down on the right pedal.
More Complex movements can be done with the foot controls - they can be unlocked and move on other axies besides just up and down - for instance, to get the 'Mech to side step.
In order to activate the 'Mech's jumpjets, you quickly press down fully on both pedals; doing so again will deactivate the jump jets. Directional control while jumping is usually achieved with the foot pedals. More complex air-borne maneuvers involve the use of the joystick - for instance, the reticule on the HUD can be used pick a landing point. The jump jets achieve this directional control by feathering or by the use of control surfaces.
14 - DI computer access and Main DI control panel - The controls allows the MechWarrior to activate or deactivate the DI computer. This panel is normally only opened by Techs when they have to access the DI system.
15 - Security control circuit box - Placed down near the foot pedals, this holds the ROM circuitry, on which the 'Mech's security access codes are stored.

On the right
1- Right weapons status display, displays information for half of the 'Mechs weapons. Ammunition counts, reload status, and energy using weapons recharge status are shown here. The Target Interlock Circuits (TICs) for half of the 'Mech's weapons are controlled here by a series of toggle switches.
2 - The Main Control Stick. This is the primary control for targeting the 'Mech's weapons systems. It also controls the 'Mech's arms. It has firing triggers for each of the target interlock circuits (TIC) - up to as many as six triggers.
Weapons aiming is achieved by the MechWarrior using this stick to manipulate the reticule on the primary view screen HUD. This does not happen in a "click the desired target and the 'Mech than tracks it (with the reticule or otherwise) for you" way - the MechWarrior must use the reticule to track their desired target until they pull the trigger(s) for weapons fire. BattleMechs are explicitly programmed to NOT choose any target, or track any target. BattleMechs only "track" the reticule. This means that the reticule does not indicate to the MechWarrior where the 'Mech's individual weapons are currently aimed - rather, the reticule indicates to the 'Mech what it should be trying to aim it's weapons at.
The finger rests on this control stick are touch/pressure sensitive and are used to help control the 'Mech's hands when the physical mode toggles are activated. When in physical mode the joystick unlocks and can move up and down as well as side to side.
3- Emergency ammo dumping control - used on conjunction with the left and right weapons status displays to eject unused ammo.
4- Communications Panel - Used to interact with and control the various communications and other networks which the 'Mech is capable of interacting with. These networks can be conventional RF (radio frequency), satellite, microwave, laser link, or land line hookups; along with the various secure communications modes these networks use. In addition to the controls located on this panel some Neurohelmets include sensors that facilitate channel switching by sensing when a MechWarrior clenches or unclenches their jaw, or when they open their mouth fully. This panel also controls ECM, Tag, C3/C3i, standard jamming modes, communications interception and decryption, and Artemis IV/V fire control systems.
5- Life support controls - These control the cockpit environmental systems and give a readout of the cockpit temperature and life support systems status.
6- Battle Computer - The access panel for the battle computer.
7- Fire Extinguisher.
8- Coolant lines hookup and control - This is where the MechWarrior's coolant vest is attached to the Mech's life support systems. It also has controls for coolant flow rate.
9- The emergency cockpit blast away system - This fires the explosive bolts on the cockpit view ports so that they fall away - but it does not activate the MechWarrior ejection system.
10- Cockpit Light controls.
11- Ignition switch - This large red bar which is used to bring the fusion reactor up to minimal operational levels, which powers the gyro and cockpit systems for BattleMech start up. It locks into place upon start up.

The rear cockpit wall
1- The Neurohelmet cable hookup, known by the acronym NCCI. This hookup is designed such that the cables will break away cleanly if they do not automatically disconnect in the event of emergency pilot ejection.
2- The air supply and recirculation system which contains about ten hours of air in tanks and a recirculator which filters and brings in external air when in atmosphere.
3- Personal Gear locker.
4- Tool Rack & Net - A 'Mech field repair kit is usually stored here.
5- The potty.

The command Chair
These are designed to move in order to compensate for shocks and they have a full seat belt harness to hold the MechWarrior in place. Built into the seat is an emergency rocket ejection system, a parachute or rockets for landing, a homing beacon under the seat cushion, and a small storage locker which usually contains flares, a jumpsuit, and some other emergency supplies. There is also a pistol holster (most clan 'Mechs don't have this feature). The seat cushions double as personal flotation devices.
Bibliography:

TechManual, pgs 31-43
Classic BattleTech Companion, pgs 233-246
----------
You're not just making all of this information up, are you?
No, I'm not. The vast majority of the information in these posts comes from the BattleTech Rules Book "TechManual," and some other things in it are from an older BattleTech Source book called "Classic BattleTech Companion," along with a few select pieces from answers I got on the official Battletech Forums. Again, none of this stuff is my original work - both of the tech write ups that formed the majority basis for this post were written up in those books by a fellow that Goes by the handle "Cray" over at the Classic BattleTech forums - and he has answered some really STUPID questions from me.
 We have him to thank for this stuff and the BattleTech publishers to thank for giving it to us.
All I've done is re-write the knowledge in those articles into this post for the MechWarrior video game community. If you really enjoy this kind of stuff, make sure to say thank you to Cray and the BT publishers.
If you get a chance, stop by http://bg.battletech.com/forums/ and drop "Cray" a thank you; he did all the creative work and original writing.
While you're at it, consider getting the TechManual and Classic Battletech Companion source books; they have a lot of interesting stuff in them (Cray's tech writeup in TM is WAY more engaging than this post). Without Catalyst (and before them, Fanpro, and Wizkids, and first of all, Fasa) we wouldn't have any of this stuff or the MW video game series in the first place. The current Core Rules books are full of neat stuff and are as close to collectively being an encyclopedia of the tech in the lore as has ever been released.
----------
So, just what kind of information does this post represent, anyways?
It represents the current (as of the time of the latest revision of this post, to the best of my meager abilities) state of BattleMech technology and operations in the BattleTech Universe Lore, from the newest source books. It does NOT represent "how BattleMechs would work in Real Life, etc, etc, etc.
----------
Hey, I found an error in this post!
As long as you're sure it's an error, make a post about it in the thread. I'll look into correcting it when I get a chance. I do have to point out though, that the newer source books (in this case, TechManual) supersedes the older source books, so where the two contradict, the newer one is "canon." This is not my rule ... it's the rule of the people who's job it is to maintain the BattleTech universe.
Also, the art doesn't represent any sort of rules either - again, the BT publishers rules, not mine. The art is for "Cool factor," not for representation of the rules or how the BT setting works in visual form. Just because someone did some art of an Atlas putting it's fist through a Masakari doesn't mean that it's possible or should happen that way.
If you're really interested in what is and is not authoritative for the fictional BT setting, here's your link: "A zillion questions about canonicitiy" ... and for these sorts of questions about BattleMechs in particular, this link: "Mech Behavior/Performance ETC, what source is definitive?"
Pinned please?
Edited by Pht, 15 September 2013 - 11:11 AM.


