
What printer are you using and at what layer size are those printed at if you do not mind me asking?

33 replies to this topic
#22
-

-

- 535 posts
Member
Posted 23 May 2013 - 01:09 AM
Love them, really nice work, you planning on painting them?
#23
-
-

- 228 posts
Member
- LocationCanada
Posted 23 May 2013 - 10:35 AM
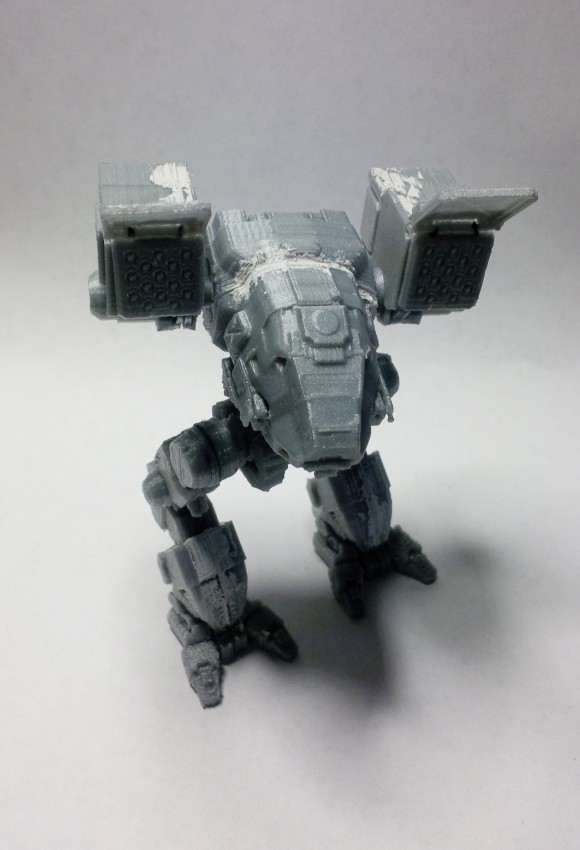
Nice joints! but I don't think my printer can print that kind of detail in a peg and socket at the size it's currently at. So it's good old fashioned friction pegs for now. They work well enough functionally. No satisfying clicky sounds, but theoretically unlimited positions. 
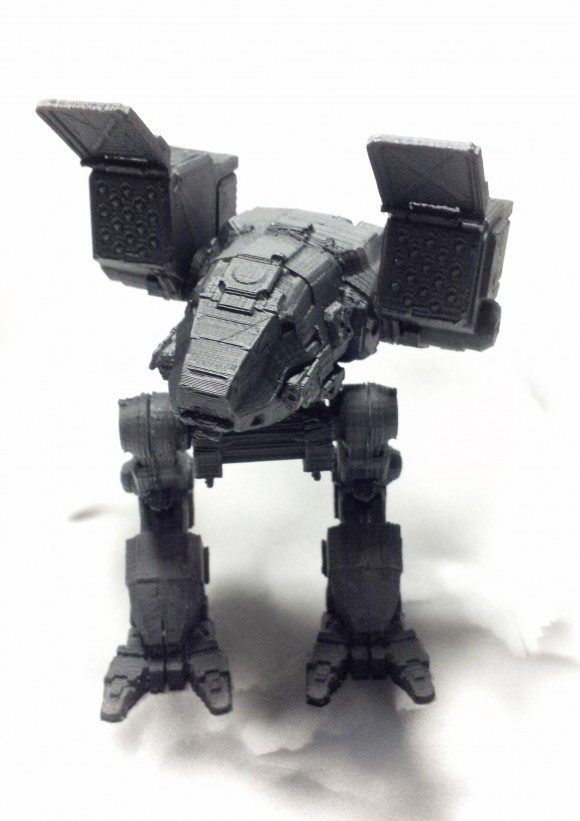
Using the Ultimaker at .15mm layer height. Still working out the kinks and figuring out the qurks, but it works decently good so far. The finish is nicer if you print one or two pieces with similar height at a time. I tried printing all the pieces in one go and there's a very minor variance in the surface finish.
And no, not planning on painting them. I don't quite trust myself to paint them, nor do I even have paints.. and I kinda like the silver PLA look. Maybe if I feel brave in the future, or I find someone that would wanna paint it.
#24
-

-

- 657 posts
Member
- LocationChesapeake, VA

Posted 30 July 2013 - 12:54 PM
This is much better than my progress so far.
I successfully exported the CPLT-C1 file to STL format, which the printer at school could read, but then it didn't come out right.
My Catapult printed out with most of the torso missing.
If one were making a diorama, my first printout would be good for spare parts.
So, it looks like the mechs can't go from electronic file to physical model without manipulation.
Oh, well... It was worth a try.
Valcrow, I can only guess at how many zillions of hours you put into your Catapult model. I have great respect for you. It remains to be seen whether I can put in that kind of time, or will keep being distracted by the game itself.
Edited by Liquid Leopard, 30 July 2013 - 12:58 PM.
#25
-
-
- 228 posts
Member
- LocationCanada
Posted 30 July 2013 - 03:04 PM
 Liquid Leopard, on 30 July 2013 - 12:54 PM, said:
This is much better than my progress so far.
I successfully exported the CPLT-C1 file to STL format, which the printer at school could read, but then it didn't come out right.
My Catapult printed out with most of the torso missing.
If one were making a diorama, my first printout would be good for spare parts.
So, it looks like the mechs can't go from electronic file to physical model without manipulation.
Oh, well... It was worth a try.
Valcrow, I can only guess at how many zillions of hours you put into your Catapult model. I have great respect for you. It remains to be seen whether I can put in that kind of time, or will keep being distracted by the game itself.
I successfully exported the CPLT-C1 file to STL format, which the printer at school could read, but then it didn't come out right.
My Catapult printed out with most of the torso missing.
If one were making a diorama, my first printout would be good for spare parts.
So, it looks like the mechs can't go from electronic file to physical model without manipulation.
Oh, well... It was worth a try.
Valcrow, I can only guess at how many zillions of hours you put into your Catapult model. I have great respect for you. It remains to be seen whether I can put in that kind of time, or will keep being distracted by the game itself.
Whoa this seemed like so long ago. Thanks, it took me a few days to figure out what was going on, and what the printer likes to ingest. The rest was just monotonous clean up. Keep at it if you have access to a good printer in your school. You'll learn a lot. This catapult was one of the first things i printed on my printer. It was mostly for me to learn the quirks so i could try more complex stuff like this atlas. http://mwomercs.com/...cture-overload/ Also check out sentinels minis.
But you are right, these models aren't made to go to print as they have a ton of holes and intersections. Pick up some modelling and you'll be able to do it too. Not only mechs but you can make virtually anything you can imagine. Take advantage of the printer access and free time while you have it.
#26
-
-
- 228 posts
Member
- LocationCanada
Posted 13 January 2014 - 10:00 PM
Wow, seems so long ago since I made this thing. Thread resurrection!
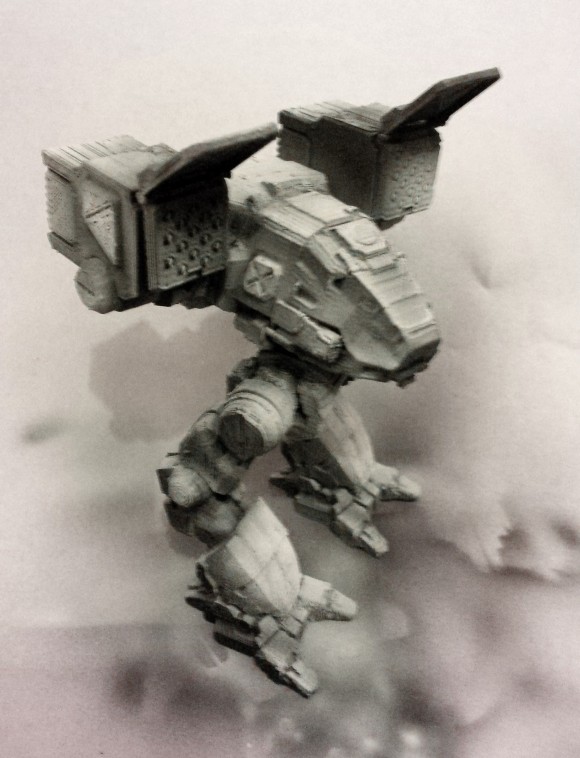
I got my airbrush this weekend. Have no idea how to use it so I thought hey... I got one of these guys lying around sitting so proudly untextured on my desk. Why not use it as target practice for my new toy. I gave the better printed ones to friends and family, now I only have this poor sap which has some shoddy printing issues, not quite good enough to give away. But good enough to attempt to paint and screw up if need be.
Puttied up some of the big seams. Ok, really I just wanted to test how well airbrush can cover up putty. There are still large seams all over the place.
Primed in Black. So far so good. Airbrush handling was a bit tricky but spraying a flat colour isn't too difficult...
After watching some airbrush stuff online.. apparently pre-shading needs to happen. So preshade it is. It looks all weird because I sprayed the highlights on. and it's not the same as the light source which makes this image look like a charcoal drawing because your brain is telling you that the mech is white and the lighting is producing the shadows which it is not.
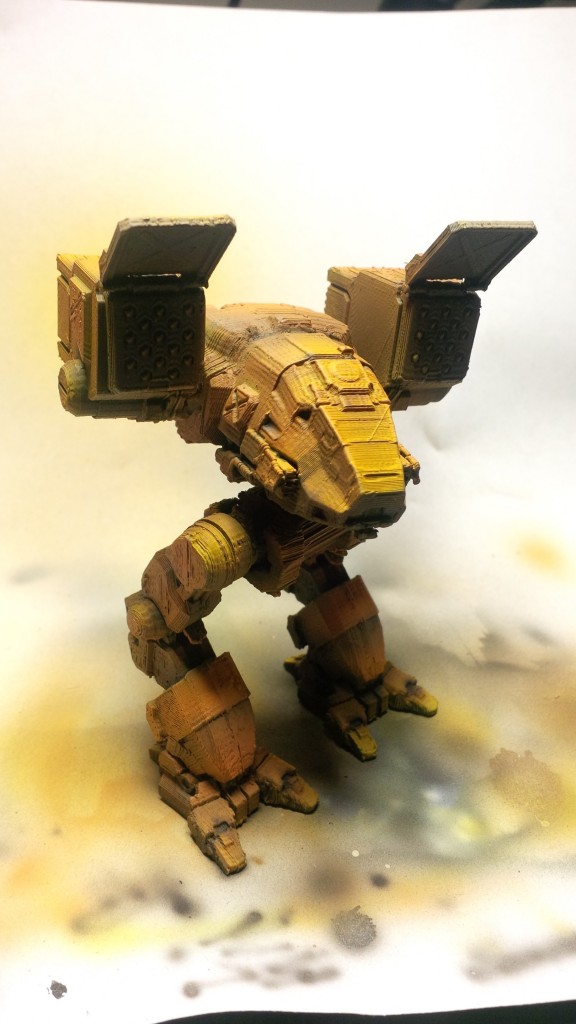
Sprayed with some colour now! Unfortunately it covered up a lot more of the pre-shading than the tutorials had led me to believe. So I went back in to put some shadows and highlights back.
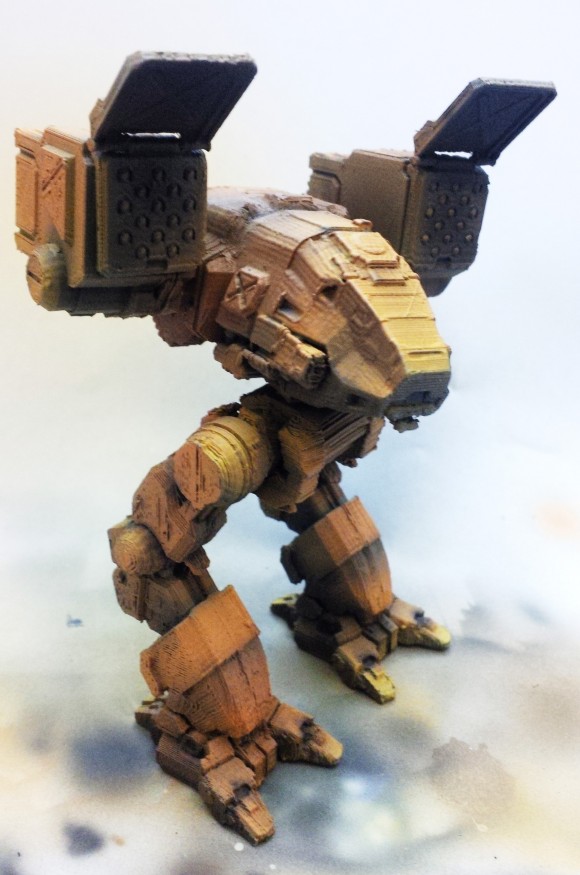
Switched to the fine tip for some more detaily work. Takes a while to get use to the spraying nuances... but wayyyyy faster than paint brushes and oh so nice gradients. (so long as you don't get splatters everywhere... which happened)
Gone as far as I could go.. Finish the rest with a brush.
Went for the iconic Catapult yellow scheme.
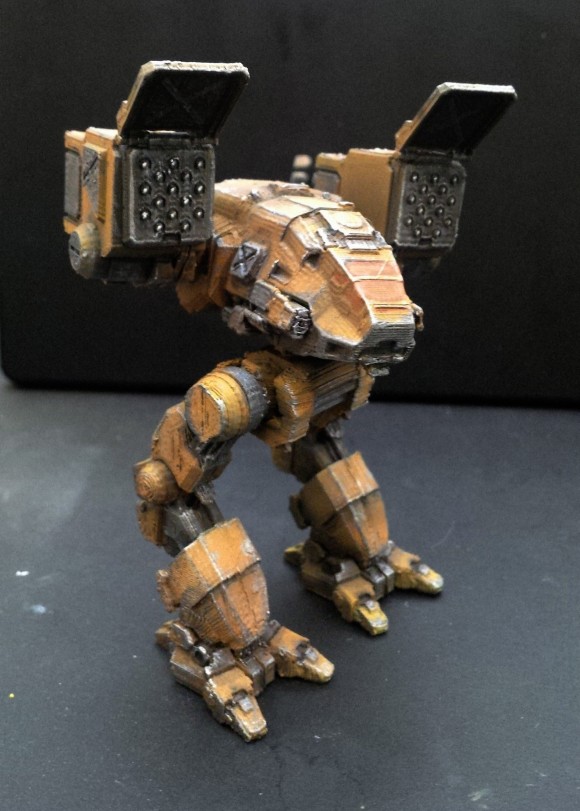

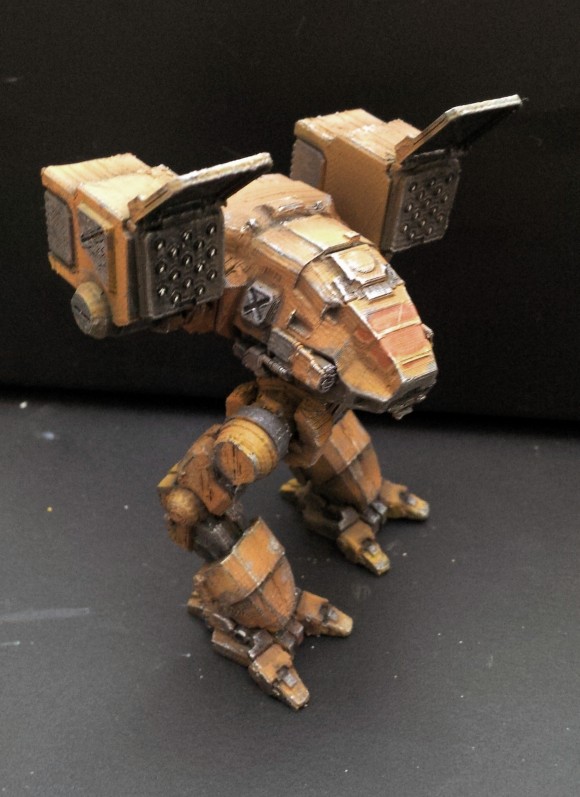
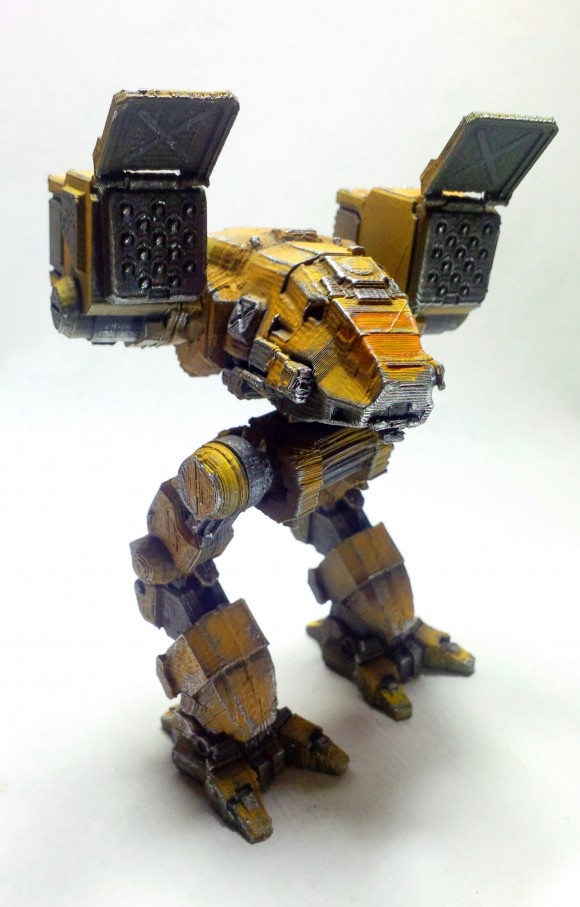
I think it turned out better than expected... In hindsight, I probably should have cleaned it up a bit more or printed a proper one and it'll have less printing artifacts... but oh well. still cool, and learned how to use my airbrush!
I got my airbrush this weekend. Have no idea how to use it so I thought hey... I got one of these guys lying around sitting so proudly untextured on my desk. Why not use it as target practice for my new toy. I gave the better printed ones to friends and family, now I only have this poor sap which has some shoddy printing issues, not quite good enough to give away. But good enough to attempt to paint and screw up if need be.
Puttied up some of the big seams. Ok, really I just wanted to test how well airbrush can cover up putty. There are still large seams all over the place.
Primed in Black. So far so good. Airbrush handling was a bit tricky but spraying a flat colour isn't too difficult...
After watching some airbrush stuff online.. apparently pre-shading needs to happen. So preshade it is. It looks all weird because I sprayed the highlights on. and it's not the same as the light source which makes this image look like a charcoal drawing because your brain is telling you that the mech is white and the lighting is producing the shadows which it is not.
Sprayed with some colour now! Unfortunately it covered up a lot more of the pre-shading than the tutorials had led me to believe. So I went back in to put some shadows and highlights back.
Switched to the fine tip for some more detaily work. Takes a while to get use to the spraying nuances... but wayyyyy faster than paint brushes and oh so nice gradients. (so long as you don't get splatters everywhere... which happened)
Gone as far as I could go.. Finish the rest with a brush.
Went for the iconic Catapult yellow scheme.
I think it turned out better than expected... In hindsight, I probably should have cleaned it up a bit more or printed a proper one and it'll have less printing artifacts... but oh well. still cool, and learned how to use my airbrush!

#28
-
-
- The Determined

- 2,081 posts
Member
- LocationOmni-mech cockpit.
Posted 14 January 2014 - 08:58 AM
Sweet Can you do it with all the mechs? Gotta get one of those printers.

#30
-
-
- 228 posts
Member
- LocationCanada
Posted 14 January 2014 - 01:03 PM
Thanks! All the wear and stuff still has to be done by a brush unfortunately, which takes a while... at least the shading is fast though.
I have the Atlas and the Sarah's Jenner, which are by far superior prints to this one since this was the first, and a lot smaller.. Doubt I'll make all of them though, there's like way too many now, not even sure when or if I'd start a next one.
SaltBeef, on 14 January 2014 - 08:58 AM, said:
Sweet Can you do it with all the mechs? Gotta get one of those printers.
I have the Atlas and the Sarah's Jenner, which are by far superior prints to this one since this was the first, and a lot smaller.. Doubt I'll make all of them though, there's like way too many now, not even sure when or if I'd start a next one.

#32
-
-
- 657 posts
Member
- LocationChesapeake, VA
Posted 11 March 2014 - 02:57 PM
Resurrecting this again! (I keep hoping for some insight into how to make this work)
Since my first try, I figured out the problem with sending the .stl file straight to the printer:
The torso is modeled as being hollow, and the wall thickness was too thin for the printer, so it printed support material and not model material.
AutoDesk Inventor showed the model of the mech, and made it look like it was OK.
While my school had access to Rapidform XOR, that program revealed that the torso was hollow with a very thin wall.
Unfortunately, I couldn't figure out how to alter the mech model in either program.
When I converted a PPC "arm" to an .ipt and opened it in Inventor, it wasn't "solid". It appears to have no "history", so no editable features. I has a sad.
#33
-
-
- 228 posts
Member
- LocationCanada
Posted 11 March 2014 - 11:31 PM
It sounds like you're in CAD 3D world, I think you would be better off in artist 3D world dealing with game models. So, the programs like blender, 3ds max would most likely give you better luck in interpolating the game models to something editable and usable.
The models are polygons, with gaps, missing faces, interpenetrating geometry. Things that CAD doesn't generally like. The reason it's coming in as hollow, thin walled, is probably because the object isn't closed. (or water tight) If you close all the objects you'll find much more success when your model goes into your 3D printing slicer.
The geometry would not come with 'history' since they're just a collection of faces. So the only editing you'd be able to do is on the poly level.
I know, jumping from Cad software to Artist software isn't really what most people like to hear though. Meshmixer (I think) might be able to automatically clean it up a bit.. haven't tried it myself though.
#34
-
-
- Little Helper

- 103 posts
Member
- LocationI quit!!!
Posted 18 April 2014 - 01:06 AM
WOW! I would love to see the K2 in a winter grey, black and off white paint scheme. Then I want the model.


1 user(s) are reading this topic
0 members, 1 guests, 0 anonymous users


