


3D Printing Fun
Started by Reven, Mar 28 2015 06:49 AM
87 replies to this topic
#61
-
-

- The People's Hero

- 33 posts
Member
Posted 09 April 2015 - 11:11 PM
Battlemaster full print completed. Now working on an Urbie....
#62
-

-
- 304 posts
Member
- LocationCentral Texas
Posted 10 April 2015 - 03:28 AM
I would be VERY interested a poseable version of the Catapult with the arms that can be changed out.
I have done some modes to my Cat that are not in the game but would like a 3d print of.
One Arm with the Rackable Missiles

Another with twin AC-20s which I never posted.
I have the models of them and would be able to pass them over.
Please send a private message.
thank you.
I have done some modes to my Cat that are not in the game but would like a 3d print of.
One Arm with the Rackable Missiles
Another with twin AC-20s which I never posted.
I have the models of them and would be able to pass them over.
Please send a private message.
thank you.
Edited by baabaa214, 10 April 2015 - 03:28 AM.
#63
-
-
- 8,163 posts
Member
Posted 10 April 2015 - 03:40 AM
 LifelesssGraphitePlanet, on 06 April 2015 - 09:30 PM, said:
Wow... can I purchase one of these off you!
Those look amazing!!!!!
Those look amazing!!!!!
LastKhan, on 06 April 2015 - 10:38 PM, said:
oh man these are awesome. Is there anyway i can "Donate" to get one of these? 
He can't sell them. Not even for a "donation". He either gifts them to everyone or he keeps them to himself. As soon as he starts making money of from it, he opens himself up for a copyright lawsuit and risks his MWO account.
That said: The work looks very good! I definatly know some guys who'd want one or two of those models.

#64
-

-
- Warrior - Point 5
- 1,132 posts
Member

Posted 10 April 2015 - 04:18 AM
...3D printing and copyright... Let the New Holy World War begins!...
P.S. Amazing job. IMHO there at last 100-200 of us who want to have same KCG ;P And a lot of same-scale other mechs models.
P.S. Amazing job. IMHO there at last 100-200 of us who want to have same KCG ;P And a lot of same-scale other mechs models.
#66
-
-
- Bad Company

- 2,611 posts
Member
- LocationBay Area, California

Posted 10 April 2015 - 11:51 AM
I would kill for... I mean pay  for someone to produce a 12" Centurion with interchanging parts for the Right Arm
No painting... I'd keep that pleasure for myself... now just to find a friend with a 3D Printer and ability to take the model from the game and put it to work
btw... EXCELLENT work on the models to those who've posted... astounding!
for someone to produce a 12" Centurion with interchanging parts for the Right Arm No painting... I'd keep that pleasure for myself... now just to find a friend with a 3D Printer and ability to take the model from the game and put it to work
btw... EXCELLENT work on the models to those who've posted... astounding!
Edited by Grendel408, 10 April 2015 - 11:52 AM.
#67
-
-
- Bad Company
- 917 posts
Member
Posted 10 April 2015 - 11:52 AM
A little while ago I tried my hand at 3D printing an atlas in cbt scale. Here is what I ended up with.
My apologies for the foot, it was a misprint, I forgot to clean it up, so I played it off as battle damage.
It is painted in house Kurita's second benjamin regulars. My excuse for the dragon on the right torso is that this particular subdivision the commander allows the mechwarrior to paint whatever they'd like on the right torso to build morale (sort of like in WWII and WWI.)
This particular mechwarrior chose to paint a dragon to inspire fear into the enemy's eyes.
Enjoy! and any tips on painting, or 3D printing in general welcome!

My apologies for the foot, it was a misprint, I forgot to clean it up, so I played it off as battle damage.
It is painted in house Kurita's second benjamin regulars. My excuse for the dragon on the right torso is that this particular subdivision the commander allows the mechwarrior to paint whatever they'd like on the right torso to build morale (sort of like in WWII and WWI.)
This particular mechwarrior chose to paint a dragon to inspire fear into the enemy's eyes.
Enjoy!
and any tips on painting, or 3D printing in general welcome! 
#68
-
-
- Overlord
- 1,566 posts
Member
- LocationCanada
Posted 10 April 2015 - 10:43 PM
Greetings all,
Reference the picture of the Atlas, and for others taking images and posting there handy work.
- I'd suggest a contrasting background for gathering the best portrayal of the 'Mech.
(in some cases, laying a dark cloth background down allows for some interesting possibilities.)
- Try not to shine a light directly on the model, use a 'bounce light' method.
(point the light away from the model and 'bounce' if off a sheet of cardboard or material to reduce or eliminate harsh lines.)
~ the cardboards colour can be used to 'offset' or enhance what's seen by the camera.
- If they are available, have multiple light sources and angles to eliminate any shadows.
(Or, use angle and direction to effectively 'create' the shadows for a model, to emphasize specific locations.)
- Try to get a perspective from center chest or lower to emphasize the 'size effect' of the models, this may now require some changes in what the background could be. (careful with using a possible 'copy write image' for that)
- Depth of field use for the cameras can truly produce some unique images, focus and blurred points sending the eye to where the image needs it.
I'll mention a site for 'add-on' micro decals that has some unique designs, made specifically for BattleTech type scales and use.
- Everything from warning/hazard signs and stripes to numbers and symbols. Those tiny details that just can't be painted on effectively. ( http://www.fightingp...cs.com/misc.htm ) I am not affiliated with any of the links, just some great ideas for additions.
Now I'm not advocating everyone 'go pro' when just grabbing images to post here, but small changes or effects can really 'pop' a picture. Great work by everyone that's working with 3D. It's really changing what we only dreamed of before to 'physical' material.
9erRed
Edited by 9erRed, 10 April 2015 - 10:51 PM.
#69
-

-
- 29 posts
Member
- LocationPlymouth, England
Posted 12 April 2015 - 02:25 PM
Loving the 3D print work, I used to do a lot of CAD work using unigraphics for work and can appreciate the hours put in. I would never have the patience to do some of modelling you guys are doing.
#70
-

-
- Bridesmaid
- 133 posts
Member
Posted 14 April 2015 - 05:57 AM
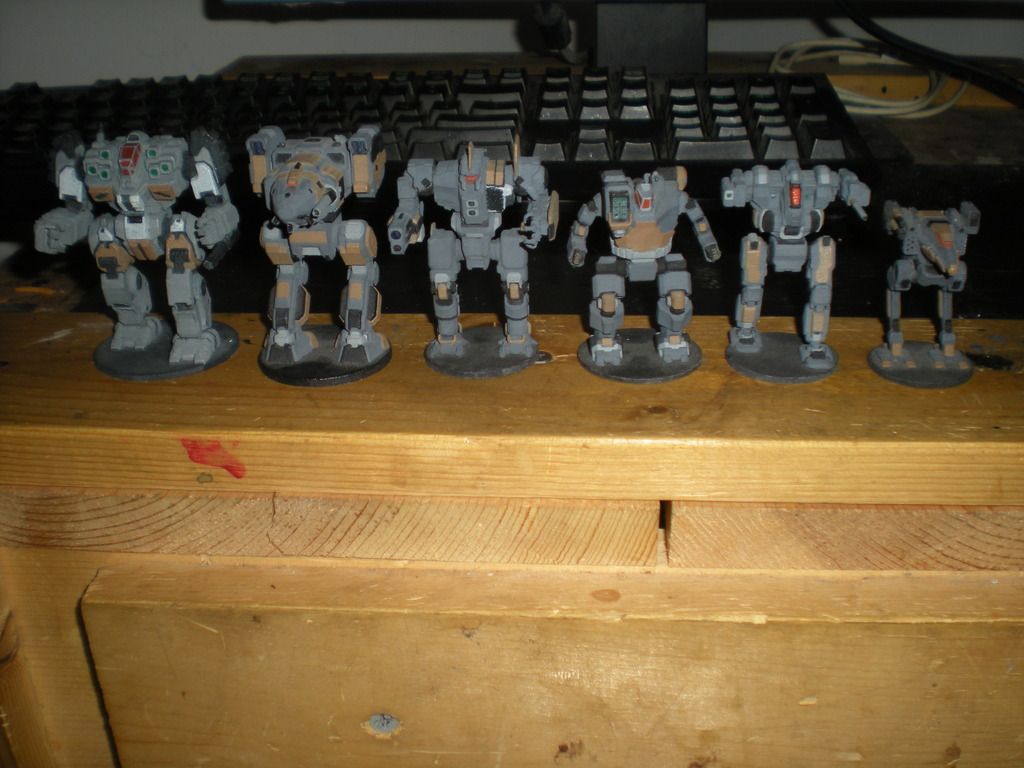
Well, my painting sucks , but this has inspired me to do some more work on the models.
I have two Urban mechs , a Puma, a Zeus , a Victor , A few Centurain Variants , a few Catapult Varitans and these guys worked on and printable. The Urban mechs and Puma are currently being shipped to me by Shapeways.
You area really making it hard for me not to try to put joints on these figures, but , not too sure Shapeways will let me giving that I am using the cheapest matieral to print them out of and the size of the items in question. The walls on the joints for them would simply be too thin and a larger model would cost far, far too much to afford when I really should not be having these be printed anyway.
They all look and feel like sand stone, not too sure if I hate or like that.
I have two Urban mechs , a Puma, a Zeus , a Victor , A few Centurain Variants , a few Catapult Varitans and these guys worked on and printable. The Urban mechs and Puma are currently being shipped to me by Shapeways.
Spoiler
You area really making it hard for me not to try to put joints on these figures, but , not too sure Shapeways will let me giving that I am using the cheapest matieral to print them out of and the size of the items in question. The walls on the joints for them would simply be too thin and a larger model would cost far, far too much to afford when I really should not be having these be printed anyway.
They all look and feel like sand stone, not too sure if I hate or like that.
Edited by Number767, 14 April 2015 - 06:00 AM.
#71
-
-
- Bad Company
- 917 posts
Member
Posted 14 April 2015 - 07:31 AM
Nice work! I like that paint scheme alot, really clean.
I think a dark black wash would help bring out the details of the models nicely if you're up to it.
I think a dark black wash would help bring out the details of the models nicely if you're up to it.
#73
-
-
- Philanthropist

- 12 posts
Member
Posted 02 May 2015 - 09:43 AM
wow, this is great, is there a little chance that you can send me ready to print files?
It would be great to have a big Centurion.. my first Mech, i bacome from my dad in the age of 6
It would be great to have a big Centurion.. my first Mech, i bacome from my dad in the age of 6
#74
Posted 19 June 2015 - 09:43 AM
LOVE TO BUY THESE HOW MUCH AND WHERE PM ANYONE PLZ OK listen i want to make statement to a few bullies when we play battle tech table top ,they respect me but when it come to other will no so much and they are old school they don't play video games like MWO or any videos games as well ,no face book ( you get the idea) but use Ebay to get any of the best battlemechs and very costly(they got money to spend ) ,so i come to for help i was hoping if can make MWO table tops games can you make the king crab from MWO and the other one in the left ,these old men cross the the line on bullying little young kids i intervene .My parent told respect other and kindness but up hold the law for those that cant. So i am here looking for your help thank you for your time the MWO atlas am i correct ?do you assemble too please ?they no taller then 3 inches tall which is tournaments rules ? last if possible send picture before sending product? plz help.i want to be ready and bring help and style to game ,can you help plz
#75
-
-
- Bad Company
- 917 posts
Member
Posted 22 June 2015 - 04:10 PM
zino117, on 19 June 2015 - 09:43 AM, said:
LOVE TO BUY THESE HOW MUCH AND WHERE PM ANYONE PLZ OK listen i want to make statement to a few bullies when we play battle tech table top ,they respect me but when it come to other will no so much and they are old school they don't play video games like MWO or any videos games as well ,no face book ( you get the idea) but use Ebay to get any of the best battlemechs and very costly(they got money to spend ) ,so i come to for help i was hoping if can make MWO table tops games can you make the king crab from MWO and the other one in the left ,these old men cross the the line on bullying little young kids i intervene .My parent told respect other and kindness but up hold the law for those that cant. So i am here looking for your help thank you for your time the MWO atlas am i correct ?do you assemble too please ?they no taller then 3 inches tall which is tournaments rules ? last if possible send picture before sending product? plz help.i want to be ready and bring help and style to game ,can you help plz
#76
-
-
- The Bushido

- 482 posts
Member
Posted 22 June 2015 - 04:35 PM
I would like to see some of these next to classic battletech miniatures
#77
-
- The Hungry

- 2 posts
Rookie
Posted 03 January 2016 - 08:19 AM
holy hell Reven that stuff is beautiful any chance you will look in to working on the files for the hula girl ?
the very thought of putting one of those in my car makes me think of getting a 3D printer
the very thought of putting one of those in my car makes me think of getting a 3D printer
#78
-
-
- Stone Cold

- 353 posts
Member
Posted 07 January 2016 - 03:58 PM
Reven, on 09 April 2015 - 11:11 PM, said:
Battlemaster full print completed. Now working on an Urbie....
Reven,
I have a new Stacker 3D printer, and am just itching to try it out on a mech, if i could get your Battle Master stl file, i would print that in a heart beat........
pm me plz
#79
-


- 2 posts
Rookie
Posted 11 February 2016 - 07:28 AM
Can I pay you to do this for me and send one to me?
#80
-
- Shredder

- 6 posts
Rookie
Posted 08 March 2016 - 12:28 PM
Reven, on 28 March 2015 - 04:26 PM, said:
1) See the 3rd image in the original post. Those are tabletop size mechs on hexes sized for the standard maps. Note the quality...they are hard to print at that size using the printers that I have..
2) I use a Makerbot replicator 2x with ABS material and a Printrbot Simple using PLA material
I printed the first stuff with the Printrbot and now print small stuff with that one (it was a $300 purchase well worth it) However it is not a "plug and play" printer and needs tender love to keep it printing well (which it definitely can)
The Makerbot is a $2,000 range printer (I got a salvaged one free that I repaired with parts printed by my first). It has a bigger print space and can print larger pieces faster and is much more "plug and play" with less tweaking required.
Both can print at a resolution of 0.1 mm in the Z axis with an accuracy of around 0.01 mm in the X, Y, Z axis
You can visually see the layers at that size, but just barely and there are many ways you can finish the part to minimize those ridges.
For the table top size, did you print those all as one piece or did you print those in pieces? Thanks for the share, they look great.


1 user(s) are reading this topic
0 members, 1 guests, 0 anonymous users


