Jump to content

How To: Create Your Own Art Using Pgi's Mechs

Art Misc

2251 replies to this topic

#1 Heffay

    Rum Runner

  • PipPipPipPipPipPipPipPipPipPip
  • The Referee
  • The Referee
  • 6,458 posts
  • LocationPHX

Posted 19 December 2012 - 09:07 AM

Update 3/21/15: Adding link to the material node group, courtesy of Andreas80. Added tutorial 3.
Update 8/16/15: Changed to no longer use Noesis, and good ol' Mech Importer updated!
Update 11/24/17: New tutorial videos!
Update 12/31/17: Another new tutorial video! Cryengine Importer, with FULLY RIGGED MECHS!

Material file for Mechs:
https://dl.dropboxus...o_camo_v3.blend

TheSkiDog's mech shader (large):
https://1drv.ms/u/s!...avpHK-mHFjI8ybI

Training video (1/2): Converting Cryengine Files:


Training video (2/2): Bulk Converting Assets, setting up a depot:


Bonus Training video (3/2): Printing Mechs via Shapeways (Courtesy of Jacob Soloman)


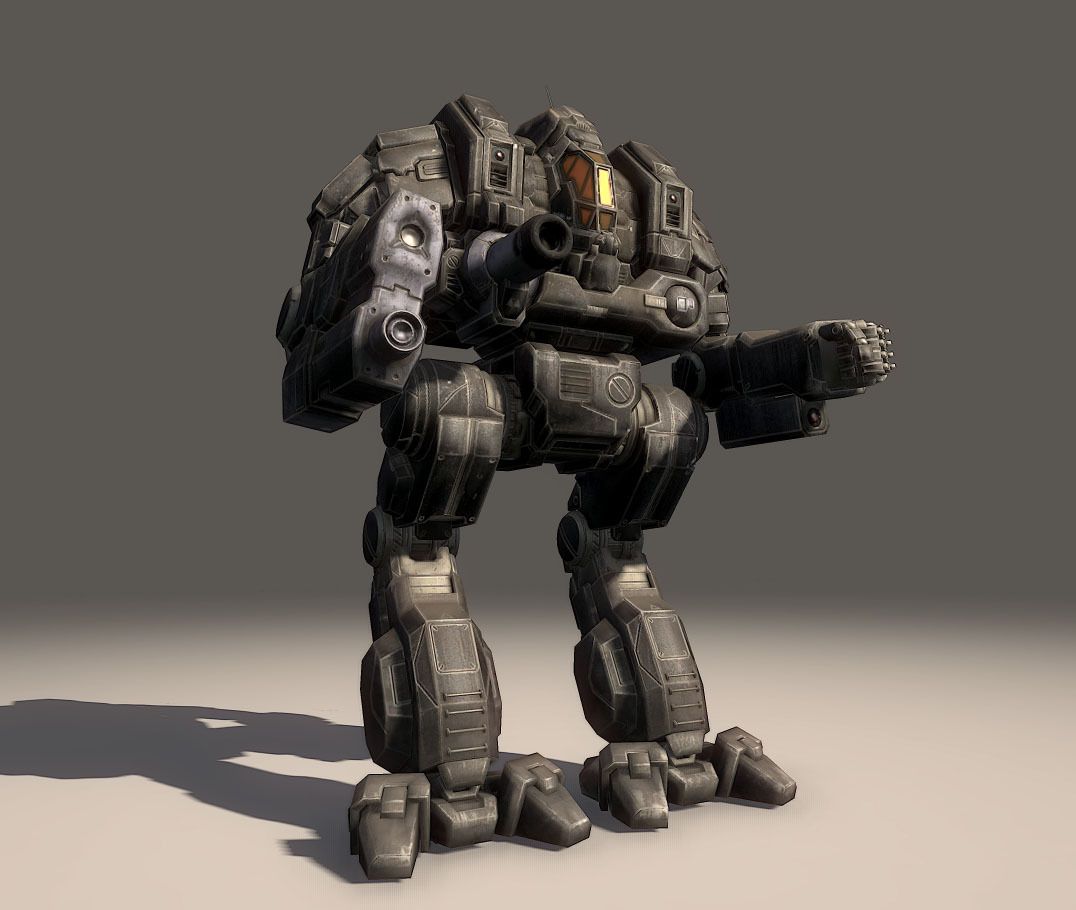
This is a basic tutorial on how to access the PGI assets to create your own MechWarrior based fan art. PGI has given permission for this to happen for non-commercial purposes, so if you're interested in creating your very own Catapult complete with custom paint jobs and poses (or heck, even animation if you're so motivated) without being limited to just photoshopping the stock images, this guide will help get you started down that path.

This guide is focused on using free (as in beer) software. There are opportunities to use other software such as 3DS Max, which was originally used to create the models and will have correspondingly better results. However, for those people who don't want to invest $3000 in software, these free solutions will give you all the tools you need, but require a bit more effort on your part.


Software you will (probably) need: Install all the software on your machine. This is not a tutorial on how to install/configure, but rather how to use the tools to get what you need. There are plenty of resources out there on each of the tools above, and as with everything (especially Blender and GIMP), it's going to take a LOT of practice to be good at using them.


The Cryengine Converter program (cgf-converter.exe) should be put into a location that is easy to access. I made a folder on my D: drive called D:\scripts, and put that in the path. It makes it easy to access from anywhere in the file structure.


Game Files
The default installation is c:\games\Piranha Games\MechWarrior Online. FOR THE LOVE OF EVERYTHING THAT IS GOOD, EVIL AND CHAOTIC NEUTRAL IN THIS WORLD, DON'T WORK ON THESE FILES! Copy them someplace safe that you can destroy accidentally and repeatedly without having to reinstall the game or causing it to have issues. You have been warned.

Extract the files using 7zip into a directory structure. Keep in mind that some image files don't go into the Mech directories, so it's usually safest to unzip all the .pak files. This takes a bit of time and disk space, but then all the assets are there. I have them all extracted to "D:\Depot\MWO". Make a note of your version of this location, as you'll use it later! THIS IS CALLED THE OBJECTDIR, and is used frequently.

Ok, the first step (making a backup of the game files is step 0) is to find the mech files. I'm not going to specify the location, but you should be able to figure out where they are located fairly easily. This is where the 7zip software comes in handy.

Once the objects are extracted, fire up Powershell. Ideally you've extracted the .pak files into the Cryengine directory format, so there will be a \Textures, \Objects, etc. Go to Objects\Mechs\Catapult to find the Catapult files. It'll look like this:

Posted Image

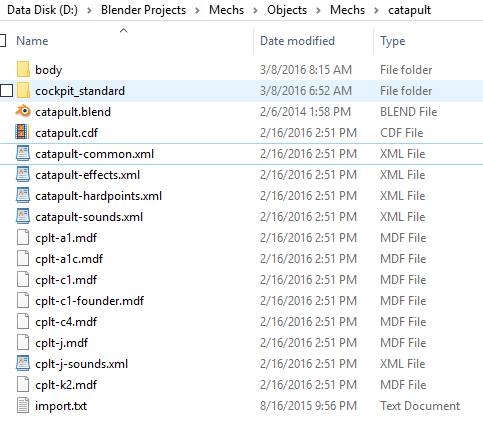
As a general rule, the mech model files are under Objects/Mechs/<mech_name>/body. So go to the body directory. There will be a TON of .cga and .cgf files. These are what you want to convert to .obj.

Now run cgf-converter on each of the files in this directory. You can use a foreach statement to do it all in one swoop. Remember, if cgf-converter.exe is not in the path, you have to specify the location of it.

```
foreach ($file in (get-childitem -Recurse *.cga,*.cgf,*.skin,*.chr)) { cgf-converter.exe $file -objectdir "d:\depot\mwo" }

NOTE: Use the -objectdir argument! It handles the materials a lot better when you do. Your objectdir will probably be different than mine, so use the proper value.

Cryengine Importer:

Now you'll have a whole bunch of .dae files that Mech Importer can use.

Install the Cryengine Importer add-on in Blender. Watch the tutorial above on how to add it, and it'll go over in great detail about how to install and import a mech (assuming you've already converted the assets!).


Using Camo Patterns:
The camo patterns are also part of the game files, using the RGB image files you'll see when looking at their files. Sparks Murphy wrote up a handy tutorial later in this thread on how you can use those with GIMP to customize your mech even more. Now you can have your mech match the paint scheme you have for your game mech! The details can be found here:

http://mwomercs.com/...ost__p__1909335


It's also described in greater detail in the tutorial video (part 2), so watch it!

And that's about it! You now have a mesh in Blender of your favorite mech that you can basically have your dirty, dirty way with.


Resources

Blender Youtube tutorials (great way to start learning Blender): http://youtube.com/cgboorman
Blender tutorials (highly recommended): http://cgcookie.com/...tion-beginners/


Include the following copyright statements on work you publish.

Quote

Some material posted is copyright © 2012 Piranha Games Inc. and/or their respective licensors. All rights reserved. MechWarrior® is a registered trade-mark of Microsoft Corporation. All other trade-marks are the property of their respective owners; ® or ™ as indicated.


Here's a nice thread that discusses what you can and can't do regarding monetization:

http://mwomercs.com/...e-monetization/


Special thanks to Kwibl of Death's Hand Bridage for all his assistance on this, Gwaihir for reminding me about the cryengine model plugin, Joe3142 for his additional instructions on how to get the maps loaded up, Sparks Murphey for the RGB file info, alfalfasprossen for the tip on getting access to the cfa files, and Andreas80 for the MWO Camo node group for Blender. You guys all rock!

Edited by Heffay, 11 March 2018 - 05:02 AM.


#2 Kilroy

    Member

  • PipPipPipPipPipPipPip
  • Legendary Founder
  • Legendary Founder
  • 650 posts
  • LocationUnder a rock

Posted 19 December 2012 - 09:20 AM

Awesome! Thanks for doing all this.

#3 Heffay

    Rum Runner

  • PipPipPipPipPipPipPipPipPipPip
  • The Referee
  • The Referee
  • 6,458 posts
  • LocationPHX

Posted 19 December 2012 - 09:38 AM

No problem. I hope they sticky it. :) Report for sticky!

#4 Adridos

    Member

  • PipPipPipPipPipPipPipPipPipPipPip
  • Bridesmaid
  • 10,635 posts
  • LocationHiding in a cake, left in green city called New A... something.

Posted 19 December 2012 - 09:44 AM

Do you have to convert the triangles to quads even with Maya, or is it using the same system as it's sibling and you can easily just work with the model in place?

#5 Heffay

    Rum Runner

  • PipPipPipPipPipPipPipPipPipPip
  • The Referee
  • The Referee
  • 6,458 posts
  • LocationPHX

Posted 19 December 2012 - 10:21 AM

View PostAdridos, on 19 December 2012 - 09:44 AM, said:

Do you have to convert the triangles to quads even with Maya, or is it using the same system as it's sibling and you can easily just work with the model in place?


I'm not sure. I think if you're going to use the skins that PGI made, you can't go around converting the topology. If maya uses triangles, then your job is even easier since you can skip the steps involving removing duplicates (probably) and converting to quads (definitely). And your topology cleanup may be non-existent.

#6 Ghogiel

    Member

  • PipPipPipPipPipPipPipPipPipPip
  • CS 2021 Gold Champ
  • CS 2021 Gold Champ
  • 6,852 posts

Posted 19 December 2012 - 11:02 AM

Open the CGF in CE3 and drop in onto a level as a brush

Export as an OBJ

Import into 3d app of choice.

Also note that the normal maps use 3DC compression. If you want them to work correctly on the mesh in any renderer that doesn't support that format, then you have to kinda reverse engineer the R&G channels back to a standard tangent space normal map channel configuration. to do so you can use levels on those channels and bump them up .5 and it'll be as close an approximation.

Posted Image

#7 Heffay

    Rum Runner

  • PipPipPipPipPipPipPipPipPipPip
  • The Referee
  • The Referee
  • 6,458 posts
  • LocationPHX

Posted 19 December 2012 - 11:06 AM

View PostGhogiel, on 19 December 2012 - 11:02 AM, said:

Open the CGF in CE3 and drop in onto a level as a brush

Export as an OBJ

Import into 3d app of choice.


Ya know, I've spent hours playing around with the CryEngine trying to figure out how to do that. ;-/ Where were you 2 months ago?? ;)

Edited by Heffay, 19 December 2012 - 11:26 AM.


#8 Ghogiel

    Member

  • PipPipPipPipPipPipPipPipPipPip
  • CS 2021 Gold Champ
  • CS 2021 Gold Champ
  • 6,852 posts

Posted 19 December 2012 - 11:12 AM

Took me 15mins.

#9 Heffay

    Rum Runner

  • PipPipPipPipPipPipPipPipPipPip
  • The Referee
  • The Referee
  • 6,458 posts
  • LocationPHX

Posted 19 December 2012 - 11:26 AM

View PostGhogiel, on 19 December 2012 - 11:12 AM, said:

Took me 15mins.


I kept trying to bring in the objects, not use the brush. I'm not familiar with Cryengine at all.

However, the .objs still doesn't import into Blender, so... yeah.

It's a great way for people to use other tools to access the mechs though. Thanks for the additional info.

#10 parman01

    Member

  • PipPipPipPipPip
  • 126 posts

Posted 19 December 2012 - 11:26 AM

Would you write short tutorial where to click in Cryengine SDK?

#11 Ghogiel

    Member

  • PipPipPipPipPipPipPipPipPipPip
  • CS 2021 Gold Champ
  • CS 2021 Gold Champ
  • 6,852 posts

Posted 19 December 2012 - 12:43 PM

Open the editor

load or create a map

go to brushes in the rollup bar

select anything and drop it onto the map
you should see 'geometry' in the brush params. surf that to the mechs cgf file

file> export object as obj

#12 cmopatrick

    Member

  • PipPipPipPipPipPipPipPip
  • 1,026 posts
  • Locationa 45 tonner on patrol...

Posted 19 December 2012 - 10:26 PM

absolutely great thread. honor is due. thanks.

#13 ivr56

    Member

  • PipPipPipPipPip
  • 122 posts

Posted 19 December 2012 - 11:41 PM

Can't seem to link the materials up in CE3. Getting errors. CE3 wont load the .mtls even when they are in the same directory as the gcf
I can import the model, then import into Maya with a untextured model but no way to link the textures back

Edited by ivr56, 19 December 2012 - 11:42 PM.


#14 Ghogiel

    Member

  • PipPipPipPipPipPipPipPipPipPip
  • CS 2021 Gold Champ
  • CS 2021 Gold Champ
  • 6,852 posts

Posted 20 December 2012 - 04:21 AM

View Postivr56, on 19 December 2012 - 11:41 PM, said:

Can't seem to link the materials up in CE3. Getting errors. CE3 wont load the .mtls even when they are in the same directory as the gcf
I can import the model, then import into Maya with a untextured model but no way to link the textures back

Your editor doesn't have their 'mech' material< it's a custom shader material that doesn't come with CE3. So it'll never display correctly, however the mtl loads for me, but obviously the shader type is not recognized, and the texture paths weren't correct to where I extracted the mech files to.

You can probably hook up that shader though. You'll have to extract the shader from the shadercache.pak and go into the shaderlist.xml and add it to you CE3 build or it definitely won't show up. Not sure what else you might have to do to get it to work, but you do have all the files.

Or just use the illum shader and to hell with it.

If you want it to display correctly in another renderer you'll have to create a new material anyway. CE map set up in the shader is probably going to be different and the mtls used in CE have info that only CE will use. So if you want to use those mtls directly in anything not CE, not going to work. I suppose if you have the crytools installed you could try syncing the mtl to max/maya if that is what you are using. But those mats aren't for viewing in those apps really, they are used for exporting to the engine.

so if you want to render in max/maya, you'll want something else besides a CE material at the end of the day.

Edited by Ghogiel, 20 December 2012 - 04:37 AM.


#15 Heffay

    Rum Runner

  • PipPipPipPipPipPipPipPipPipPip
  • The Referee
  • The Referee
  • 6,458 posts
  • LocationPHX

Posted 20 December 2012 - 05:40 AM

View PostGhogiel, on 20 December 2012 - 04:21 AM, said:

so if you want to render in max/maya, you'll want something else besides a CE material at the end of the day.


Well, it is possible somehow. Let me go grab Kwibl and ask him how he managed to do it. The last commando pic from my original post is from him, and claims it was done in maya.

#16 Adridos

    Member

  • PipPipPipPipPipPipPipPipPipPipPip
  • Bridesmaid
  • 10,635 posts
  • LocationHiding in a cake, left in green city called New A... something.

Posted 20 December 2012 - 07:22 AM

Ghogiel, I'm using the CE3 export .obj method to get the all into one scene in Maya, but there is a small issue.

Whenever I run the converted models, they are strongly displaced from the centre of the screen, while their moving point is in the middle, basically, Maya thinks they are on the grid, but in the reality, they are around 1000 X and Y units away. Do you know how to fix that, or is it just some flaw of my handling of both these programs?

Thanks.

#17 Ghogiel

    Member

  • PipPipPipPipPipPipPipPipPipPip
  • CS 2021 Gold Champ
  • CS 2021 Gold Champ
  • 6,852 posts

Posted 20 December 2012 - 08:45 AM

That is the correct behavior doing it like this. The CE OBJ export function will store the worldspace transforms of the mesh as it's pivot center.


You can center them before exporting. Once you place the mech onto the map you should see at the bottom of the CE viewport the coords of the object. Just zero those and it should be centered.

Or you could just import it into Maya and center pivots in that, then zero it's worldspace coords.


View PostHeffay, on 20 December 2012 - 05:40 AM, said:


Well, it is possible somehow. Let me go grab Kwibl and ask him how he managed to do it. The last commando pic from my original post is from him, and claims it was done in maya.


The cryengine shader will not work correctly in the renderer. for a start I am pretty sure that either MR or the scanline renderer will not work correctly with 3DC. He either synced the mat from CE3 with the crytools, then converted the crytek shader to a standard phong/blinn material and did a render. Or just created a new standard material and just plugged in the maps.

Edited by Ghogiel, 20 December 2012 - 08:49 AM.


#18 Kwibl

    Member

  • PipPipPipPipPipPip
  • Death Star
  • 255 posts
  • LocationUK

Posted 20 December 2012 - 09:02 AM

View PostHeffay, on 20 December 2012 - 05:40 AM, said:


Well, it is possible somehow. Let me go grab Kwibl and ask him how he managed to do it. The last commando pic from my original post is from him, and claims it was done in maya.


The render is from UDK, i didn't try applying the materials inside of Maya. All i did was convert the .DDS texture files inside of the mech files to other file formats that are supported by other programs. Noesis allows you to export them as other file formats.

As Ghogiel says the quickest way to set up the materials is to simply create a new shader material and plug the individual maps into it in whatever you're using, then play with the settings to try and recreate the in-game look on the shaders. Once you've got one shader right it's simply a case of saving it and plugging in the maps from the other mechs to the pre-existing shader.

I'm not too experienced with rendering so i can't really tell you much more, Ghogiel seems to have a better understanding, particularly with regards to cryengine.

Also i would slightly tweak the original post, merging the cockpit glass to the mech is a good idea but a few extra steps need to be taken or else the cockpit's UV's will overlap the mech's UV's.
Their UV's need to be saved on a seperate UV channel and inside of the 3D application you need to apply a second material to the glass. If you're staying inside of the 3d program then just apply the cockpit textures to this material, if you're importing it into an engine (Based on what experience i've got of UDK) the second material needs to be applied in order for the engine to recognise that those faces have a second material slot, which needs it's own shader applied.

Edited by Kwibl, 20 December 2012 - 09:12 AM.


#19 Adridos

    Member

  • PipPipPipPipPipPipPipPipPipPipPip
  • Bridesmaid
  • 10,635 posts
  • LocationHiding in a cake, left in green city called New A... something.

Posted 20 December 2012 - 09:42 AM

First thing I've done with this. Yep, a scale:

Posted Image

#20 Heffay

    Rum Runner

  • PipPipPipPipPipPipPipPipPipPip
  • The Referee
  • The Referee
  • 6,458 posts
  • LocationPHX

Posted 20 December 2012 - 11:26 AM

View PostAdridos, on 20 December 2012 - 09:42 AM, said:

First thing I've done with this. Yep, a scale:


The catapult and dragon look a little out of place. ;-)


2 user(s) are reading this topic

0 members, 2 guests, 0 anonymous users