
What do you mean the coordinates were all wrong? Can you provide a screenshot?

2251 replies to this topic
#1882
-

-

- 28 posts
Member
Posted 11 May 2016 - 10:23 PM
here's the screenshot of the LOD1 parts of the Timberwolf.
The objects are loaded all over the place, when i export this to FBX and then load in Max I get the same result so I just imported the individual parts that I needed and then aligned them to the bone structure I got from the CHR file. Unfortunately some of the objects have their origins in their mesh center so instead I loaded them on the file with the full-resolution 'mech model to reference the positions and that one worked.
The objects are loaded all over the place, when i export this to FBX and then load in Max I get the same result so I just imported the individual parts that I needed and then aligned them to the bone structure I got from the CHR file. Unfortunately some of the objects have their origins in their mesh center so instead I loaded them on the file with the full-resolution 'mech model to reference the positions and that one worked.
#1883
-
-
- The Referee

- 6,458 posts
Rum Runner
- LocationPHX
Posted 12 May 2016 - 06:21 PM
 Volt, on 11 May 2016 - 10:23 PM, said:
here's the screenshot of the LOD1 parts of the Timberwolf.
The objects are loaded all over the place, when i export this to FBX and then load in Max I get the same result so I just imported the individual parts that I needed and then aligned them to the bone structure I got from the CHR file. Unfortunately some of the objects have their origins in their mesh center so instead I loaded them on the file with the full-resolution 'mech model to reference the positions and that one worked.
The objects are loaded all over the place, when i export this to FBX and then load in Max I get the same result so I just imported the individual parts that I needed and then aligned them to the bone structure I got from the CHR file. Unfortunately some of the objects have their origins in their mesh center so instead I loaded them on the file with the full-resolution 'mech model to reference the positions and that one worked.
Interesting. My guess is that the .cdf file gives the relative location only for the full resolution geometry, so what is happening is that the transforms for each component is based off of a full sized mech.
It may be possible to solve this by taking the translation parts of mech-importer and dividing them by ... whatever the LOD factor is. I'm not sure of exactly how LODs are calculated, but a few options:
1) Each level is 1/2 of the previous level. A LOD1 model will be 1/2, LOD3 is 1/8th, etc. So for the LOD3, take the transforms and divide by 8 to get the LOD transform.
2) ... I can't think of a 2. Let me know if 1 doesn't work though.
#1884
-
-
- 28 posts
Member
Posted 12 May 2016 - 10:09 PM
I'm not certain 1) will work since the highres models and the LOD models are of the same physical size. I built an LOD1 Timberwolf (minus the parts that do not have LOD1 equivalent) and the assembled models are of the same dimensions.
Now that I'm looking at the LOD models, it appears I won't be able to use them to make papercraft since the manner used to reduce the complexity of the meshes rendered the models... um... "ugly" with all sharp edges and stuff.
I guess I will have to work on the highres model and then reduce the complexity by hand instead, that way I'd have more control over the surfaces that would be converted into paper folds.
#1885

Posted 16 May 2016 - 04:35 PM
@Volt Im wondering if you could help me out with the textures.
Im trying to figure out how to best get the ones applied to the mechs to look like the default in game mechs do (no changed colors etc) and could you make me a lit scene where I could import the .obj files I export from Blender into 3DS Max o that I can make nice quality images, with an alpha channel?
Im trying to figure out how to best get the ones applied to the mechs to look like the default in game mechs do (no changed colors etc) and could you make me a lit scene where I could import the .obj files I export from Blender into 3DS Max o that I can make nice quality images, with an alpha channel?
Edited by Seijin Dinger, 16 May 2016 - 04:58 PM.
#1886
-
-
- Shredder

- 1,907 posts
Member
- LocationFracking the third toaster.
Posted 18 May 2016 - 05:22 AM
Mountain dawn
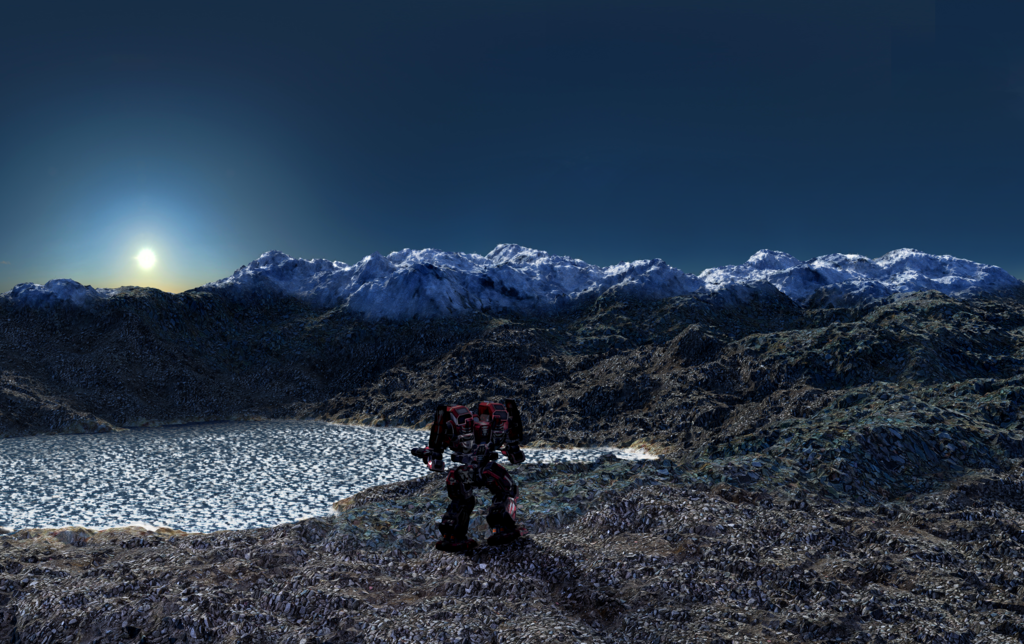
getting the hang of creating terrain scenes in blender.

getting the hang of creating terrain scenes in blender.
#1887
-
-
- 28 posts
Member
Posted 19 May 2016 - 02:34 AM
@Seijin
I would love to help but I only followed your instructions on the textures.
*_dif.dss as the base for a layered mix map on diffuse channel dialed 100
*_spc.dss on specular color and level, both dialed 100
*_ddn.dss on a normal map bump map dialed 30 (I sometimes get weird artifacts if I go above 30 because I have not converted my faces to quads yet)
I used the *_rgb.dss as an RTB Tinted mask for my diffuse channel so I can play with the colors (again, using RGB Tint map), one mix channel for each of the three color filters (R, G and .
.
What I've been trying to do but cannot achieve yet is to get that glossy metallic surface feel in-game. I've tried raytrace and architectural materials with varying levels of reflectivity (using the *_spc.dss as my reflect map to control the level per polygon) but I'm not getting the desired effect. Still playing around with other options at the moment.
Or wait, do you mean, which textures and colors are used by default when you buy a 'mech and how to configure them in the material editor window?
I would love to help but I only followed your instructions on the textures.
*_dif.dss as the base for a layered mix map on diffuse channel dialed 100
*_spc.dss on specular color and level, both dialed 100
*_ddn.dss on a normal map bump map dialed 30 (I sometimes get weird artifacts if I go above 30 because I have not converted my faces to quads yet)
I used the *_rgb.dss as an RTB Tinted mask for my diffuse channel so I can play with the colors (again, using RGB Tint map), one mix channel for each of the three color filters (R, G and
.What I've been trying to do but cannot achieve yet is to get that glossy metallic surface feel in-game. I've tried raytrace and architectural materials with varying levels of reflectivity (using the *_spc.dss as my reflect map to control the level per polygon) but I'm not getting the desired effect. Still playing around with other options at the moment.
Or wait, do you mean, which textures and colors are used by default when you buy a 'mech and how to configure them in the material editor window?
#1888
-
-
- 28 posts
Member
Posted 19 May 2016 - 04:38 AM
Just finished extracting and texturing the Kodiak.
anyone having issues with the claws being in the wrong place?
anyone having issues with the claws being in the wrong place?
#1889
Posted 19 May 2016 - 12:17 PM
Kodiak Claws are in correct place for me.
And yeah just the default texture in the mech shop. The ones I get when I load the mechs into blender or 3DS Max are somewhat of a black color vs the green color in game.
Game
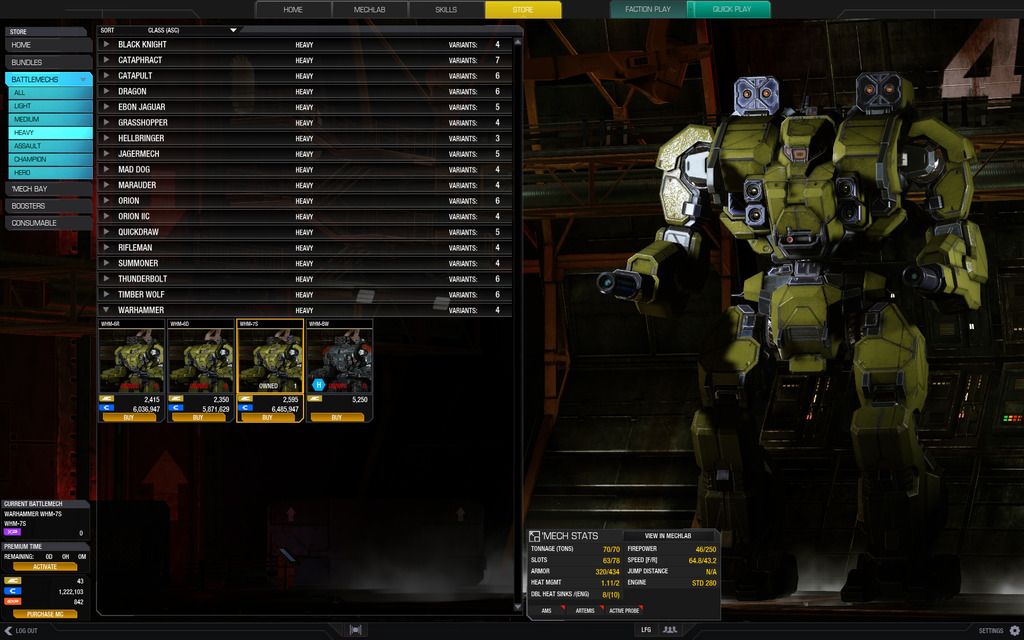
Blender
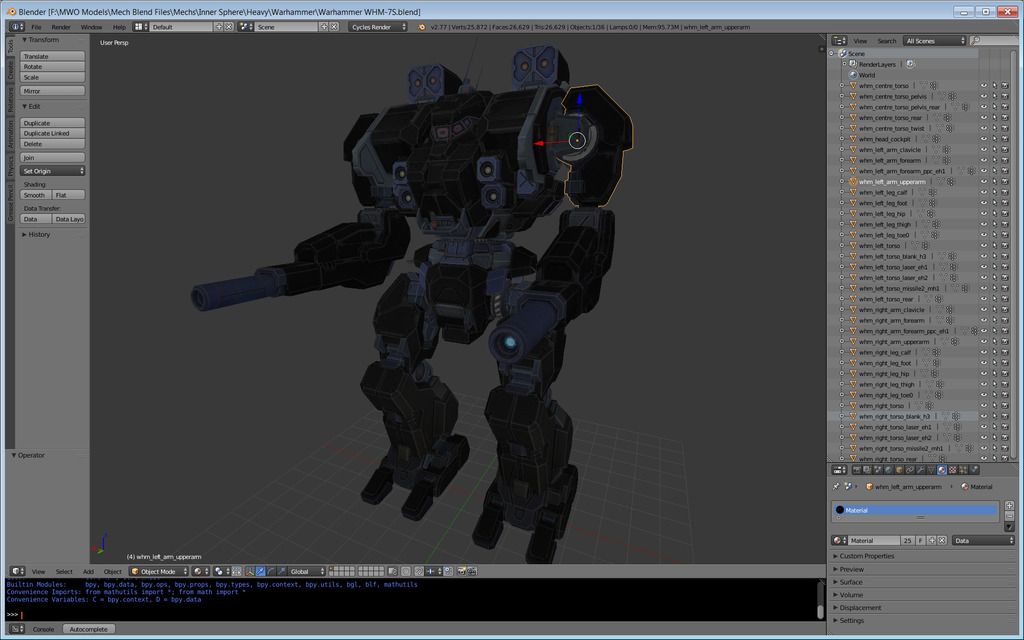
And yeah just the default texture in the mech shop. The ones I get when I load the mechs into blender or 3DS Max are somewhat of a black color vs the green color in game.
Game
Blender
#1890
-
-
- 28 posts
Member
Posted 19 May 2016 - 04:20 PM
I don't know how to do it in blender but for Max it's as follows:
1) put a mix map in the diffuse color channel
2) in the mix map:
2.1) put the dif texture in the color #1 slot
2.2) put the rgb texture in the mix amount slot
2.3) put and RGB Tint map in the color #2 slot
2.3.1) instance the rgb texture in the RGB Tint map
2.3.2) change the R,G and B colors to the desired color, in this case, put a yellowish-green color in all three slots
#1891
-

-
- The Marauder

- 166 posts
Member
- LocationGER | BW | HCH
Posted 29 May 2016 - 01:07 PM
I'm using this node setup currently:

Put it together by trial & error, but I think it looks good enough


Put it together by trial & error, but I think it looks good enough

#1892
-

-
- The Warlord

- 155 posts
Member
- LocationLas Vegas NV
Posted 29 May 2016 - 02:05 PM
is there a way to customize hanging items like adding photos to your dashboard like in a car.
#1893
-
-
- Shredder
- 1,907 posts
Member
- LocationFracking the third toaster.
Posted 02 June 2016 - 04:35 AM
Lightning
(Starry background not my image).

(Starry background not my image).
Edited by mad kat, 02 June 2016 - 11:20 PM.
#1894

Posted 02 June 2016 - 07:54 PM
mad kat, on 02 June 2016 - 04:35 AM, said:
Lightning
(Starry background not my image).
(Starry background not my image).
I'm working on a PPC effect in Blende right now, so allow me the question:
Is that effect made in blender? Or did you paint it over in Photoshop?
Rawyn, on 29 May 2016 - 01:07 PM, said:
I'm using this node setup currently:
Put it together by trial & error, but I think it looks good enough
Put it together by trial & error, but I think it looks good enough
Minor thing: Use the RGB map as a mask for the metal detail. That way it's only on the painted surfaces, like they handle it ingame
#1895
-
-
- Shredder
- 1,907 posts
Member
- LocationFracking the third toaster.
Posted 02 June 2016 - 09:52 PM
Iqfish, on 02 June 2016 - 07:54 PM, said:
I'm working on a PPC effect in Blender right now, so allow me the question:
Is that effect made in blender? Or did you paint it over in Photoshop?
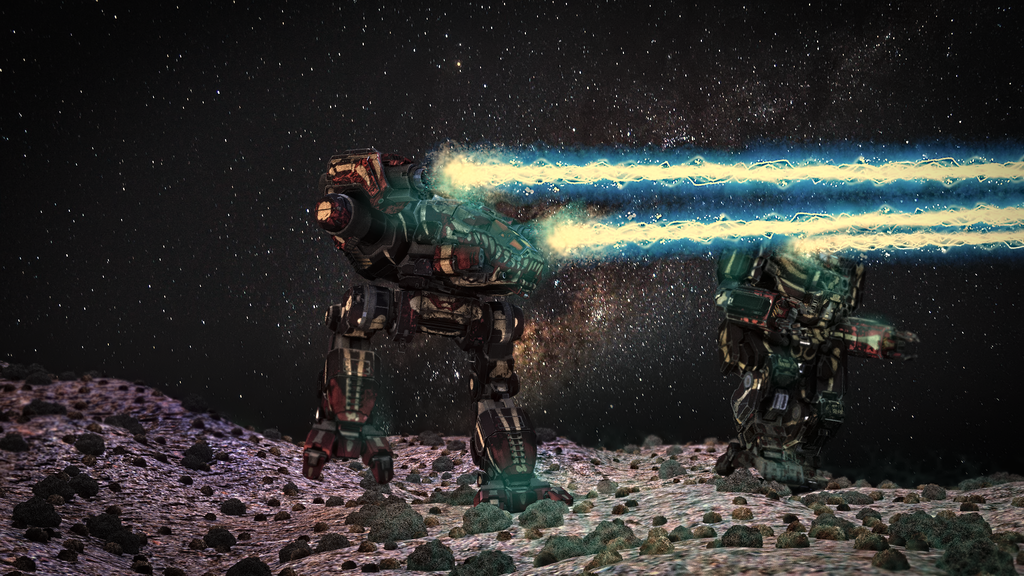
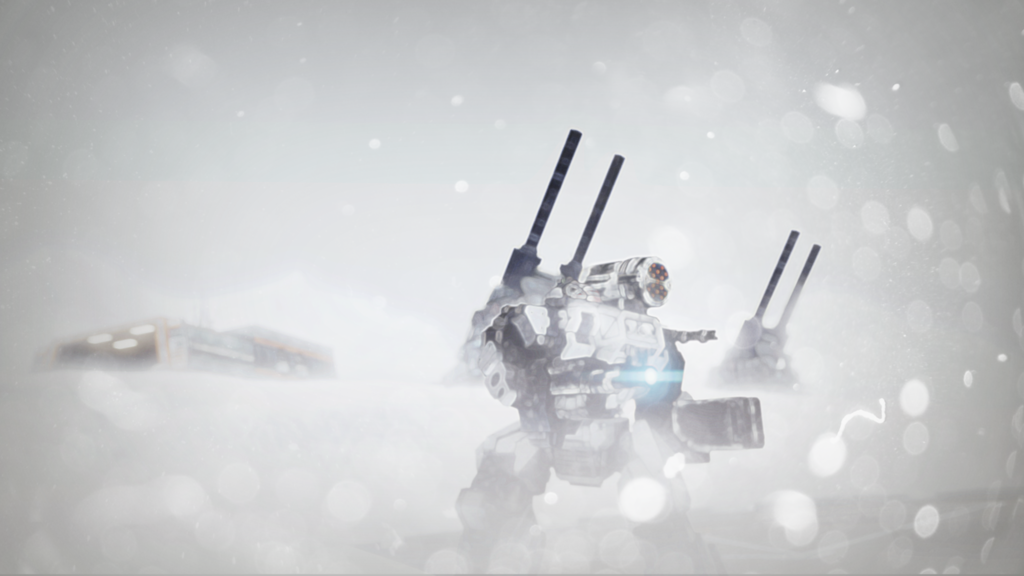
I've tried a PPC effect in blender but i didn't like it, (didn't go into enough detail) as below.

For the one above with the K2 and thunderbolt i rendered the mechs and the terrain on two different layers in blender then merged everything in GIMP with the background and adjusted levels etc.
The ppcs were drawn by hand in a smallish segement Using a variety of brushes then copied, feathered and extended over each other to extend the beam and flattened.
Then i put it into Raw Therapee and give it more colour, sharpness, tone mapping and contrast detail etc.
Edited by mad kat, 02 June 2016 - 10:56 PM.
#1896
-
-
- The Marauder
- 166 posts
Member
- LocationGER | BW | HCH
Posted 02 June 2016 - 11:26 PM
Iqfish, on 02 June 2016 - 07:54 PM, said:
Minor thing: Use the RGB map as a mask for the metal detail. That way it's only on the painted surfaces, like they handle it ingame
Thought about that as well, I just liked some bumpiness on the metal surfaces. Still looking for a more fitting texture though. Less bumps, more, ehm, scratches or brushed look.
Edited by Rawyn, 02 June 2016 - 11:26 PM.
#1897
Posted 05 June 2016 - 08:06 AM
Rawyn, on 02 June 2016 - 11:26 PM, said:
Thought about that as well, I just liked some bumpiness on the metal surfaces. Still looking for a more fitting texture though. Less bumps, more, ehm, scratches or brushed look.
Tile the bumps more often, i think in MWO they are tiled 32 times per mech. That way the bumps get smaller
#1898
-
-
- 28 posts
Member
Posted 05 June 2016 - 06:29 PM
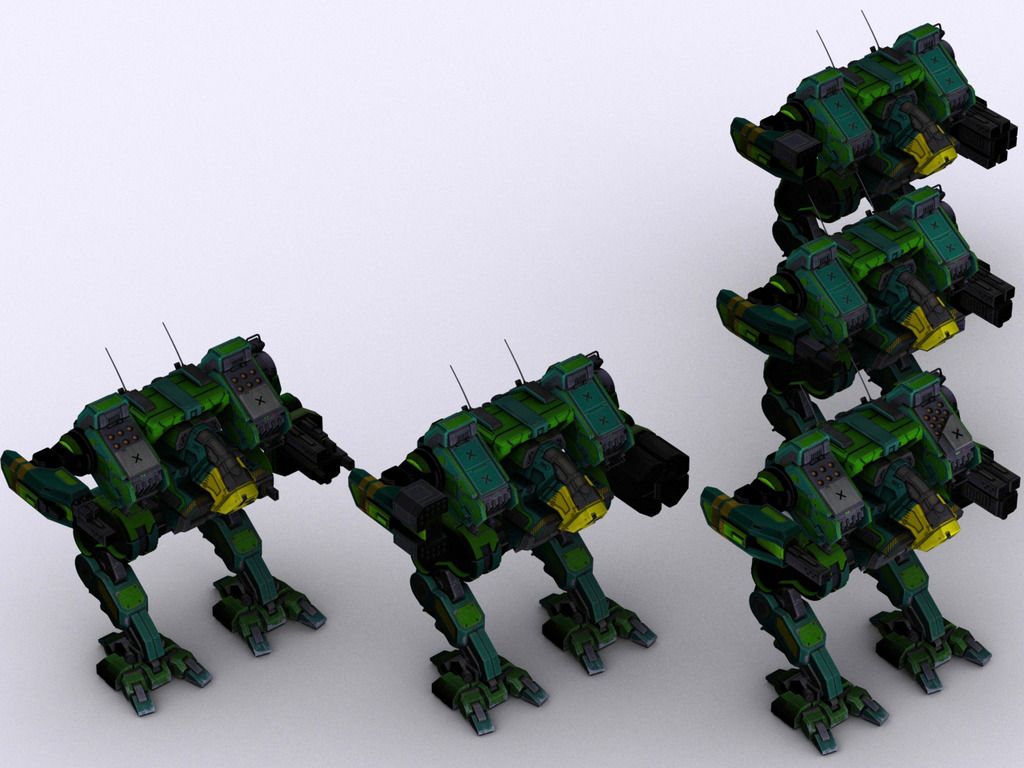
got bored the other day, decided to make a Jade Flacon Camo Black Lanner since it was my favorite MW4:M Medium Mech. I used the following parts:
Mad Dog Feet and L/R Torso
Stormcrow Legs and Pelvis
Nova Torso and Left Arm
Shadow Cat Right Arm
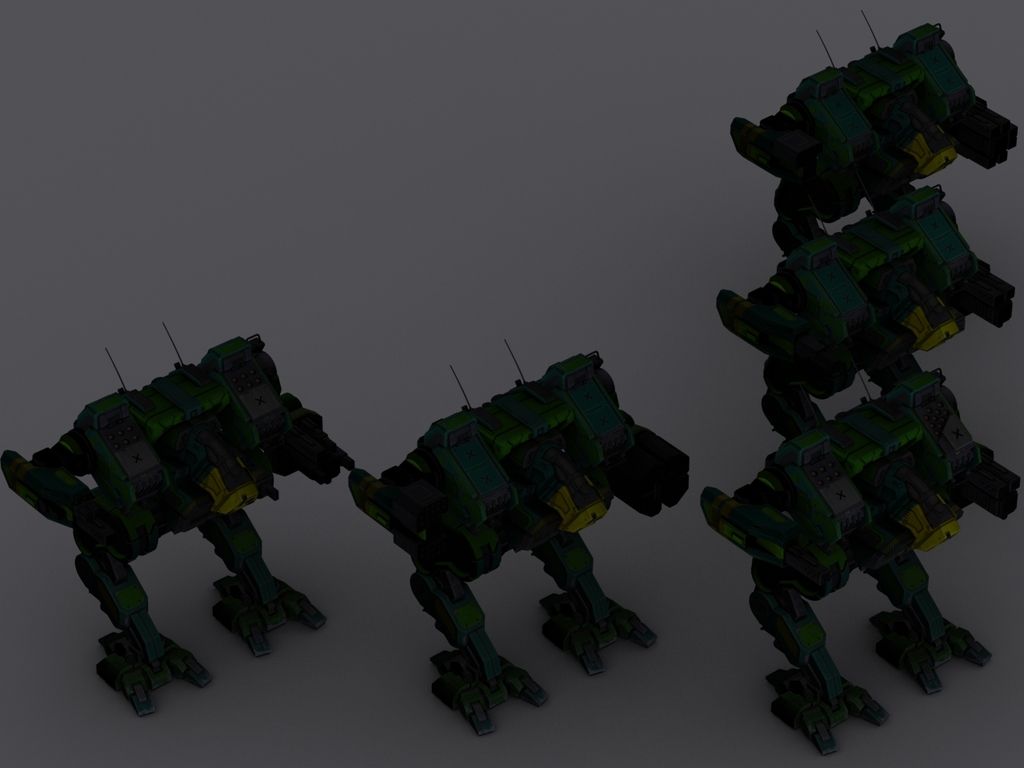
Not as pretty as I wanted but here are the Prime and A to D configs
Mad Dog Feet and L/R Torso
Stormcrow Legs and Pelvis
Nova Torso and Left Arm
Shadow Cat Right Arm
Not as pretty as I wanted but here are the Prime and A to D configs
Edited by Volt, 06 June 2016 - 10:01 PM.
#1899
Posted 06 June 2016 - 05:07 AM
Volt, on 05 June 2016 - 06:29 PM, said:
got bored the other day, decided to make a Jade Flacon Camo Black Lanner since it was my favorite MW4:M Medium Mech. I used the following parts:
Mad Dog Feet and L/R Torso
Stormcrow Legs and Pelvis
Nova Torso and Left Arm
Shadow Cat Right Arm
Not as pretty as I wanted but here are the Prime and A to D configs
Mad Dog Feet and L/R Torso
Stormcrow Legs and Pelvis
Nova Torso and Left Arm
Shadow Cat Right Arm
Not as pretty as I wanted but here are the Prime and A to D configs
Nice! I may know a thing or two about kitbashing mechs, haha.
However I really can't make out any details. Try to make your images brighter next time


3 user(s) are reading this topic
0 members, 3 guests, 0 anonymous users


