


Fochts BT Art
Started by CG Anastasius Focht, Oct 31 2011 06:49 PM
176 replies to this topic
#61
-

-

- 28 posts
Member
Posted 15 November 2011 - 01:39 PM
Wow, these look great. Some of these will look even better with some paint
#62
-
-
- 328 posts
Member
- LocationSydney, Australia
Posted 15 November 2011 - 02:05 PM
 Solistx, on 15 November 2011 - 01:39 PM, said:
Wow, these look great. Some of these will look even better with some paint
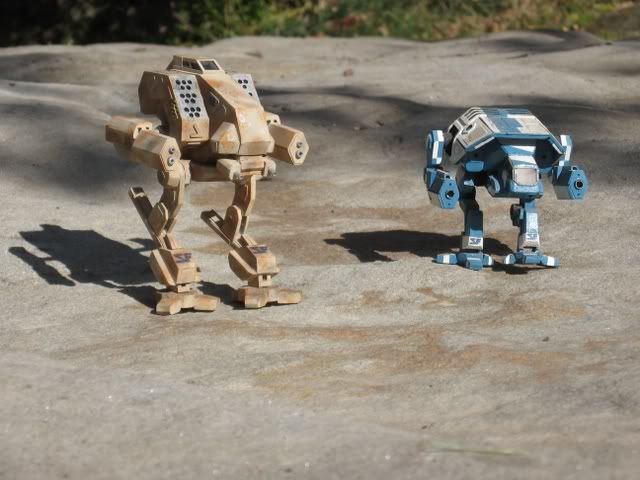
Ive toyed with the idea of painting these ones, most of my mechs have a cammo scheme, but not all do.
My BK's for example are Silver, in keeping with the same scheme as the Black Knight game cover art.
Their function would be more ceremonial guard, than front line combat.
As i said i often toy with the idea of painting the black watch lance, but so far have always chosen to leave then in "ninja" cammo lol
#64
-
-
- 328 posts
Member
- LocationSydney, Australia
Posted 15 November 2011 - 10:06 PM
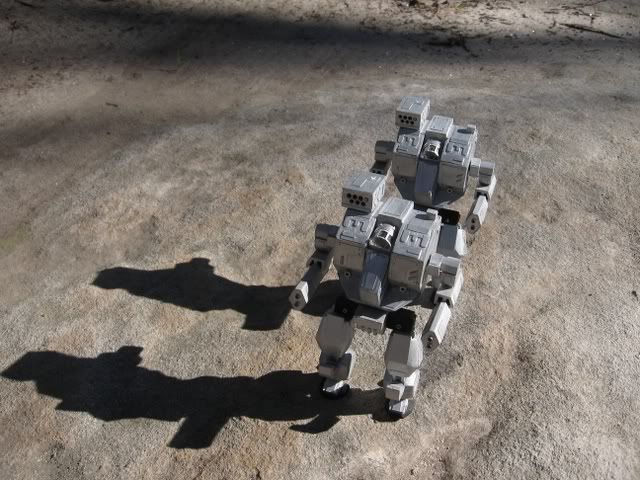
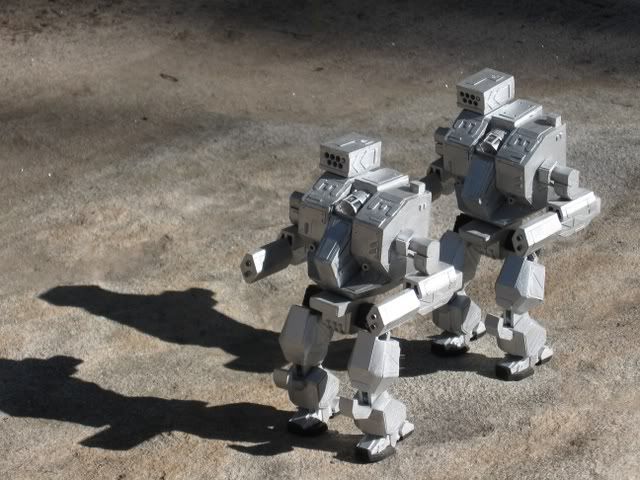
Pair of Unskined Loki's
#66
-

-
- 154 posts
Member

- LocationMidwest USA
Posted 17 November 2011 - 08:23 AM
Amazing work! Really enjoyable to see.
#67
-

-
- Little Helper

- 1,997 posts
Member
Posted 17 November 2011 - 08:28 AM
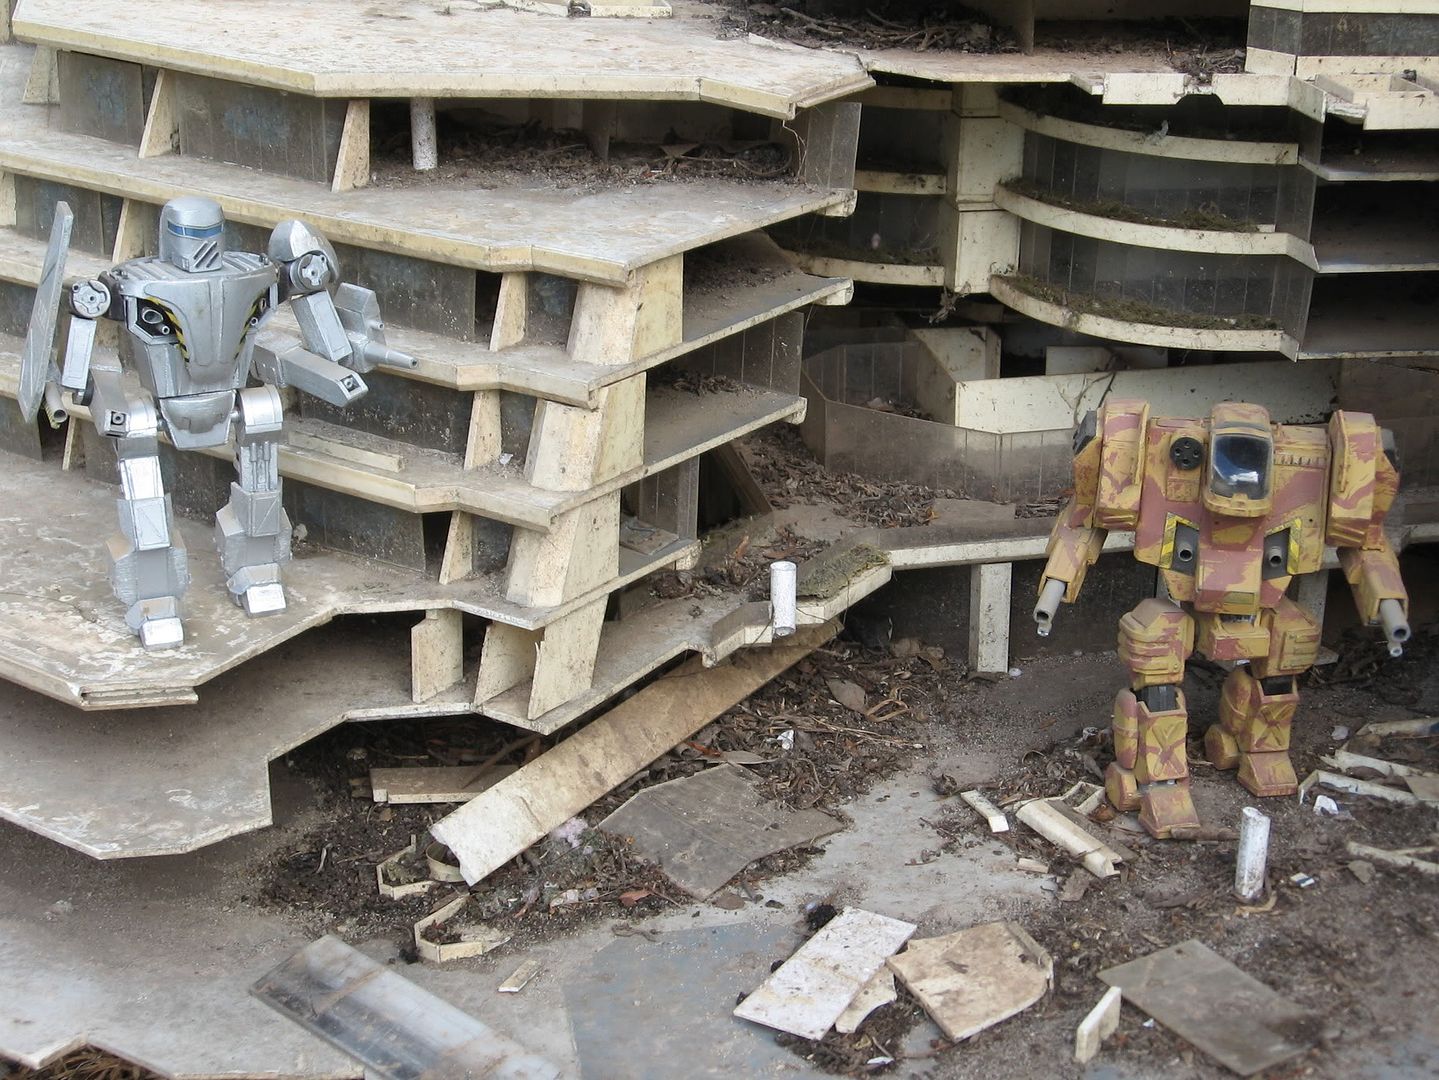
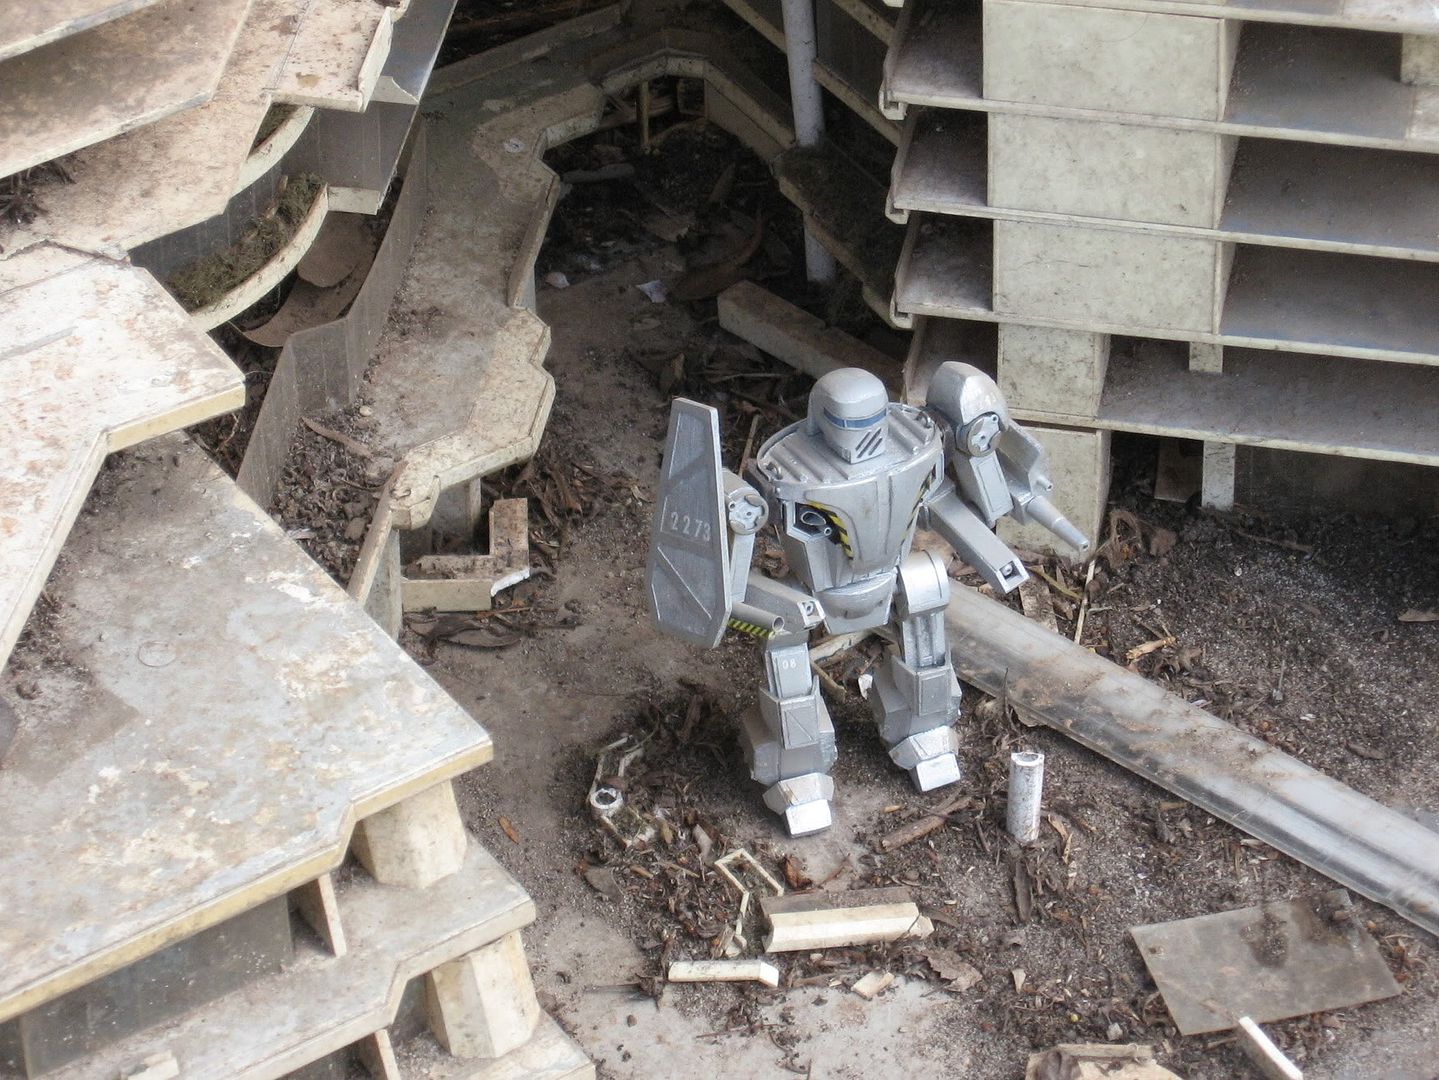
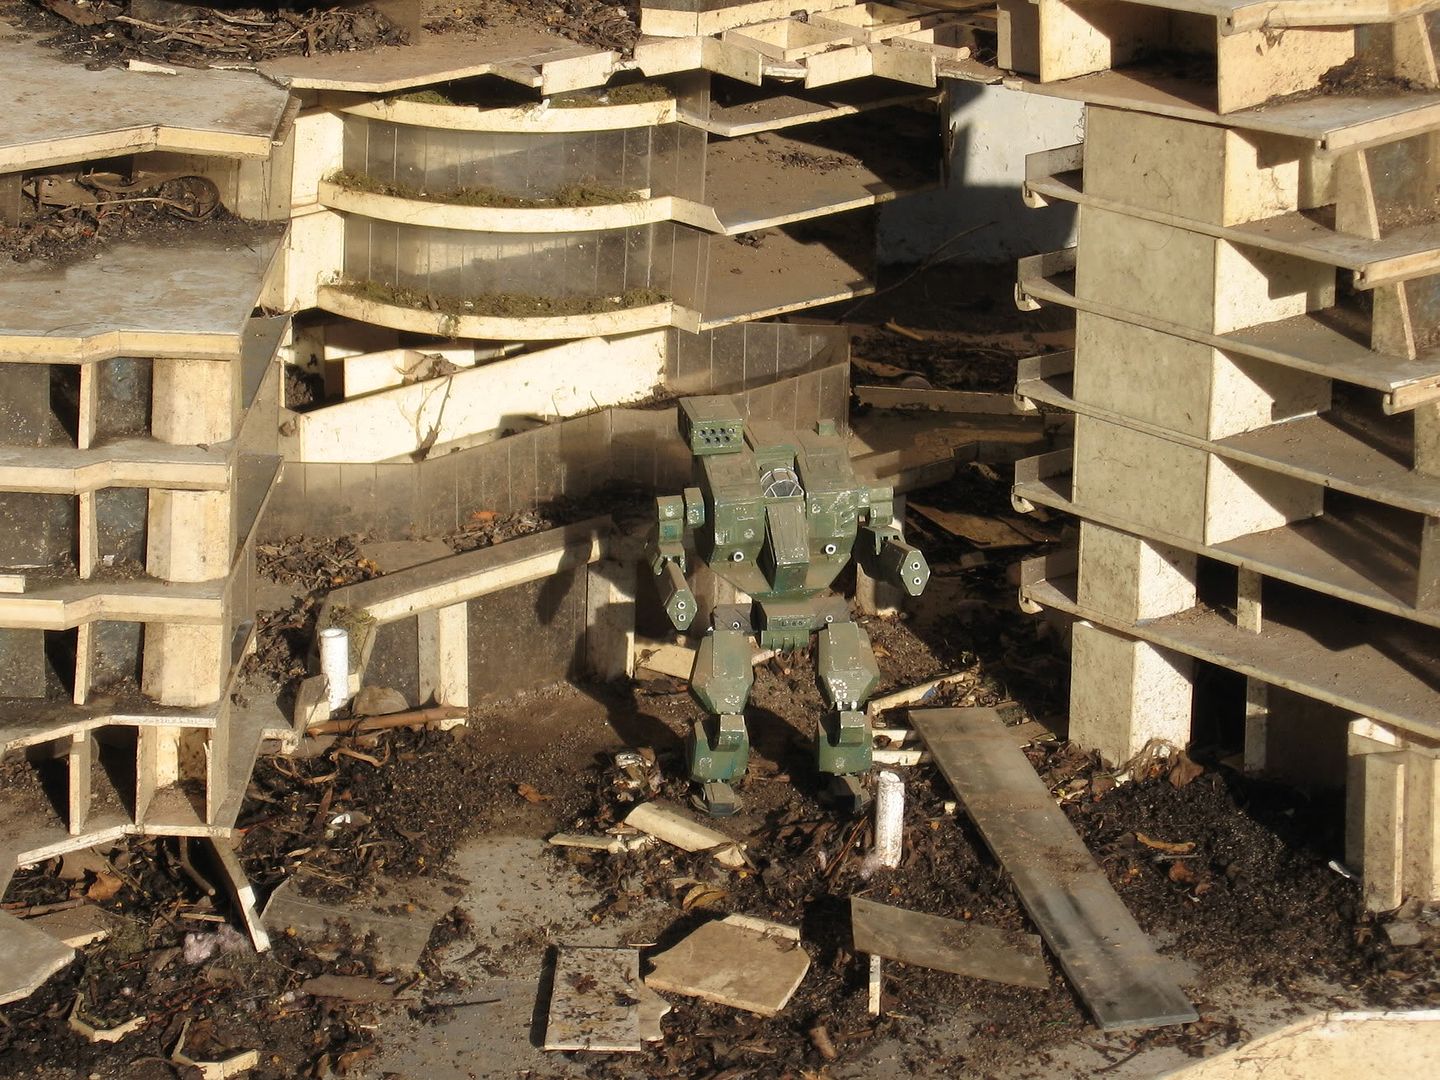
The fact that you have a to-scale building is amazingly awesome. Love the work!

#72
-

-
- IS Exemplar

- 1,971 posts
Member
- LocationHouston,TX
Posted 21 November 2011 - 04:09 PM
Dang i wish i could make one myself or buy one from you but i cant because of the copyright issues but could you show me the specs to make a victor or if its possible could you make a locust
#73
-
-
- 328 posts
Member
- LocationSydney, Australia
Posted 21 November 2011 - 04:54 PM
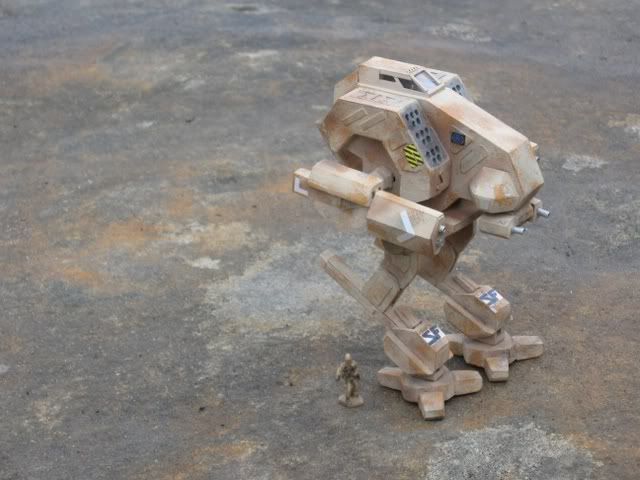
Ive made a number of Locusts over the years some in the scale featured here, and two even larger ones.
Sadly being my early work they dont have the degree of detail or finese my later models do.
I have one badly damaged one in this scale, and its been on my mind to rebuild it, so you never know. Im building four vultures atm and still have a long way to go before they are done. But i may update my locust when they are done.
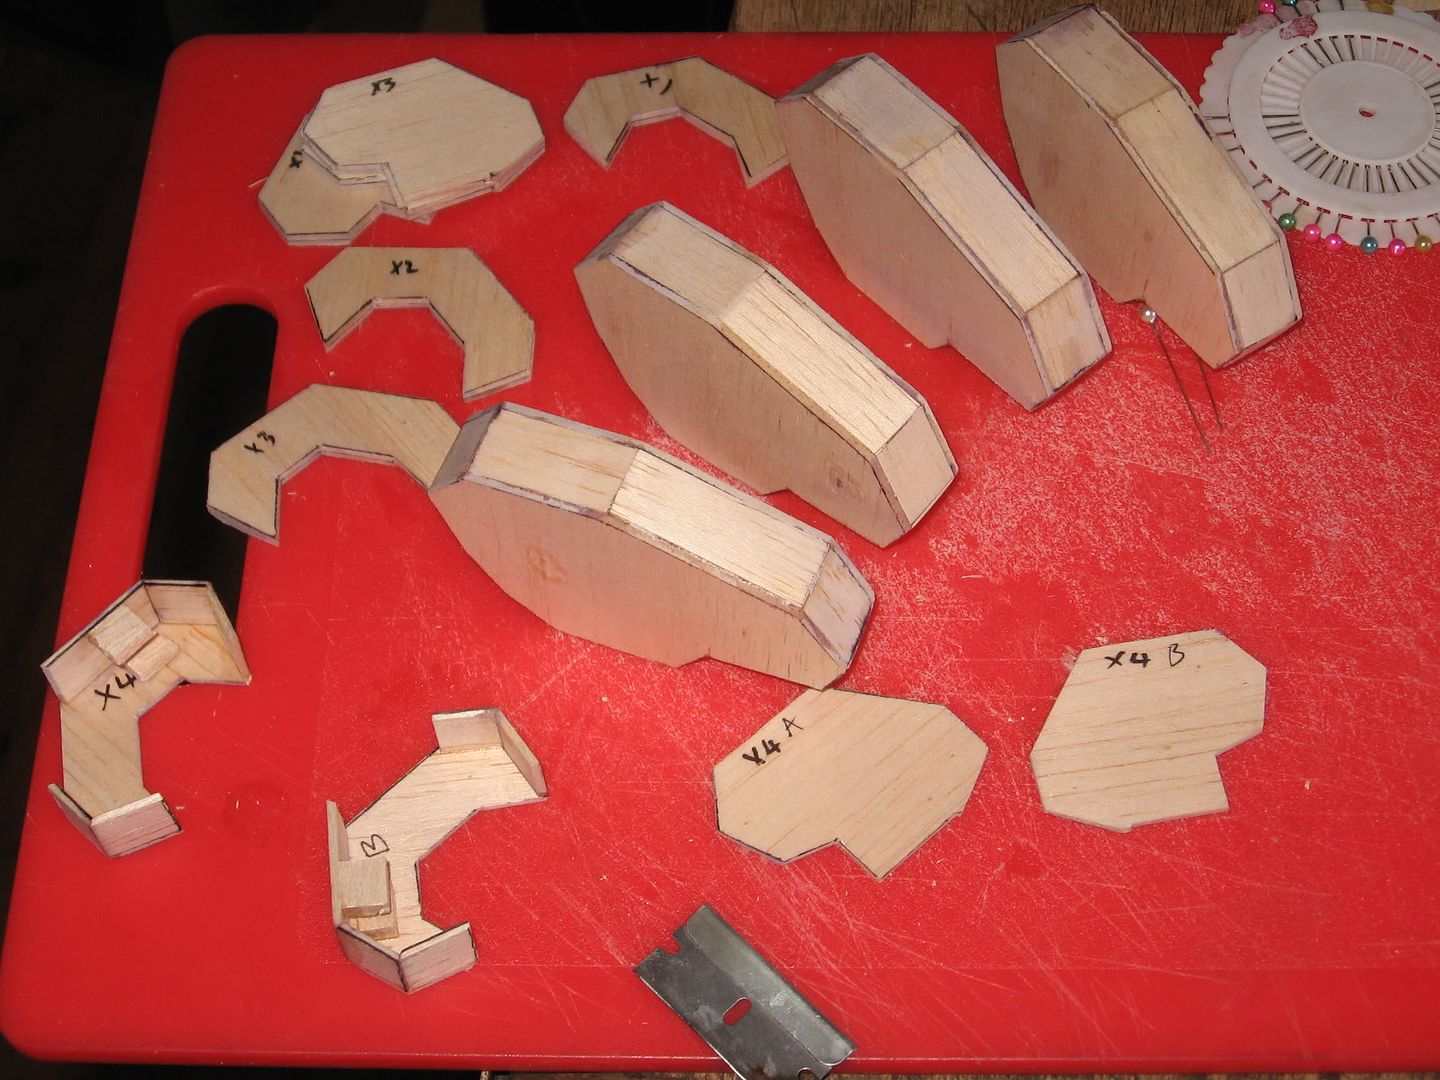
Building in multiples has advantages and disadvantages, one being it takes much longer than a single chassis, and the work is repetative (4 dozen toe components in this project, same shapes over and over)
The Victors, i dont really have any specs or templates from that build, i used the spinning figure in the MW4 mechlab and did them by eye.
I also used 2 client connections and walked one victor around another in a server for close up looks at how they were built, and copied them.
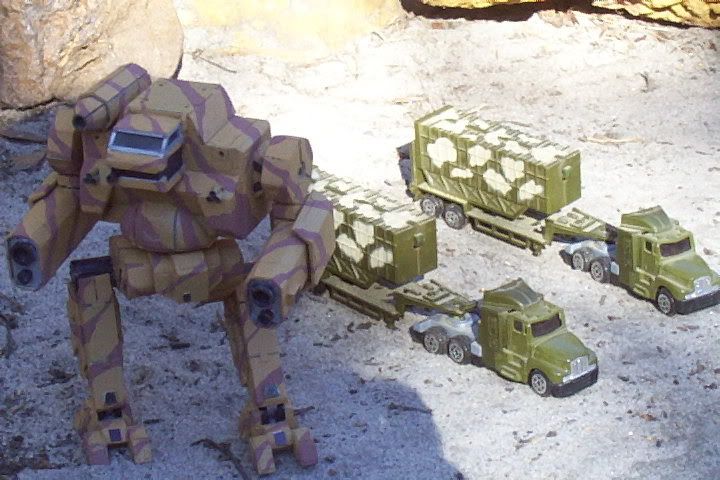
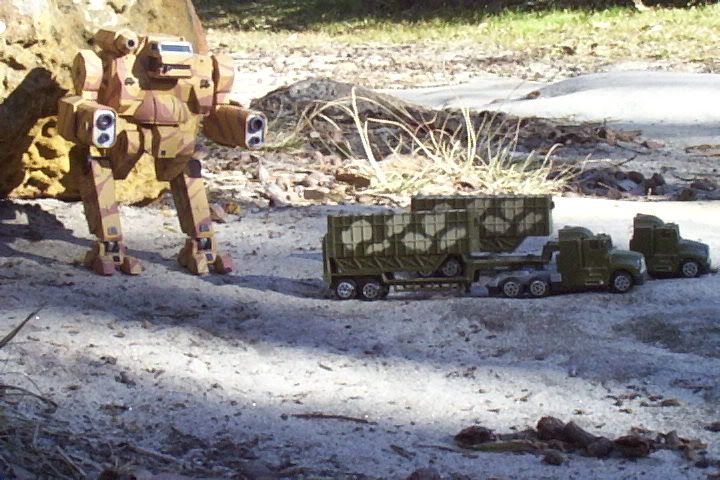
My advice is to start with a basic shape, and copy that, start with the shape of the centre torso, build that shape, then the side torso shapes and then the hip shape upper leg etc etc. The photo below shows the two Victors on the back of a transport at an early stage, some of the basic panels are as you can see just rectangles. Try and isolate these simple shapes and work from there.
Thats how i do it, i break the total design down to the simplest shapes, copy those shapes and slap them together.

Sadly being my early work they dont have the degree of detail or finese my later models do.
I have one badly damaged one in this scale, and its been on my mind to rebuild it, so you never know. Im building four vultures atm and still have a long way to go before they are done. But i may update my locust when they are done.
Building in multiples has advantages and disadvantages, one being it takes much longer than a single chassis, and the work is repetative (4 dozen toe components in this project, same shapes over and over)
The Victors, i dont really have any specs or templates from that build, i used the spinning figure in the MW4 mechlab and did them by eye.
I also used 2 client connections and walked one victor around another in a server for close up looks at how they were built, and copied them.
My advice is to start with a basic shape, and copy that, start with the shape of the centre torso, build that shape, then the side torso shapes and then the hip shape upper leg etc etc. The photo below shows the two Victors on the back of a transport at an early stage, some of the basic panels are as you can see just rectangles. Try and isolate these simple shapes and work from there.
Thats how i do it, i break the total design down to the simplest shapes, copy those shapes and slap them together.
Edited by [CG]Anastasius Focht, 21 November 2011 - 04:57 PM.
#74
-
-
- IS Exemplar
- 1,971 posts
Member
- LocationHouston,TX
Posted 21 November 2011 - 06:18 PM
do you carve or cut and how do you make the joints spin
Edited by Cementblade, 21 November 2011 - 06:19 PM.
#75
-
-
- 328 posts
Member
- LocationSydney, Australia
Posted 21 November 2011 - 06:50 PM
Cementblade, on 21 November 2011 - 06:18 PM, said:
do you carve or cut and how do you make the joints spin
I cut usually with a sharp razor, and then sand with emery boards (the same as the ladies use to shape nails).
once im happy with the piece i give it a light coat of superglue and sand it again. This converts the balsa from soft, to hard.
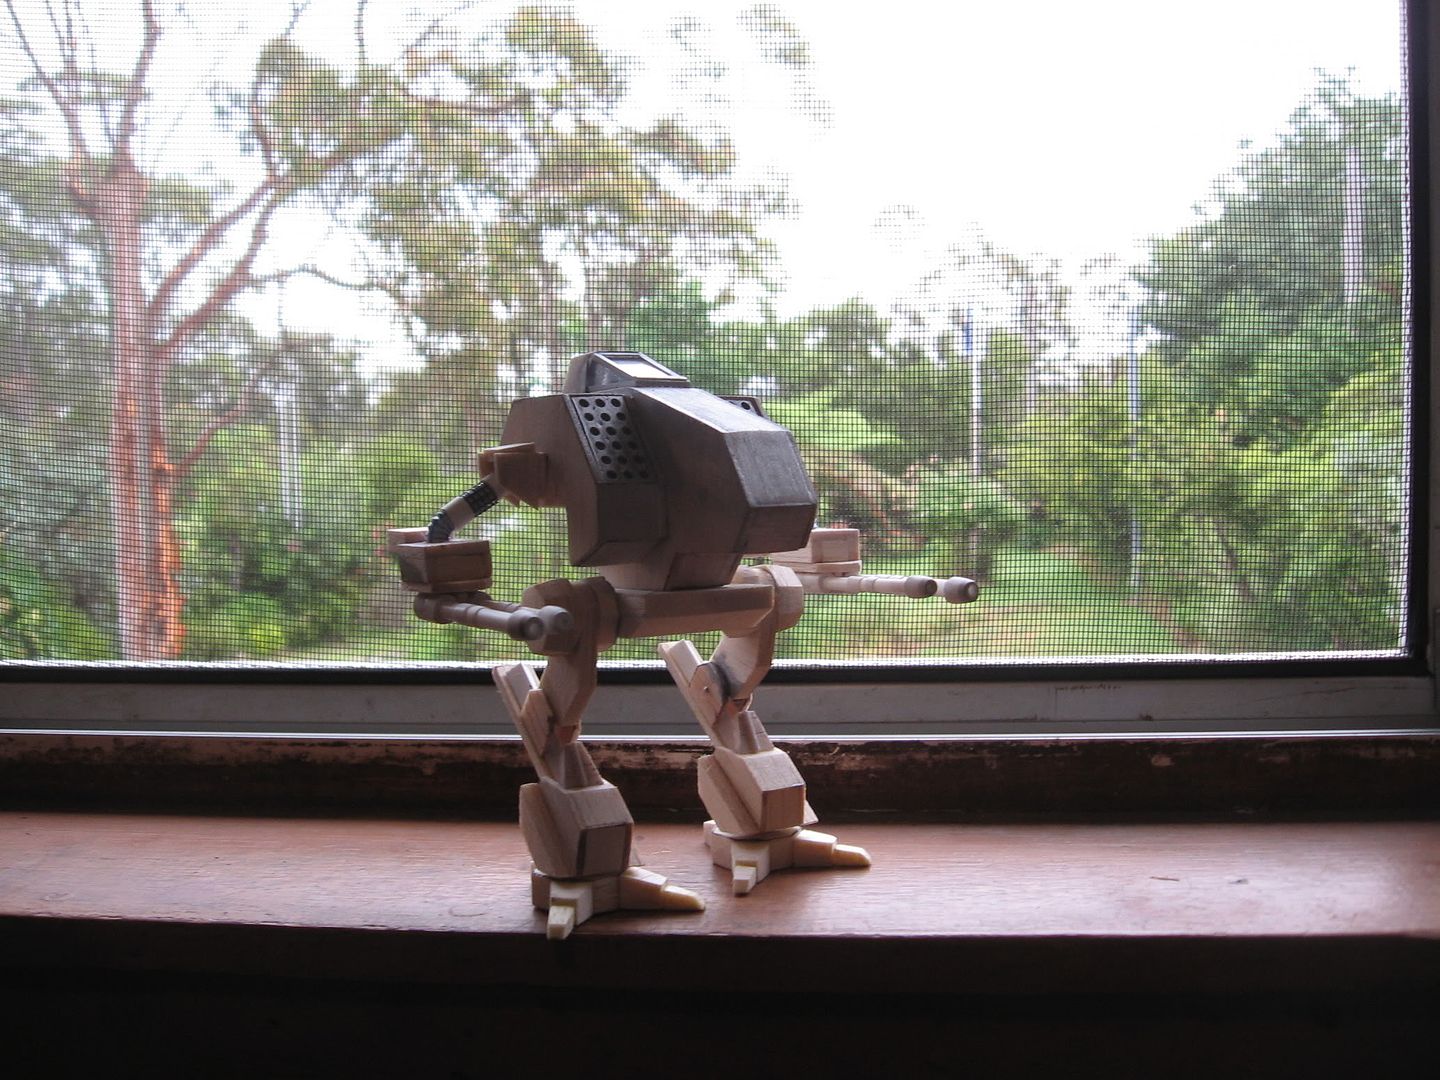
In the case of the victors i copied the joints from the original game art, so the shoulders are tongue and groove, a central tongue with two outside parts that form the groove these shots show the idea, then a rod is run through the middle. a small drop of superglue at one end secures the rod. but apply with a match or similar, too much glue will lock the joint.
exposed shoulder tongue joints

completed joints

You can buy styrene tube/rods at the hobby shop, but im a scrounger so in this case i took the plastic rod from some cotton Q tip ear cleaners of the kind you often find in the bathroom cupboard. another example is the left arm lasers in the model without battlefist.
They are the threaded ends from some common garden sprinkler fittings, the main gun on the right arm could have been a simple tube, but the model called for a hex shaped part, and a standard BIC pen shell worked perfectly.
I try and find things that will work, rather than build them from scratch if i can. toothpicks ,washers, straws .... the machine guns on my madcats are brass female connectors from an old computer cable connector, the radar dish on my atlas is just a brass thumb tack, the blue visor on my BK's is just unexposed xray film, the list goes on and on. often i will see a shape in an everyday item and it will scream component at me.
Heres a classic example, i was throwing out the plastic container of a self saucing hot pudding.....(rum and raisin lol)
http://img119.images...griff0141lc.jpg
when i saw it would be perfect for a BK build, it had the right curves, both left and right, and up and down
http://img162.images...griff0498ra.jpg
(spot the locust lol)
Knee joint again tongue and groove
http://img218.images...griff0687pl.jpg
These get trimed flush with the outer face of the groove assembly and the knee guards added, as that pic shows
Fairly typical 3 way hip assembly using plastic rods
http://img163.images...griff0333zt.jpg
Edited by [CG]Anastasius Focht, 21 November 2011 - 06:57 PM.
#76
-
-
- 328 posts
Member
- LocationSydney, Australia
Posted 21 November 2011 - 07:16 PM
Heres how my MW4 style vultures started out, (4 of them)
First the CT shape, then the L/R torso shapes
http://i30.photobuck...njo69/008-2.jpg
heres one at the latest stage
http://i30.photobuck...njo69/006-6.jpg
Still very much what i call a "blank" thus far, the fine detail gets added as a second and often third layer where needed, and this part of the buil will take as long as the blank part did
Edited by [CG]Anastasius Focht, 21 November 2011 - 07:19 PM.
#77
-
-
- IS Exemplar
- 1,971 posts
Member
- LocationHouston,TX
Posted 21 November 2011 - 07:19 PM
Dang the victors and locust like old 1980 battlemechs very cool and the black knight is more like the shiny knight pretty awesome too
i really wish i had those good job and thanks for the help but if its possible could you make a youtube tutorial? so i can make them that highly detailed
i really wish i had those good job and thanks for the help but if its possible could you make a youtube tutorial? so i can make them that highly detailed
Edited by Cementblade, 21 November 2011 - 07:20 PM.
#78
-
-
- 328 posts
Member
- LocationSydney, Australia
Posted 21 November 2011 - 08:47 PM
I doubt the pace at which i work would lend itself to a video tutorial, Its a very slow process
#79
-
-
- IS Exemplar
- 1,971 posts
Member
- LocationHouston,TX
Posted 21 November 2011 - 10:36 PM
How long does it normally take to finish (for you)
#80
-
-
- 328 posts
Member
- LocationSydney, Australia
Posted 22 November 2011 - 05:23 PM
Thats a huge variable, it could be weeks or months, a single chassis can go together pretty quick, but multiple ones take longer, not just for the obvious reasons, but things like enthusiasm drop off, making the same part over and over again can get boring, the build slows which drains enthusiasm again, where as a single chassis changes rapidly and so you see tangible reward everyday.
The level of detail is a factor, the more and fine the detail the longer it takes, i spent a week just making the cockpit assemblys for the vultures, using tiny styrene L shaped stock, one mistake and the whole assembly gets chucked.
Painting and weathering is a factor, if the final result is clean like my Zues in ComStar livery, thats faster than a weathered cammo scheme.
To give an example, on my Loki's i painted them silver as a base, then disolved salt in boiling water until i had a super saline (no more will disolve) solution, i then spattered the silvered mechs with this and let it dry, leaving salt crystals crusted on the models at random, then the cammo scheme was applied (2 colours) and when that was dry the salted areas are scratched off, exposing the silver undercoat in random places like the paint had been chipped.
So its a variable it depends on how much attention to detail you want to add.
The Zeus took about 2-3 weeks, the vultures are no where near completed after 2 months
Dont let that put you off trying one though, You get better, develop technique as time goes by.
I'd start with a single small chassis, find plenty of source art for it and have a go.
Edited by [CG]Anastasius Focht, 22 November 2011 - 05:26 PM.


1 user(s) are reading this topic
0 members, 1 guests, 0 anonymous users


